What To Do When Your Vacuum Motor Overheats And Smells Bad?
You are vacuuming your living room when suddenly a foul, burning smell hits your nose. The machine feels hot to the touch, and you are not sure if you should keep going or pull the plug. Sound familiar?
A vacuum motor that overheats and smells bad is one of the most common and most ignored appliance problems in households everywhere.
Here is the truth: ignoring this problem can cost you more than just a vacuum. Overheating motors can damage internal wiring, trigger safety shutoffs, or in rare but documented cases, start a fire.
The good news is that most cases of a smelly, overheating vacuum motor can be fixed at home without expensive repairs. This guide walks you through every cause, every fix, and every prevention tip you need to keep your vacuum running safely and efficiently for years.
Key Takeaways
- Unplug your vacuum immediately the moment you notice overheating or a bad smell, because continued use can worsen internal damage and create fire risks. Never assume it is just “dust burning off.”
- Clogged filters, full dust bins, and blocked hoses are the top three causes of vacuum motor overheating. In most cases, a simple cleaning routine solves the problem without any professional help.
- A burning rubber smell almost always points to a worn or snapped drive belt, while a burning plastic or electrical smell typically signals motor stress, damaged wiring, or serious internal component failure.
- The thermal overload protector in your vacuum is a built-in safety device that automatically shuts the motor off when it gets too hot. Learning how to reset it properly will save you from panicking unnecessarily.
- Carbon brush wear is an underrated cause of vacuum motor problems. When these small internal components wear down, the motor struggles, overheats, and eventually fails if not addressed in time.
- Regular maintenance every four to six weeks is the single most effective way to prevent overheating. Cleaning filters, clearing hose blockages, and checking the brush roll takes less than 10 minutes and extends your vacuum’s life significantly.
Why Your Vacuum Motor Overheats: The Big Picture
Before jumping into fixes, you need to understand what actually causes a vacuum motor to overheat. The motor in your vacuum works by pulling air through the machine. That airflow does two things at once: it creates the suction you need to pick up dirt, and it also cools the motor itself. Think of it like an engine that uses its own airflow to stay at a safe temperature.
When that airflow gets restricted for any reason, the motor keeps running but the cooling effect disappears. The motor generates heat with no way to release it, and the temperature climbs fast. Most motors have a built-in thermal protection switch that trips when this happens, shutting the vacuum off before permanent damage occurs. However, if the problem is ignored repeatedly, the motor windings can scorch, the wiring can melt, and the entire unit can fail.
The bad smell usually comes from one of two sources. Either something external is burning, such as hair, a belt, or debris caught in the brush roll, or the motor itself is getting so hot that its internal components are starting to degrade. Both situations are serious and need your immediate attention. The specific smell is actually your best diagnostic clue, which is why learning to identify it matters so much.
Stop Using It Immediately: The First And Most Important Step
The very first thing you should do when your vacuum smells bad or feels dangerously hot is to turn it off and unplug it from the wall. This is not optional. This is the most critical action you can take, and every vacuum repair expert and appliance technician will say the same thing.
Continuing to run an overheating vacuum accelerates damage in every way. It can burn out the motor windings, melt plastic housing components, damage internal wiring, or cause a small electrical fire. The CPSC has documented at least 10 actual vacuum fires in a single recall event alone, which shows this is a real and documented danger.
Once the vacuum is unplugged, place it on a hard floor away from walls, furniture, and carpet. Give it at least 30 to 45 minutes to cool down completely before you touch or inspect any internal components. Do not try to open the motor housing while it is still warm. Rushing this step can lead to burns and also makes it harder to assess what went wrong because some damage signs only become obvious once things have cooled.
Use this waiting time productively. Think about what you were doing right before the smell started. Were you vacuuming carpet with a lot of hair? Had you recently emptied the bin or replaced the filter? Was the vacuum running for a long time without a break? These details will guide your troubleshooting in the next steps.
Check And Clean The Vacuum Filter Right Away
Once your vacuum has cooled down, the filter is the first physical component you should inspect. A clogged filter is the number one reason vacuum motors overheat, and it is also the easiest to fix. Filters trap fine dust and allergen particles, which is exactly what they are designed to do. But when they become so packed with debris that air cannot pass through them, the motor is forced to work much harder to maintain suction.
A blocked filter creates the same effect as holding your hand over your mouth and nose and trying to breathe hard. The motor essentially suffocates itself trying to pull air through a wall of packed dust. The heat has nowhere to go, and the temperature spikes.
To clean the filter, remove it from the vacuum according to your model’s instructions. Most filters simply lift out from the top or back of the unit. Tap the filter gently over a trash can to knock off loose debris. If the filter is washable, rinse it under cold running water until the water runs clear. Do not use hot water, soap, or detergent unless your manufacturer specifically recommends it.
After rinsing, squeeze out the excess water gently and allow the filter to air dry completely, which usually takes 24 hours. Never reinstall a wet filter. A damp filter restricts airflow just as badly as a dirty one, and it can also promote mold growth inside the vacuum body.
If your filter is not washable, replace it with a new one. Most vacuum filters should be replaced every three to six months depending on use frequency.
Inspect And Clear The Dust Bin Or Bag
Right after checking the filter, turn your attention to the dust bin or dust bag. An overfull collection chamber is another major contributor to motor overheating, and it is something many people overlook because they wait until the bin is completely packed before emptying it.
When a dust bag or canister is too full, the air coming back through the machine has no room to circulate properly. This forces the motor to pull harder against a dense, compressed wall of debris. The result is reduced suction, increased heat, and strain on every component from the motor to the intake port.
The rule of thumb used by most vacuum technicians is to empty the bin or replace the bag when it reaches about two-thirds full. Do not wait until you can see the contents piling up to the brim. For bagless vacuums, open the canister over a trash bin and empty the contents completely. Then use a damp cloth to wipe the inside walls of the canister to remove fine dust that clings to the surface.
For bagged vacuums, remove the full bag carefully to avoid releasing dust back into the air, seal it, and dispose of it immediately. Reusing vacuum bags even just once is a bad habit. Pores in used bags are already stretched with trapped fine particles that restrict airflow even when you think the bag looks empty.
After cleaning, check the canister seals and bag seat for any dust buildup or debris that could prevent an airtight fit when you reassemble the unit.
Look For Blockages In The Hose And Attachments
A clog in the vacuum hose or attachment tubes is another very common cause of overheating and one that can produce a strong burning smell quickly. When air cannot pass freely through the hose, the motor struggles exactly as it does with a dirty filter. The blockage forces the motor to work at maximum strain with little to no reward in actual suction performance.
To check for a clog, detach the hose from both the main body of the vacuum and from the floor head. Hold one end up and look through it toward a light source. If you cannot see light or if the view is obstructed, you have a blockage. You can also drop a coin into one end of the hose and listen. If it slides through freely, the hose is clear. If it stops or slows, something is blocking the path.
To remove a clog, use a long, flexible brush, a broom handle, or a straightened wire hanger to gently push the blockage through and out the other end. Never use sharp objects that could puncture or scratch the inside of the hose. After clearing the visible blockage, rinse flexible hoses with warm water to flush out fine debris lodged against the inner walls.
Allow the hose to dry completely for several hours before reattaching it to avoid introducing moisture near the motor. Also inspect all attachment nozzles, extension wands, and the floor head inlet opening for packed debris that could restrict airflow even when the main hose is clear.
Examine The Brush Roll For Hair And Debris
The brush roll, also called the beater bar, is the spinning cylindrical brush at the bottom of your vacuum head. It agitates carpet fibers to loosen dirt before the suction pulls it up. This component is directly connected to the vacuum belt and, depending on the model, may also connect to the motor. When the brush roll gets jammed with hair, string, or other debris, it puts significant strain on the belt and motor.
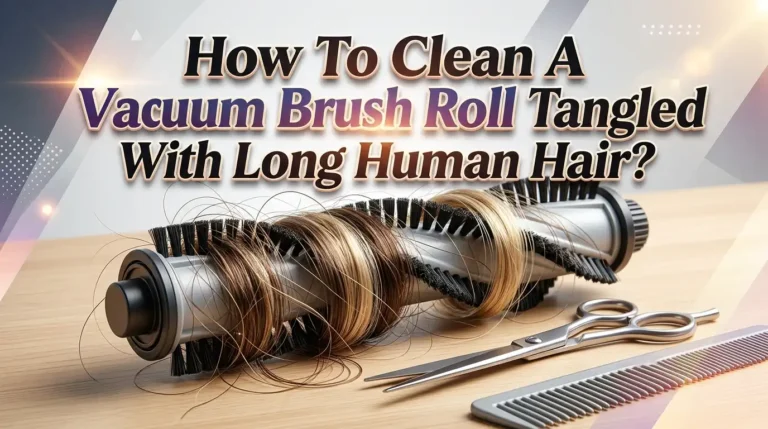
Hair is the single most common cause of brush roll blockages. Long human hair and pet fur wrap around the brush bar with every use, gradually building up into a thick, tangled layer that acts like a brake on the spinning brush. When the motor tries to turn a brush roll that is nearly locked in place, it generates enormous amounts of heat very quickly. This is often the source of a burning rubber or plastic smell from the brush area.
To clean the brush roll, turn the vacuum upside down and use a seam ripper, small scissors, or a utility knife to carefully cut through the wrapped hair. Pull the cut sections away from the bristles and dispose of them.
Check that the brush spins freely by hand once you are done. If it still feels stiff or resistant, inspect the bearings at each end of the brush for damage. Also look for small objects like paper clips, rubber bands, or fabric threads that may have wound themselves around the axle pins.
Make it a habit to check and clean the brush roll every two to three weeks if you have pets or people with long hair in your home.
Identify The Type Of Smell To Diagnose The Problem
Not all bad vacuum smells are the same, and the specific smell you are noticing tells you a lot about exactly what is going wrong inside the machine. Learning to identify the smell is a powerful diagnostic tool that saves time and prevents unnecessary disassembly.
A burning rubber smell almost always points to the drive belt. The belt connects the motor to the brush roll and is made of flexible rubber. When the brush roll jams, the belt keeps trying to turn it and the friction generates heat that burns and degrades the rubber. A belt that smells strongly of burning rubber is likely already stretched, cracked, or melted in spots and will need to be replaced.
A burning plastic or hot electronics smell is more serious. This type of smell usually signals that the motor itself is overheating so severely that plastic components near it are beginning to degrade. It can also indicate that electrical wiring inside the vacuum is scorching. This smell should be treated as an urgent warning. Do not attempt to restart the vacuum until you have identified and resolved the source.
A musty or sour smell that is not burning-related usually comes from bacteria, mold, or pet dander built up inside the bin, bag, or hose. This is an odor problem rather than a heat problem, but it still needs to be cleaned out promptly because mold spores recirculate into your air every time you run the machine.
An egg or sewage smell from a vacuum can come from pet accidents or organic debris that has decomposed inside the filter or canister. This requires a full deep clean of all removable components.
Inspect And Replace The Drive Belt
If the smell coming from your vacuum is clearly burning rubber, your next step is to inspect the drive belt. The belt is a small, looped rubber band that wraps around a peg on the motor shaft and around the brush roll axle. It transfers rotational power from the motor to the brush. On most vacuum models, accessing the belt requires removing the bottom plate of the floor head, which usually involves removing a few screws.
Once you can see the belt, check it for the following signs of damage: visible stretching or looseness (a healthy belt should be snug with minimal slack), cracks or fraying along the surface, melted or glossy patches from friction heat, or complete snapping where the belt has broken into two pieces. A belt that shows any of these signs must be replaced. Continuing to use a damaged belt strains the motor and will cause overheating to continue.
Replacing a vacuum belt is one of the easiest DIY repairs you can do. Most replacement belts are inexpensive and widely available at hardware stores or appliance repair shops. To install the new belt, loop one end around the motor peg and stretch the other end around the brush roll axle. Make sure the belt sits centered on both components before reassembling the floor head.
After replacing the belt, turn the brush roll by hand a few times to confirm the belt sits correctly and the roll spins freely. Many vacuum manufacturers recommend replacing the belt every 12 months even before it shows obvious damage, since rubber belts degrade with heat and time regardless of visible wear.
Reset The Thermal Overload Protector
Most vacuum cleaners are equipped with a thermal overload protector, which is an automatic safety switch built into or near the motor. When the motor temperature climbs to a dangerous level, this switch trips and cuts power to the motor, which is why your vacuum suddenly shuts off mid-use. This is not a malfunction. It is the machine protecting itself from permanent damage.
After the vacuum shuts off due to thermal overload, many people press the power button repeatedly thinking the machine has simply stopped working. This approach does not work and can cause more harm because the root issue, which is the heat buildup, has not been addressed.
The correct process for resetting the thermal overload protector involves three steps. First, turn the vacuum off and unplug it completely. Second, address whatever caused the overheating (clean the filter, clear the blockage, or clean the brush roll). Third, allow the machine to cool in a well-ventilated area for 30 to 45 minutes.
Once the motor has cooled, many models have a small reset button located on the bottom or back of the vacuum body. It is usually a small red or black button that pops out slightly when the overload trips. Press this button firmly until you hear or feel it click back into its normal position.
Then plug the machine back in and test it on a low setting for a short period. If the vacuum runs normally without overheating, the issue has been resolved. If it trips again quickly, the underlying cause has not been fully fixed and needs further investigation.
Check The Carbon Brushes Inside The Motor
This step is more advanced, but it is important if your vacuum continues to overheat or produce a burning smell even after you have cleaned everything and replaced the belt. Carbon brushes are small, rectangular blocks of carbon material that maintain electrical contact between the stationary wiring and the spinning motor armature. They are the component that literally makes your motor turn.
Over time, carbon brushes wear down from constant friction against the spinning armature. When carbon brushes become too short, usually less than half their original length, they lose consistent contact with the armature.
This causes electrical arcing, irregular motor operation, increased heat production, and a burning or sparking smell. You may also notice the motor running unevenly, with a sputtering or pulsing sound.
To inspect carbon brushes, you will need to access the motor housing, which varies by vacuum model. Many central vacuum systems and larger upright vacuums have accessible brush caps on the motor body that you can unscrew to slide out the carbon brush for inspection. A new carbon brush is typically around 3/4 inch long.
If the brush you remove is significantly shorter than this, worn at an extreme angle, or crumbling, it needs to be replaced. Carbon brushes are sold in matched pairs and should always be replaced as a set.
This is a repair worth attempting at home if you are comfortable with basic appliance disassembly, but if you are uncertain, take the motor unit to a vacuum repair shop for professional assessment.
Deep Clean The Entire Vacuum To Remove Odors
Even after you have fixed the root mechanical cause of the smell, a strong burnt or musty odor can linger inside the vacuum for some time. A thorough deep clean of all accessible components is the most effective way to eliminate this residual smell and prevent it from recirculating into your home every time you vacuum.
Start by removing every detachable component: the canister or bag compartment, filters, hose, extension wands, and floor head attachments. Wash each plastic component with warm water and a small amount of dish soap. Use a narrow bottle brush to scrub inside the hose and wand tubes. For stubborn odors in hoses, fill the hose with undiluted white vinegar, swish it around so it coats the inside walls, let it sit for 10 minutes, then rinse thoroughly with clean water.
For the main vacuum body, use a slightly damp cloth to wipe out the interior of the dustbin compartment and any other accessible cavities. Never submerge the main body or motor area in water. Use a dry microfiber cloth to clean the motor grille and intake ports carefully.
After cleaning, sprinkle a small amount of baking soda into a clean dust bag or canister before reassembling. Baking soda is a natural odor absorber and will neutralize any remaining smell during your next vacuuming session.
Allow all washed components to air dry fully for at least 24 hours before you put the vacuum back together. Reassembling with damp parts will trap moisture and potentially create mold, which introduces a whole new odor problem.
Know When To Call A Professional Or Replace The Motor
There are situations where DIY fixes are not enough, and recognizing these early can save you from wasting time on repairs that will not hold. If your vacuum continues to overheat, emit burning smells, or shut off repeatedly after you have completed all the cleaning and maintenance steps above, the motor itself may be failing internally due to damaged windings, shorted coils, or severe electrical degradation.
Signs that your vacuum needs professional repair or motor replacement include:
- The motor makes a loud grinding, screeching, or rattling noise during operation
- Visible sparks or smoke coming from the motor area or ventilation grilles
- The vacuum shuts off within a few minutes of starting even after a full cooling period
- A persistent burning electrical smell that does not go away after deep cleaning
- The vacuum runs but produces no suction even when all filters and hoses are clear
When deciding between motor replacement and buying a new vacuum, a practical rule used by appliance repair professionals is: if the repair cost exceeds 50% of the price of a comparable new vacuum, it is more economical to replace the machine. A motor replacement alone can range from $50 to $150 for parts, plus labor costs at a repair shop. For older vacuums or budget models, this cost may exceed the value of the machine.
For newer, higher-quality vacuums, motor replacement is often well worth the investment because the rest of the machine remains in good working order. Bring the vacuum to a certified appliance repair technician who can test the motor with the right equipment and give you an accurate repair estimate before you commit to any costs.
Long-Term Maintenance To Prevent Overheating Again
The most effective way to deal with an overheating vacuum motor is to prevent it from ever reaching that point again. A consistent maintenance routine takes very little time but makes an enormous difference in how long your vacuum lasts and how well it performs.
Filter maintenance is the most impactful habit you can build. Clean washable filters at least once a month, and more frequently if you have pets, thick carpets, or high-traffic areas. Replace non-washable filters every three months. Mark it on your calendar so you do not forget. A clean filter alone can reduce motor strain by a significant margin.
Empty the dust bin or replace the bag at the two-thirds full mark, not when it is completely packed. This single habit prevents airflow restriction, which is the root cause of most overheating events.
Check and clean the brush roll every two to three weeks if you have pets or long-haired family members. Keep a small pair of scissors near the vacuum for quick brush roll maintenance sessions. Inspect the belt every six months and replace it annually regardless of visible wear, since rubber degrades even without obvious damage.
Do not run the vacuum continuously for more than 20 to 30 minutes without giving it a short break. Sustained high-temperature operation shortens motor life even when all other components are clean. Clean in sections if you have a large home.
Store your vacuum in a cool, dry place away from direct sunlight and humidity. Heat and moisture both degrade rubber and plastic components over time. A well-maintained vacuum should last anywhere from 8 to 15 years with proper care.
Safety Precautions You Should Never Skip
Working on an overheating vacuum involves some genuine safety considerations, and following basic precautions every time protects both you and your appliance.
Always unplug the vacuum before opening it, cleaning internal components, or inspecting the motor. This sounds obvious, but it is the step most often skipped in haste. An accidental power-on while your hands are inside the machine can cause serious injury from the spinning brush roll or belt.
Never use water near the motor housing. Even when doing a thorough deep clean, water and electricity are a dangerous combination. Keep all liquid cleaning confined to detachable plastic components that have been fully removed from the vacuum body.
If you smell smoke or see visible sparks from your vacuum at any point, do not just unplug it. Move it away from flammable materials and monitor it for a few minutes to ensure it is not smoldering internally. The CPSC has documented cases of vacuums continuing to develop heat even after being switched off due to internal electrical shorts.
Do not leave a vacuum running unattended, especially one that has previously shown overheating symptoms. If you must leave the room, turn it off first. This simple habit reduces fire risk significantly.
Finally, keep small children away from any vacuum that is being serviced, repaired, or cooling down from an overheating event. Exposed internal components and residual heat both present injury risks for curious young hands.
FAQs
Why does my vacuum smell like something is burning?
A burning smell from a vacuum usually comes from one of four sources: a clogged filter restricting airflow and overheating the motor, a worn or damaged drive belt creating rubber friction, a jammed brush roll preventing normal rotation, or the motor itself overheating due to sustained blockage or internal wear. Identify the smell first. Burning rubber points to the belt, while a hot electronics smell points to the motor.
Is it safe to use a vacuum that has overheated?
No. You should stop using it immediately, unplug it, and let it cool for at least 30 to 45 minutes. After that, you need to diagnose and fix the root cause before using it again. Running an overheating vacuum repeatedly can permanently damage the motor, melt internal wiring, or in serious cases, create a fire hazard.
How do I reset my vacuum after it overheats and shuts off?
First, turn the vacuum off and unplug it. Then clean the filter, empty the bin, and clear any hose blockages. Let the machine cool fully for 30 to 45 minutes. After cooling, locate the thermal reset button on the bottom or back of the vacuum body and press it firmly until it clicks. Then plug the vacuum back in and test it briefly.
How often should I clean my vacuum filter to avoid overheating?
You should clean washable filters at least once a month under normal use conditions. If you have pets, thick carpets, or a large home with heavy foot traffic, clean the filter every two to three weeks. Replace non-washable filters every three months. A clogged filter is the single most common cause of vacuum motor overheating.
Can a full dust bag cause the vacuum motor to overheat?
Yes, absolutely. A dust bag or canister that is too full reduces airflow through the entire machine. The motor has to work much harder to maintain suction against a packed collection chamber, which generates excess heat with nowhere to go. Empty the bin or replace the bag when it reaches about two-thirds full to avoid this problem.
How long do vacuum motors typically last?
A well-maintained vacuum motor can last anywhere from 8 to 15 years. Factors that shorten motor life include running the machine with a clogged filter, using it with a full dust bin, ignoring brush roll maintenance, and running it continuously for extended periods without breaks. Regular maintenance dramatically extends the life of the motor and the entire machine.
Should I repair or replace a vacuum with a burnt-out motor?
Use the 50% rule as your guide. If the repair cost is less than half the price of a comparable new vacuum, repair it. If the repair cost exceeds that threshold, especially for an older machine, replacing the vacuum is the more economical choice. For high-quality, newer vacuums, motor replacement is often worth the investment since the rest of the machine remains functional.
What does a burning electrical smell from a vacuum mean?
A burning electrical or hot plastic smell typically signals that the motor is overheating to the point where plastic components near it are degrading, or that electrical wiring inside the machine is scorching. This is a serious warning sign. Unplug the vacuum immediately and do not restart it until you have inspected the internal components or had a professional technician assess the motor.

Hi, I’m Ivy! I’m a smart home enthusiast and self-proclaimed clean freak who loves testing the latest cleaning tech so you don’t have to waste your money on the wrong one. I started HomeTechClean to share honest reviews and practical advice for anyone who wants a cleaner home with less effort.