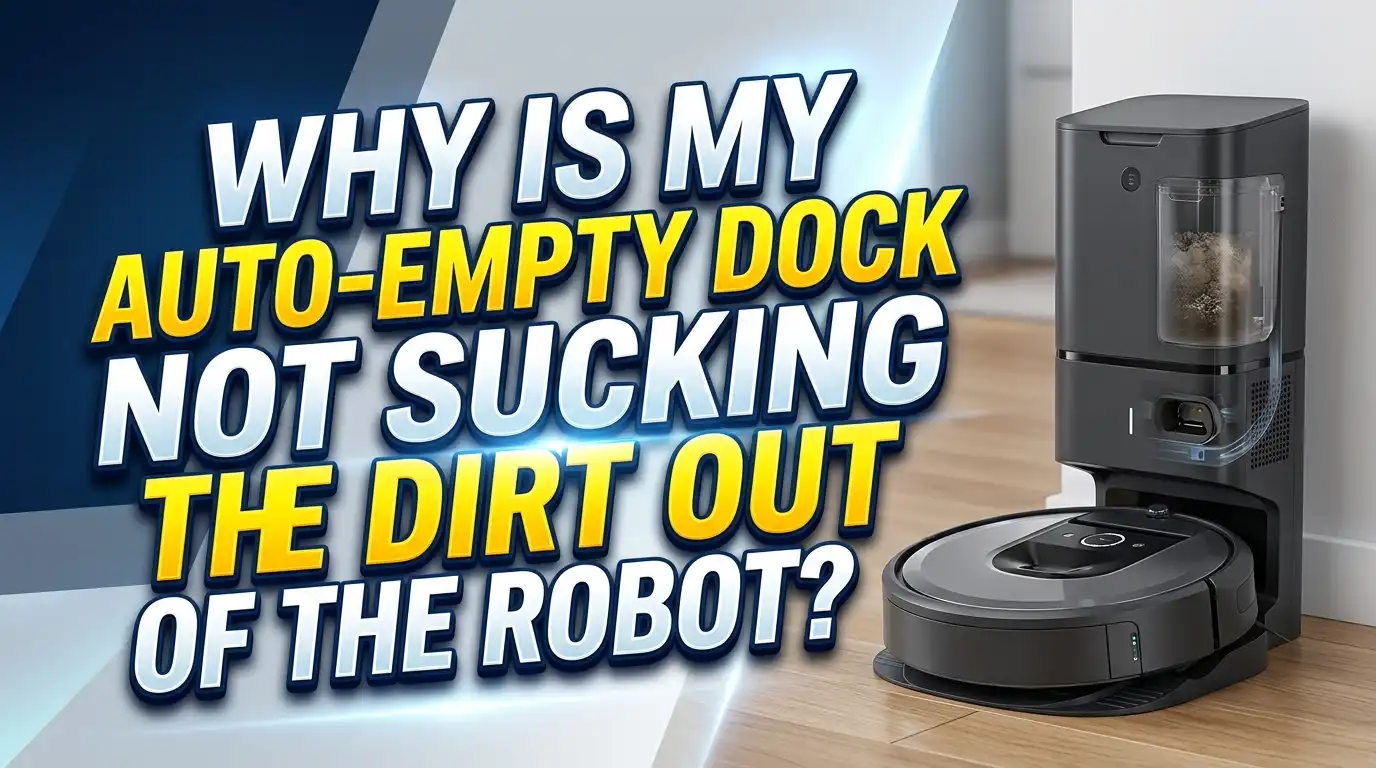
Why Is My Auto-Empty Dock Not Sucking The Dirt Out Of The Robot?
You press the clean button, your robot vacuum does its job, rolls back to the dock — and then… nothing. The auto-empty dock just sits there, completely silent, while your dustbin stays full. Sound familiar?
This is one of the most common and frustrating problems robot vacuum owners face. You bought the auto-empty dock to eliminate the hassle of emptying the bin yourself, so when it stops working, it defeats the entire purpose. The good news is that most of these issues have clear, fixable causes.
In this guide, you will find every reason your auto-empty dock is not sucking dirt from the robot, and you will get step-by-step fixes for each one. Whether you own a Roborock, Roomba, Shark, Dreame, Eufy, or Deebot, the core problems and solutions are almost always the same.
In a Nutshell
- The most common cause is a misalignment between the robot and the dock, meaning the suction port is not connecting properly with the robot’s dustbin outlet.
- A full or incorrectly installed collection bag inside the dock is another frequent culprit that completely stops suction from working.
- Clogs in the air duct or suction tube block airflow inside the dock, making it impossible for the system to pull dirt from the robot.
- A dirty or loose main brush cover on the robot itself can break the suction seal, causing the auto-empty process to fail entirely.
- App settings like Do Not Disturb (DND) mode or a disabled auto-empty toggle silently prevent the dock from running the emptying cycle without any error message.
- Dirty charging contacts or a power issue can stop the dock from activating at all, which means the suction motor inside the base never turns on.
Understanding How an Auto-Empty Dock Actually Works
Before you can fix the problem, you need to understand what the dock is supposed to do. An auto-empty dock uses a high-powered internal motor to create strong suction. When the robot docks correctly, a port on the bottom or side of the robot’s dustbin aligns with a suction inlet on the dock. The motor pulls air through the robot’s dustbin, and debris travels up through the air channel into either a collection bag or a bagless container inside the dock.
The whole system depends on an airtight connection between the robot and the dock. If there is even a small gap, misalignment, or blockage anywhere in that airflow path, the suction either fails completely or becomes too weak to pull the dirt out.
This is why so many different things can cause the same symptom. The problem could be physical, mechanical, software-related, or even placement-related. Every single part of that airflow path needs to be clear and sealed for the system to work correctly.
Understanding this airflow principle will help you trace the problem faster. You are essentially looking for wherever the airflow path is broken, blocked, or disconnected. Once you find it, the fix is usually simple and takes less than five minutes.
Think of it like a straw: if there is a hole anywhere in the straw, you cannot sip your drink. The same logic applies here — one gap anywhere in the system, and the whole thing stops working.
Check If the Robot Is Docking in the Correct Position
The single most reported cause of auto-empty failure is a misalignment between the robot and the dock. The robot needs to sit in a very precise position for the suction port on the dock to line up perfectly with the dustbin outlet on the robot.
Even being off by just one or two millimeters can break the seal entirely. When this happens, the dock’s motor may still run, but it is just sucking air instead of pulling dirt from the dustbin.
Here is what to check and fix:
- Place the robot manually on the dock and look closely at where it sits. The robot should click into place with a snug, firm connection.
- Remove any obstacles around the dock that could cause the robot to approach from an angle. Furniture, rugs, or cords can push the robot slightly off course during docking.
- Check the floor surface under the dock. If the dock sits on a soft carpet or rug, it may shift position over time. Place the dock on a flat, hard surface and make sure it cannot slide around.
- Use tape or a thin mat under the dock to keep it from moving. Many users solve this problem simply by securing the dock so it stays perfectly still every time the robot returns.
- Some models have a docking ramp or mat that comes in the box. Use it. It is designed to guide the robot into the correct position every single time.
After adjusting the dock position, run a cleaning cycle and let the robot dock automatically. Watch the docking moment to see if the connection looks snug.
Inspect the Dustbin Suction Port on the Robot
The suction port is the opening on the robot that connects to the dock’s air inlet. This small port is the most critical connection point in the entire system.
If this port is blocked, dirty, or covered, no amount of motor power will suck the dirt out.
Here is how to check it:
First, remove the dustbin from the robot. Look at the port opening on both the dustbin and the robot body itself. You are looking for lint, hair, debris, or anything that could be physically blocking the opening.
Use a dry cloth or a small brush to clean around the port. Do not use water near this area. Hair and fine dust tend to pack tightly around this opening over time, especially if you have pets.
Also check the small rubber or silicone seal around the port if your model has one. This seal is what creates an airtight connection with the dock. If it is torn, deformed, or missing, you will lose suction every time. Contact the manufacturer to get a replacement seal if needed.
After cleaning, reinsert the dustbin and make sure it clicks firmly into place. A loose dustbin creates a gap that breaks the suction path before it even reaches the dock connection.
Check the Collection Bag or Bagless Bin Inside the Dock
Many auto-empty docks use a collection bag inside the base unit to hold all the dirt that is pulled out of the robot. When this bag is full, the system stops working — sometimes silently, with no error notification.
Open the top or side panel of your dock and look at the collection bag.
- If the bag is full, replace it immediately. Do not try to empty and reuse a disposable bag — the seal at the top of the bag is designed for single use, and reusing it creates gaps that kill suction.
- If the bag has become damp or compressed, even if it is not completely full, it can restrict airflow enough to stop the system from working.
- Make sure the bag is seated correctly in its slot. A slightly misaligned bag will not form a proper seal, and air will bypass the bag instead of passing through it.
- For bagless dock models, check that the dust container is empty and that no debris has packed around the inlet tube inside the dock.
Most manufacturers recommend replacing the collection bag every 30 to 60 days depending on use. If you have pets or thick carpets, you may need to replace it more often. Mark your calendar or set a reminder in the app so you never forget.
Clear Any Blockages in the Air Duct of the Dock
The air duct is the internal tube or channel inside the dock that connects the suction motor to the collection bag. Over time, large debris, clumps of hair, or tightly packed dust can create a clog inside this duct, completely blocking airflow.
When this happens, you will usually hear the dock motor running louder than usual, or you may hear it running but producing no results.
Here is how to clear the air duct:
First, unplug the dock from power. Never work on the internals of the dock while it is powered on.
Check if your dock has an access panel or removable duct cover. Many Roborock, Dreame, and Eufy models allow you to unscrew or pop off a section of the air duct for cleaning. Refer to your model’s manual for exact access points.
Use a long, thin brush — like a bottle brush or a cleaning brush that came in the box — to clear the inside of the duct. You can also use compressed air to blast the clog loose from the outside.
Do not use water inside the duct. Moisture can damage the motor or create mold. Always use dry cleaning methods only.
After clearing the duct, plug the dock back in and test the auto-empty function. You should notice the sound change — a clear duct produces a smooth, consistent suction sound, not a strained or stuttering noise.
Reattach the Main Brush Cover on the Robot Properly
This one surprises a lot of people. The main brush cover on the bottom of your robot plays a direct role in how well the auto-empty function works. If this cover is loose, incorrectly attached, or missing, air leaks out of the bottom of the robot during the emptying cycle.
When air leaks from the brush area, it breaks the suction pressure that is needed to pull dirt from the dustbin into the dock.
Here is how to fix it:
Turn the robot upside down and locate the brush cover. It is the long panel on the underside that houses the main roller brush.
Remove the brush cover completely by pressing the release tabs on each end. Then look at the seating slots where the cover clips in.
Make sure no debris is stuck in these slots. Hair and lint commonly get trapped here and prevent the cover from sitting flush.
Reinsert the cover firmly and press down on both ends until you hear or feel a click. Give it a gentle tug to confirm it is locked in place.
Run the auto-empty function again. Many users have found that simply reseating the brush cover was the only fix they needed. It is a simple step that is easy to overlook.
Check Your App Settings — Auto-Empty May Be Disabled
If the dock is powered on and the robot is docking correctly, but still no suction happens, the problem might be in your app settings. Auto-empty can be toggled off in the companion app for most robot vacuum brands, and if this switch is off, the dock will never activate after a cleaning session.
Open your robot vacuum’s app and look for these settings:
- Find the auto-empty or self-empty setting and confirm it is turned on. This is often located under device settings or cleaning preferences.
- Check the frequency setting. Some apps let you set auto-empty to happen after every clean, every other clean, or manually only. Make sure it is not set to manual mode.
- Look for a schedule that may be conflicting with when the robot normally cleans.
It is also worth checking whether the auto-empty was accidentally disabled after a firmware update. Updates sometimes reset certain preferences back to factory defaults, including the auto-empty toggle.
After confirming everything is enabled in the app, run a test cleaning cycle and watch to see if the dock activates when the robot returns.
Disable Do Not Disturb Mode If It Is Active
Do Not Disturb (DND) mode is a feature that silences your robot vacuum during specific hours — usually at night. However, many users do not realize that DND mode also disables the auto-empty function during those hours.
If your cleaning schedule runs during DND hours, the robot will return to the dock and sit quietly, waiting until DND ends. This creates the impression that the dock is not working, when it is actually just following its scheduled quiet period.
Here is what to do:
Go into your app and find the DND settings. Check the time range that DND is set to cover.
If your robot usually cleans during that window, you have two options. Either adjust your cleaning schedule to run outside of DND hours, or shorten the DND window so it does not overlap with cleaning time.
You can also manually trigger the auto-empty from the app after a cleaning cycle. Most apps have an “Empty Now” button that you can press regardless of DND settings.
This is a quick fix that takes about two minutes in the app, but it catches a lot of people off guard because the dock gives no indication that it is in quiet mode.
Clean the Charging Contacts on Both the Robot and the Dock
Dirty charging contacts are an often-overlooked cause of auto-empty failures. The contacts on the bottom of the robot and on the dock’s docking surface allow the system to communicate. If these contacts are dirty, corroded, or coated with dust, the robot and dock may fail to establish proper communication — and without that connection, the dock may not know to trigger the emptying cycle.
Use a dry microfiber cloth or a cotton swab to gently wipe the metal contacts on the bottom of the robot. Do the same for the contacts on the dock’s surface.
If there is any visible corrosion or dark residue on the contacts, use a small amount of isopropyl alcohol on a cotton swab to clean them. Let the contacts dry completely before using the robot again.
Some contacts are spring-loaded and can become stuck in a compressed position. Press them gently with your finger to make sure they spring back freely.
After cleaning, place the robot on the dock and confirm that the charging indicator light turns on. If the robot shows a proper charge connection, the contacts are clean and functional.
Perform a Power Reset on the Dock
Sometimes the dock’s internal system gets stuck in an error state and simply needs a fresh start. A power reset clears any temporary software glitches that might be preventing the suction motor from activating.
This is one of the easiest fixes to try and should always be part of your troubleshooting routine.
Here is how to do it:
Unplug the dock from the wall outlet. Wait a full 30 seconds — do not just flip the switch or unplug and replug immediately. The capacitors inside the dock need time to fully discharge.
After 30 seconds, plug the dock back in. You should see the indicator lights on the dock cycle through their startup sequence.
Next, restart the robot itself by holding the power button for several seconds until it shuts down, then power it back on.
Now let the robot run a short cleaning cycle and dock itself automatically. Watch to see if the auto-empty cycle triggers when it returns.
This reset procedure solves the problem in a significant number of cases, especially when no physical blockage or alignment issue is present.
Make Sure the Dock Dust Container Cover Is Installed
Most auto-empty docks have a removable cover or lid on the dust container compartment. If this cover is not installed correctly, or if you accidentally left it off after replacing the bag, the dock will not run the auto-empty cycle.
The system uses sensors to detect whether the cover is closed and secure. If the sensor reads the cover as open or missing, it prevents the suction motor from turning on — this is a safety feature designed to prevent debris from blowing out of the dock.
Check the following:
Open the dust compartment and look at the collection bag. Then close the cover firmly and make sure it snaps into place. Some covers have a locking mechanism that requires a push or a twist to fully engage.
Also check if any debris is sitting in the seating area of the cover. Even a small piece of lint can prevent the cover from closing completely.
If your dock has a cover sensor, check the companion app for any error messages related to the dust container compartment. The app will often show a specific message if the cover sensor is not registering correctly.
Update the Robot Vacuum Firmware
Firmware bugs are a real and surprisingly common cause of auto-empty failures. Manufacturers regularly release updates that fix bugs related to docking behavior, communication between the robot and the dock, and auto-empty scheduling.
If your dock worked fine in the past but suddenly stopped, a firmware issue may be the cause — especially if the problem started after a recent update.
Here is what to do:
Open your app and go to the device settings or about section. Look for a firmware update option.
If an update is available, install it. Make sure the robot is charged and docked before starting the update, and do not interrupt the update process.
If a recent update broke the feature, check the manufacturer’s community forums or support pages. Other users will often report the same issue, and the manufacturer may already have a fix or workaround available.
In some cases, you can roll back to a previous firmware version through official support channels. Contact customer support and explain exactly when the problem started. They can often tell you if a known bug is causing your specific issue.
Check the Dock Placement and Surrounding Environment
Where you place your auto-empty dock matters more than most people think. The surrounding environment can affect docking accuracy, sensor performance, and the overall success of the auto-empty cycle.
The dock should always be placed on a flat, hard floor. Placing it on carpet or a rug causes it to shift when the robot bumps into it during docking, which leads to misalignment.
Keep at least one meter of clear space in front of the dock and about half a meter of clear space on each side. These clearance zones allow the robot to approach the dock in a straight line, which is essential for precise alignment.
Avoid placing the dock in direct sunlight or near bright light sources. Infrared sensors on both the robot and the dock can be confused by direct sunlight, which may cause the robot to dock incorrectly or at an angle.
Also make sure the dock is not placed near stairs, ledges, or areas where the robot might get stuck on its way back. If the robot has to take a strange route to the dock, it may approach from an awkward angle.
Contact the Manufacturer for Warranty or Motor Issues
If you have worked through every step above and the dock still refuses to suck dirt from the robot, the problem may be a hardware failure — specifically, a failing suction motor inside the dock.
The suction motor is the heart of the auto-empty system. Over time, motors can wear out, especially in households with high cleaning frequency or heavy pet hair loads. A failing motor will produce weaker-than-normal suction or may not run at all.
Signs of a failing motor include:
- The dock runs but produces almost no suction sound.
- The suction sound is weaker or different than it was when the unit was new.
- The dock makes grinding, rattling, or high-pitched noises during the emptying cycle.
- The motor runs for a second and then stops suddenly.
If your unit is still within the warranty period, contact the manufacturer right away. Most brands offer 12 to 24 months of warranty coverage on both the robot and the dock. Document the problem with a short video if you can — it helps support teams process your claim faster.
If the unit is out of warranty, ask about repair options or replacement parts. Some manufacturers sell replacement motors or full dock units at a reduced price for registered product owners.
Establish a Regular Maintenance Routine to Prevent Future Issues
The best way to avoid auto-empty dock problems is to set up a simple maintenance routine that keeps everything clean and functioning properly. Most auto-empty failures are preventable with five minutes of maintenance every week or two.
Here is a practical routine you can follow:
Every week, wipe down the charging contacts on the robot and the dock with a dry cloth. Check the docking area for debris that might be blocking the robot’s path or causing misalignment.
Every two to four weeks, remove the collection bag or bagless container from the dock and replace or empty it. Check the air duct opening inside the dock for any visible debris and clear it with a brush.
Every month, remove the robot’s main brush and clean out the brush chamber. Reattach the brush cover firmly and confirm it clicks into place. Also check the robot’s dustbin outlet port and clean around it.
Every two to three months, do a deeper clean of the dock’s interior using a brush tool or compressed air. Check the suction tube for any developing clogs and clear them before they become a full blockage.
Setting a reminder on your phone or using the maintenance schedule in your robot’s app will make this routine easy to stick to. A well-maintained system empties reliably after every single cleaning session.
Frequently Asked Questions
Why does my robot vacuum dock but the auto-empty cycle never starts?
The most common reasons are that the auto-empty setting is disabled in the app, the robot is not docking in the correct position, or the dock is operating within a Do Not Disturb window. Check all three of these before looking at physical causes.
How do I know if the collection bag inside my dock is full?
Some docks have a sensor that sends a notification to the app when the bag is full. If your dock does not have this feature, check the bag every 30 days or whenever you notice the suction sound has changed. A full bag often makes the motor sound more strained than usual.
Can I use my auto-empty dock without a collection bag?
No, you cannot use a dock that requires a bag without one installed. Running the system without a bag will cause dirt and fine dust to enter the motor and damage it. Always use the correct bag type recommended by the manufacturer.
Why does my dock’s motor run but nothing comes out of the robot?
This usually means there is a misalignment between the robot and the dock, a blockage in the air duct, or a broken seal on the robot’s dustbin outlet. Start by checking the robot’s docking position, then check the port and seals.
How often should I replace the auto-empty dock’s collection bag?
Most manufacturers recommend replacing the bag every 30 to 60 days for average households. If you have pets, live in a dusty environment, or run the robot daily, you should check and replace the bag every two to three weeks.
Why did my auto-empty dock stop working after a firmware update?
Firmware updates can sometimes reset app settings or introduce bugs that affect the auto-empty function. Check your app settings first to confirm auto-empty is still enabled. If the issue is a known bug, check the manufacturer’s forum for a patch or contact customer support.
Is it normal for the auto-empty dock to sound loud when it runs?
Yes, auto-empty docks use powerful motors and are noticeably loud during the emptying cycle, which typically lasts 10 to 20 seconds. However, if the sound seems louder than usual or sounds strained, it may indicate a blockage in the air duct or a collection bag that needs replacing.
What should I do if none of these fixes work?
If you have checked alignment, cleared blockages, confirmed app settings, replaced the bag, reset the dock, and the problem persists, contact the manufacturer’s customer support. Provide a detailed description of the problem and mention each troubleshooting step you have already tried. A hardware failure or defective unit may require a warranty replacement.

Hi, I’m Ivy! I’m a smart home enthusiast and self-proclaimed clean freak who loves testing the latest cleaning tech so you don’t have to waste your money on the wrong one. I started HomeTechClean to share honest reviews and practical advice for anyone who wants a cleaner home with less effort.