How to Prevent Dirty Water Leaks From Your Robot Vacuum Base Station?
If you have ever walked into your living room and found a puddle of murky water sitting right under your robot vacuum’s base station, you know how frustrating that moment feels. You bought this device to make your life easier, not to clean up after it.
The good news is that dirty water leaks from a robot vacuum base station are almost always preventable. Most of the time, the fix is simple, fast, and does not require any special tools or technical skills.
This guide breaks down every possible reason your base station leaks dirty water and gives you clear, step-by-step instructions to fix and prevent each one. Whether you own a Roborock, Dreame, Eufy, Ecovacs, Narwal, or any other brand with a self-cleaning dock, this post covers everything you need to know.
Key Takeaways
- Dirty water leaks almost always come from a small number of root causes: a full dirty water tank, a damaged rubber seal, a clogged drain line, a dirty or blocked overflow sensor, or improper installation of the tank. Identifying which one applies to your situation cuts your repair time in half.
- Regular maintenance is the single most effective prevention strategy. Emptying the dirty water tank after every two or three cleaning cycles, cleaning the wash tray weekly, and inspecting all rubber seals monthly will stop most leaks before they ever start.
- The type of cleaning solution you use matters more than most people realize. Using non-approved foaming detergents or regular household cleaners causes soap buildup inside the internal pump and pipes, which eventually leads to blockages and overflow leaks.
- Overflow sensors and drain filters are often the hidden culprits. These small components are easy to overlook during routine cleaning, but a dirty sensor gives a false “tank full” reading and a blocked filter stops dirty water from draining properly, both leading to leaks.
- Rubber seals and gaskets degrade over time. Seals that look fine at first glance may already be cracked, warped, or compressed flat. Replacing them proactively every six to twelve months is far cheaper than dealing with recurring water damage to your flooring.
- Placement of your base station affects leak risk. Setting the dock on an uneven surface, a soft rug, or too close to a wall can interfere with proper water flow inside the station and cause spills during the mop-cleaning cycle.
Understanding Why Your Robot Vacuum Base Station Leaks Dirty Water
Before jumping into solutions, it helps to understand what is actually happening inside your base station when dirty water leaks out. Modern robot vacuums with self-cleaning docks use an internal pump system to pull dirty water from the mop-cleaning tray and push it into a sealed dirty water tank. This cycle involves rubber seals, plastic valves, suction tubes, drain filters, and overflow sensors all working together. When any one of these components fails, gets clogged, or is installed incorrectly, dirty water has nowhere to go except onto your floor.
The dirty water inside the base station is not the same as the water the robot uses to mop. It is a mix of floor grime, cleaning solution residue, debris particles, and bacteria-laden rinse water from the mop pad. That is why a leak is not just an inconvenience but a hygiene problem as well. Understanding this helps you take the issue more seriously and stick to a consistent maintenance schedule.
The most common brands affected by this problem include Roborock, Dreame, Eufy, Ecovacs, and Narwal, and each brand’s base station design has its own quirks. However, the core causes and prevention steps are nearly universal across all brands.
Check and Empty the Dirty Water Tank Regularly
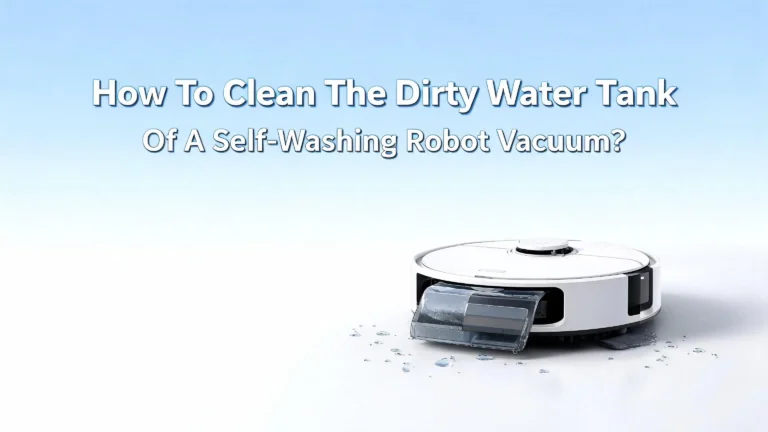
The single most common cause of dirty water leaks is a full or overfilled dirty water tank. When the tank reaches capacity, the pump has no space to push more water, and the excess overflows out of the cleaning tray and onto the floor. This sounds obvious, but many users forget that the dirty water tank fills up faster than expected, especially in homes with pets, high-traffic flooring, or large floor areas.
Here is what you should do:
- Remove the dirty water tank from the base station after every two to three cleaning cycles, or at least once every three days if your robot runs daily.
- Pour out the dirty water into a toilet or drain, never into a sink you use for food preparation.
- Rinse the tank with warm, clean water and let it air dry completely before reinstalling it.
- Check the tank’s capacity level indicator if your model has one. Some brands include a transparent window or a fill-line marking on the side of the tank.
Do not wait for the base station’s app notification to tell you the tank is full. By the time the sensor triggers an alert, water may already be at the edge of the tray. Building a habit of proactively checking the tank every few days will prevent overflows before they happen.
If you notice the tank fills up unusually quickly, the robot may be using too much water during mopping. Go into your app settings and reduce the water output level by one step. This reduces the volume of dirty water generated per session without affecting cleaning quality on most floor types.
Inspect and Reseat the Dirty Water Tank Correctly
Even if the dirty water tank is not full, an improperly seated tank is a very common cause of leaks. The tank must be pushed firmly and completely into its housing for the internal pump to create a proper seal and suction. If the tank sits even slightly crooked or is not fully clicked in, dirty water bypasses the tank entirely and drips out from the base.
Follow these steps to reseat the tank correctly:
- Pull the dirty water tank out completely and set it aside.
- Inspect the tank housing inside the base station for any debris or grime buildup around the connection point.
- Wipe the housing edges with a damp cloth to remove any buildup that could prevent the tank from seating flush.
- Reinsert the tank slowly and firmly, pushing straight down or inward depending on your model’s design.
- You should hear or feel a distinct click when the tank locks into place. If you do not hear a click, the tank is not fully seated.
Some users find that pressing the tank down and giving it a slight wiggle left and right helps it seat properly. Once the tank is locked, gently tug it outward to confirm it does not pull out easily. A tank that slides out without effort is not properly locked and will leak.
On models like the Xiaomi Robot Vacuum 5 Pro and Eufy S1 Pro, the tank sealing ring can shift out of position during normal use. Always check that the rubber sealing ring sits evenly around the tank’s connection port before reinserting.
Clean the Mop Wash Tray and Cleaning Basin Thoroughly
The mop wash tray, also called the cleaning basin or washboard, is where the robot parks its mop pads for rinsing. Over time, dirt, hair, soap scum, and debris accumulate in this tray. When buildup blocks the drain opening at the bottom of the tray, dirty water cannot flow into the pump and tank system. Instead, it rises to the top of the tray and overflows.
A clogged wash tray is one of the most underestimated causes of base station leaks. Many users clean the dirty water tank but never think to scrub out the wash basin.
Here is a step-by-step cleaning routine for the wash tray:
- Remove the tray from the base station by pulling it out according to your model’s instructions.
- Hold it horizontally to avoid spilling any residual water inside.
- Take the tray to a sink and use a soft brush or old toothbrush to scrub all inner surfaces.
- Pay special attention to the drain opening at the bottom of the tray. Use a toothpick or thin brush to dislodge any debris blocking the hole.
- Rinse the tray thoroughly with warm water until the water runs clear.
- Dry the tray completely before reinserting it.
Repeat this cleaning process at least once a week if you run your robot daily. Homes with pets should clean the wash tray every two to three days because pet hair tends to accumulate in the basin faster than regular dust and dirt.
Examine the Rubber Seals and Gaskets for Damage
Rubber seals and gaskets are the components that keep water inside the system and prevent leaks at connection points. Every base station has multiple rubber seals, including the seal around the dirty water tank lid, the seals at hose connection points, and the gasket inside the mop wash tray drain. When any of these seals crack, deform, harden with age, or shift out of position, dirty water escapes through the gap.
How to inspect seals properly:
- Remove the dirty water tank and look closely at the rubber sealing ring around the tank’s connection port. The seal should appear soft, flexible, and evenly shaped.
- Press gently on the seal with your finger. It should spring back immediately. A seal that stays compressed or feels stiff and brittle needs replacing.
- Look for visible cracks, tears, or flat spots along the entire surface of the seal.
- Check the seal on the dirty water tank lid as well. A damaged lid seal allows air into the system, which disrupts the suction pump and causes dirty water to back up.
If you find a damaged seal, contact your manufacturer’s support team for a replacement part. Most brands sell replacement seal kits directly through their official website or support channel. Do not attempt to continue using the base station with a damaged seal as this will almost certainly cause repeat leaks and potential floor damage.
As a preventive measure, gently wipe all rubber seals with a damp cloth during your regular cleaning routine. Keeping seals free of grime and debris extends their lifespan significantly.
Clear Clogged Internal Drain Hoses and Pump Filters
Inside the base station, a network of small hoses and tubes carries dirty water from the wash tray to the pump and then to the dirty water tank. These hoses can develop blockages over time, particularly from limescale buildup caused by hard water, soap residue, or small debris particles that pass through the wash tray drain. When a hose is blocked, dirty water backs up in the system and overflows from the nearest exit point, which is usually the wash tray.
To address a clogged drain hose:
- Turn off and unplug the base station from the power outlet.
- Locate the drain filter on your model. Most brands place it near the dirty water tank housing or at the pump inlet. Refer to your user manual for the exact location.
- Remove the filter and rinse it under warm running water. Use a small brush to remove any trapped debris.
- If you notice visible scale buildup in the filter, soak it in a 50/50 mixture of white vinegar and water for 15 to 20 minutes, then rinse completely.
- Reinstall the filter firmly before reconnecting power.
If your base station’s hoses appear permanently clogged or collapsed, contact customer support for service. Do not try to disassemble internal pump components yourself unless you have experience with appliance repair, as this can void your warranty. Running a diluted white vinegar cycle through the station, if your brand recommends this practice, is an effective way to dissolve mineral deposits in hoses before they build into a major blockage.
Clean the Overflow Sensor to Prevent False Readings
Many base stations include a small overflow sensor inside the wash tray or at the base of the dirty water tank housing. This sensor detects when the water level reaches a maximum point and signals the system to stop pumping. If the sensor gets covered with grime, soap film, or mineral deposits, it gives an inaccurate reading. In some cases, a dirty sensor tells the system the tank is full when it is not, which stops the pump and causes water to overflow from the tray. In other cases, a malfunctioning sensor fails to trigger a stop, allowing the tank to genuinely overfill.
Here is how to clean the overflow sensor:
- Locate the sensor inside the wash tray area or near the tank connection point. It often looks like a small magnet, float, or LED optical component.
- Dip a cotton swab in warm water and gently wipe the sensor surface clean.
- Avoid using harsh cleaners or alcohol on sensors as these can damage the sensor coating.
- If the sensor uses a magnetic float mechanism, check that the float moves freely up and down and is not stuck in one position.
- Dry the sensor area completely with a dry cloth before reinserting the tray.
Clean the overflow sensor at least once a month as part of your standard base station maintenance routine. If cleaning the sensor does not resolve the overflow error or the leak, the sensor itself may be defective. In this case, reach out to the manufacturer’s customer support team to request a replacement unit or repair.
Use Only Approved Cleaning Solutions
One of the less-obvious causes of dirty water leaks is using the wrong type of cleaning liquid in the base station. Many users add regular household floor cleaners, dish soap, or scented detergents to their robot’s clean water tank. These products often create excessive foam when they enter the mop-washing cycle. Foam expands rapidly inside the wash tray and pump hoses, causing the system to overflow even when the dirty water tank is not full.
Regular cleaning detergents also leave behind a sticky residue inside hoses, valves, and filters. This residue accumulates over weeks and months, gradually narrowing the internal passages until water can barely flow through them at all.
Always use the cleaning solution recommended by your robot’s manufacturer, or use plain distilled water. Manufacturer-approved solutions are specifically formulated to be low-foaming and residue-free inside the base station’s internal components.
If you accidentally used a non-approved product, take these steps immediately:
- Empty the dirty water tank and clean the wash tray completely.
- Run two to three plain water-only cleaning cycles to flush the system.
- Clean all filters and seals after the flush cycles.
- Check for any remaining foam or residue in the wash basin after each flush cycle.
Distilled or demineralized water is the best choice for both the clean water tank and for flushing the system because it contains no minerals that contribute to limescale buildup in internal hoses.
Ensure the Base Station Is Placed on a Flat, Hard Surface
The physical placement of your robot vacuum’s base station affects how water flows inside it more than most people expect. Base stations rely on precise internal drainage paths that channel dirty water from the mop wash tray down into the pump and then up into the dirty water tank. If the station sits on an uneven surface, even at a slight angle, gravity shifts the water in the wrong direction. This causes pooling in areas where it should not be, leading to leaks from gaps and seams that would otherwise stay dry.
Follow these placement guidelines:
- Place the base station on a hard, flat floor surface such as tile, hardwood, laminate, or linoleum.
- Avoid placing the base station on thick rugs, carpet, or any soft surface that can compress unevenly under the unit’s weight.
- Use a small bubble level, or the level tool on your smartphone, to verify the base station sits perfectly flat.
- Keep at least two to three inches of clearance on all sides of the station, including behind it. Poor ventilation around the unit traps moisture and accelerates seal degradation.
- Do not place the base station near floor drains or in bathrooms where ambient humidity is consistently high.
If your floors are slightly uneven, thin rubber anti-vibration pads can be placed under the base station’s feet to create a stable, level platform. These pads also reduce operational vibration noise, which is a useful side benefit.
Check and Replace the Dirty Water Tank Lid Seal
The lid seal on the dirty water tank is a component that many users do not think to inspect because it is not visible during normal use. This seal creates an airtight connection between the tank lid and the tank body. The base station’s pump relies on suction to pull dirty water from the wash tray through the internal hoses and into the tank. If the lid seal is damaged or missing, the airtight seal breaks, and the pump loses its suction capability. When this happens, dirty water stops being pumped into the tank and instead accumulates in the wash tray until it overflows.
A faulty lid seal is one of the most frequently reported causes of dirty water pump errors on models like the Eufy S1 Pro and similar base station robots.
Here is how to test and address the lid seal:
- Remove the dirty water tank and flip it over to locate the lid and its surrounding rubber seal.
- Fill the tank with a small amount of clean water, close the lid, and then turn it upside down over a sink. If water drips out, the lid seal is compromised.
- Inspect the seal visually for cracks, warping, or compression marks.
- If the seal appears fine but the tank still leaks, press the seal firmly back into its channel around the lid’s rim.
- If the seal is clearly damaged, order a replacement tank or replacement seal from the manufacturer.
Some users on forums have successfully re-seated shifted lid seals by pressing them firmly and evenly back into place. However, a cracked or permanently deformed seal must be replaced. Do not attempt to repair it with household sealants or adhesives, as these materials may not be safe for contact with water that touches your floors.
Perform Monthly Deep Cleaning of the Entire Base Station
Daily and weekly maintenance keeps your base station functioning well, but a monthly deep clean is what truly prevents long-term buildup from causing leaks. Over time, biological residue from dirty mop water, mineral deposits from tap water, and soap film from cleaning solutions all accumulate in spots that a quick rinse does not reach. This gradual buildup eventually causes blockages, seal degradation, and sensor failures that lead to leaks.
A monthly deep clean should include the following steps:
- Unplug the base station from the power source.
- Remove and empty the dirty water tank.
- Remove the mop wash tray and scrub it with a soft brush and warm water.
- Clean the drain filter under the tray.
- Wipe the overflow sensor with a damp cotton swab.
- Inspect all visible rubber seals.
- Wipe down the inside walls of the base station cavity with a damp microfiber cloth.
- Check all hose connection points for visible cracks or looseness.
- Wipe the exterior of the base station with a dry cloth.
- Allow all components to air dry before reassembling.
This entire process takes about 15 to 20 minutes and is one of the best investments of time you can make to extend your base station’s life and prevent future leaks. Set a monthly reminder on your phone so the task does not get forgotten. Pairing the deep clean with another monthly habit, such as the first day of each month or the day you replace your mop pads, makes it easier to remember.
Monitor Your Robot Vacuum App for Early Warning Signs
Most modern robot vacuums with self-cleaning base stations connect to a smartphone app that provides real-time status updates and error notifications. These app alerts are one of the earliest indicators that something inside the base station is going wrong. Learning to read and respond to these alerts quickly can prevent a minor issue from becoming a full-blown dirty water leak.
Common app warnings to watch for:
- “Dirty water tank full” or “Empty dirty water tank”: Act on this immediately rather than waiting until the next session.
- “Cleaning sink full” or “Overflow detected”: This usually means the drain is blocked or the pump is struggling.
- “Dirty water pump error”: This is a sign of a suction problem caused by a faulty seal, blocked hose, or full tank.
- “Mop washing failed”: Often triggered when the wash tray cannot drain properly.
Do not dismiss these alerts or assume the robot will handle the problem on its own. When you see any of these notifications, go inspect the base station right away. Remove the dirty water tank, check the wash tray, and look for early signs of overflow or blockage. Catching these issues when the alert first appears means the difference between a two-minute fix and mopping dirty water off your floor.
Some apps also allow you to set automatic pauses after each cleaning session so the robot waits for human confirmation before starting the mop-cleaning cycle. This is a useful setting to enable if you are concerned about unattended leaks.
Replace Worn Components Before They Fail
Preventive component replacement is a maintenance strategy that robot vacuum owners often overlook. The rubber seals, dirty water tank, mop wash tray, and drain filter inside your base station all have a functional lifespan. Using them until they fail completely means you will almost always be dealing with a leak before you realize the part needed replacing.
Here is a general replacement timeline that works for most brands:
- Rubber seals and gaskets: Inspect every month, replace every six to twelve months or sooner if you see cracking or deformation.
- Dirty water tank: Replace if the lid no longer closes securely, the tank body is cracked, or the lid seal is permanently damaged.
- Drain filter: Replace every three to six months depending on how often the robot runs and the type of flooring it cleans.
- Mop wash tray: Replace if cracked, warped, or if the drain port is permanently blocked and cannot be cleared by cleaning.
Check your robot vacuum brand’s official support or accessories page for genuine replacement parts. Using unofficial third-party seals and parts is tempting because of lower cost, but incompatible components can cause new leaks by failing to form a proper seal with the original housing design.
Keeping a set of commonly needed spare parts at home, such as an extra set of rubber seals and a spare dirty water tank, means you can fix a problem the moment you find it without waiting for shipping.
Adjust Water Flow Settings in Your App to Reduce Overflow Risk
Robot vacuums with self-cleaning base stations generate dirty rinse water during every mop-cleaning session. The volume of dirty water produced per session is directly related to how much water the robot uses during mopping. Higher water flow settings mean more water applied to the floor per pass, which results in more dirty water being returned to the base station per cleaning session. Over time, running the robot on maximum water flow settings fills the dirty water tank much faster than the app’s fill indicator may suggest.
Reducing the water flow level by one step in your app settings is one of the easiest ways to extend the time between dirty water tank emptying and reduce overflow risk.
Here is how to find and adjust water flow settings:
- Open your robot vacuum’s app on your smartphone.
- Go to the cleaning settings or mopping settings section.
- Look for “water level,” “mop intensity,” or “mopping water output” options.
- Reduce the setting from high to medium, or from medium to low, especially on hard floors that do not require heavy mopping.
- Run a test cleaning session and observe the dirty water tank level afterward.
Medium water flow is sufficient for most standard household floor types. You only need high water flow for very grimy floors or after a significant spill. Running on high water flow every session accelerates dirty water tank fill rates and increases the frequency of rinse cycles, both of which raise the risk of overflow if maintenance is not kept up.
When to Contact Customer Support or Request a Warranty Repair
There are situations where dirty water leaks from a robot vacuum base station indicate a hardware defect that cannot be fixed through regular maintenance. Knowing when to stop troubleshooting and contact your manufacturer’s support team saves time and prevents further damage to your floors and the machine.
Contact customer support in these situations:
- The dirty water pump produces no suction despite the tank being empty and all seals being intact. This suggests the internal pump motor has failed.
- Water leaks from the bottom of the base station, not from the wash tray. This indicates an internal hose has cracked or become disconnected.
- The overflow sensor gives false readings after repeated cleaning. A malfunctioning sensor may require replacement under warranty.
- The base station leaks during the first few weeks of ownership. This may indicate a manufacturing defect, and most brands offer a replacement or free repair under the standard warranty period.
- The dirty water tank or lid shows physical deformations that appeared without impact or mishandling. Some batches of plastic tanks have known quality issues, and several brands including Eufy have issued recalls for affected units.
When you contact support, provide your model number, the date of purchase, a description of the problem, and photos or video of the leak if possible. Most reputable brands resolve genuine hardware defects quickly, especially when supported by clear visual evidence. Always check whether your issue has been addressed in recent firmware updates, as some pump and sensor errors can be corrected through a simple software update pushed to the robot through the app.
FAQs
Why does my robot vacuum base station keep leaking dirty water even after I empty the tank?
If the dirty water tank is empty but the base station still leaks, the most likely causes are a damaged rubber seal on the tank lid, a clogged wash tray drain, a blocked drain filter, or a dirty overflow sensor giving a false full reading. Start by cleaning the wash tray drain and the overflow sensor. Then inspect all rubber seals for damage. If the seals look fine and the drain is clear, test the pump by running a short cleaning session and watching where the water exits. This helps pinpoint the exact failure point.
How often should I empty the dirty water tank in my robot vacuum base station?
The general recommendation is to empty the dirty water tank every two to three cleaning sessions, or every two to three days if your robot runs daily. Homes with pets, heavy foot traffic, or larger floor areas may need to empty the tank after every single cleaning session. Do not rely solely on the app notification, as the sensor sometimes triggers only when the tank is already at maximum capacity.
Can I use regular floor cleaner in my robot vacuum’s clean water tank?
No. Regular household floor cleaners, dish soap, and scented detergents are not compatible with most robot vacuum base station systems. These products create excessive foam inside the pump and hoses, cause residue buildup in internal components, and can block the dirty water drain entirely. Always use plain distilled water or the cleaning solution specifically approved and sold by your robot vacuum’s manufacturer.
What does the dirty water pump error mean on my robot vacuum?
A dirty water pump error typically means the base station’s pump is unable to move dirty water from the mop wash tray into the dirty water tank. The most common causes are a full dirty water tank, a damaged or displaced seal on the tank lid, a blocked drain in the wash tray, or a clogged pump filter. Start by emptying and reinserting the dirty water tank, then clean the wash tray drain. If the error persists after these steps, inspect the tank lid seal and contact customer support if the pump appears mechanically faulty.
Is it safe to run my robot vacuum if the base station is leaking dirty water?
No. You should stop the cleaning session immediately and remove the robot from the base station when you notice a dirty water leak. Dirty water from the base station contains floor grime, bacteria, and cleaning solution residue. Allowing it to pool on your floor creates a hygiene problem and can damage hardwood or laminate flooring quickly. Disconnect the base station from power, clean up the leaked water, and then troubleshoot the cause before running the robot again.
How do I know if my dirty water tank seal needs replacing?
Perform this simple test: fill the dirty water tank with a small amount of clean water, close the lid tightly, and turn the tank upside down over a sink. If water drips from around the lid, the seal is compromised. You can also feel the seal with your finger. A healthy seal feels soft and springy. A seal that feels hard, has visible flat spots, or shows cracks or tears needs to be replaced. Contact your manufacturer’s support page to order a genuine replacement seal or replacement tank.
Why does my base station leak water only sometimes and not every session?
Intermittent leaks are usually caused by a partially clogged drain, a seal that only fails under certain pressure conditions, or a dirty overflow sensor that gives inconsistent readings. An inconsistently seated dirty water tank can also cause sporadic leaks. The tank may appear installed correctly but not be fully locked in place every time. Try removing and firmly reinserting the tank before each session to ensure it clicks securely. If the intermittent leaking continues, do a full deep clean of the wash tray, filter, and sensor.
Does the placement of my base station affect whether it leaks?
Yes, it does. A base station placed on an uneven surface, a thick rug, or a soft mat can sit at a slight angle that disrupts the internal drainage direction. Even a small tilt can cause dirty water to pool against a seal instead of flowing toward the pump and tank, leading to leaks at unexpected points. Always place the base station on a hard, flat surface and use a level to verify it sits evenly. If your flooring is slightly uneven, rubber anti-vibration pads under the unit’s feet can create a stable and level foundation.

Hi, I’m Ivy! I’m a smart home enthusiast and self-proclaimed clean freak who loves testing the latest cleaning tech so you don’t have to waste your money on the wrong one. I started HomeTechClean to share honest reviews and practical advice for anyone who wants a cleaner home with less effort.