How To Clean A Smelly Robot Vacuum Mop Pad Effectively?
Your robot vacuum mop was supposed to make your home cleaner and fresher. Instead, every time it finishes a mopping cycle, a musty, sour smell fills the room. That damp, mildewy odor coming from the mop pad is more than just unpleasant.
It means bacteria, mold, and trapped grime are spreading across your floors with every pass. You are not alone in this struggle. Thousands of robot vacuum owners deal with smelly mop pads, and the good news is that fixing this problem is simple once you know the right steps.
This guide walks you through everything you need to know about cleaning a smelly robot vacuum mop pad. You will learn why it smells, how to deep clean it, which household products work best, and how to prevent the odor from coming back.
Key Takeaways
- Bacteria and mildew are the main cause of smelly robot vacuum mop pads. They grow rapidly on damp fabric left sitting in a dark, enclosed space after a mopping cycle.
- Remove the mop pad immediately after each cleaning session. Leaving a wet pad attached to the robot or inside the dock overnight gives bacteria hours to multiply and produce foul odors.
- A weekly deep clean with white vinegar or baking soda eliminates stubborn smells that regular rinsing cannot fix. Both are natural deodorizers that kill odor causing bacteria without damaging microfiber fabric.
- Always air dry mop pads completely before reattaching them or storing them. Even slightly damp pads can restart the cycle of mildew growth and bad odors within hours.
- Replace worn mop pads every two to six months depending on use. Old pads with frayed, matted, or discolored fibers hold onto bacteria no matter how well you clean them.
- Clean the docking station basin and water tanks regularly because dirty water residue in these areas contributes to the overall smell. The mop pad is often not the only source of the odor.
Why Does Your Robot Vacuum Mop Pad Smell Bad
Understanding why the smell develops helps you fix it at the source. The primary reason is bacterial growth on damp fabric. After your robot finishes mopping, the pad stays wet. It sits against the bottom of the robot or inside a docking station with limited airflow. This warm, moist environment is perfect for bacteria and mildew.
Organic matter makes the problem worse. The pad picks up food particles, pet dander, dust, hair, and skin cells from your floor. These materials become trapped in the microfiber weave. As bacteria break down this organic matter, they release gases that produce that familiar sour or musty smell.
Leftover cleaning solution also plays a role. Detergent residue builds up inside the mop pad fibers over time. This residue mixes with moisture and floor grime to create a sticky layer that holds onto odors. Many owners do not realize that using too much cleaning solution actually makes the smell worse instead of better.
Some robot vacuums have self washing docking stations. Even these models can develop smelly pads if the dirty water tank is not emptied regularly or if the wash basin itself grows bacteria. The pad gets “cleaned” in contaminated water, which defeats the purpose entirely.
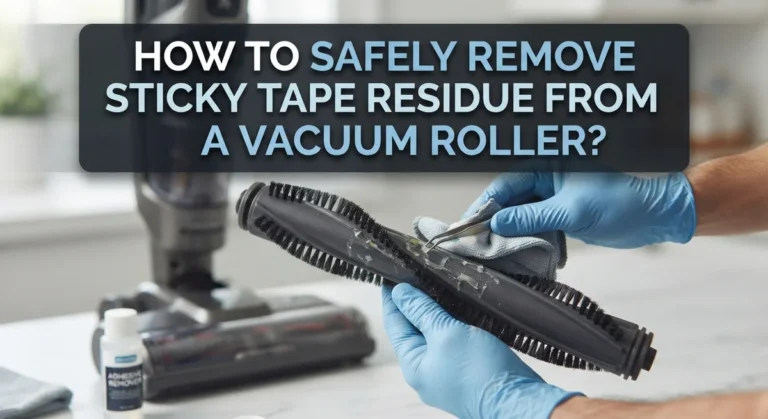
How To Remove The Mop Pad Safely Before Cleaning
Before you start any cleaning process, you need to remove the mop pad correctly. Power off your robot vacuum first. Place it on a flat, clean surface where you have room to work. This prevents accidental activation and protects internal components from water exposure.
Most robot vacuum mop pads attach with velcro, clips, or magnetic mounts. Check your owner’s manual for the exact removal method for your model. For velcro attached pads, grip one corner firmly and peel the pad away from the plate in a smooth motion. Avoid yanking or twisting, as this can damage the velcro strips over time.
For models with clip on systems, press the release button or lever before pulling the pad free. Some newer robots from brands like Ecovacs use a double tap power button method to release the roller mop component. If your model has a retractable mop, make sure the mechanism extends fully before attempting removal.
Once removed, shake the pad over a trash can to dislodge loose dirt, hair, and debris. This pre step makes the actual washing process much more effective. Inspect the pad for visible stains, discoloration, or matted areas. These spots tell you where bacteria and grime have built up the most and need extra attention during cleaning.
Keep the area where the pad attaches to the robot clean as well. Wipe the mounting plate with a damp cloth to remove any residue or grime that could transfer back onto a freshly cleaned pad.
The Quick Rinse Method For Daily Maintenance
If you use your robot mop daily or several times a week, a quick rinse after every session prevents odor from building up in the first place. This method takes less than five minutes and makes a significant difference.
Hold the mop pad under warm running water immediately after removing it from the robot. Use your fingers to gently massage the fabric, working from the center outward. You will see dirty water running out of the fibers. Keep rinsing until the water runs mostly clear.
Add a small drop of mild dish soap to the pad and work it through the fibers with your hands. Dish soap cuts through grease and floor grime effectively without leaving heavy residue. Rinse the soap out thoroughly under running water. Any leftover soap will attract dirt during the next mopping cycle.
Squeeze out excess water gently without wringing or twisting the pad aggressively. Microfiber fabric is durable, but harsh wringing can damage the fine fibers over time and reduce the pad’s cleaning ability. Press the pad between your palms or against the side of the sink to remove water.
Hang the pad in a well ventilated area to air dry completely. A drying rack near a window works perfectly. Do not fold the pad while it is still damp. Folding traps moisture inside the layers and creates the exact conditions bacteria need to grow. A fully dried pad should feel light and fluffy, not heavy or stiff.
Deep Cleaning With White Vinegar To Kill Odor
White vinegar is one of the most effective natural solutions for eliminating stubborn mop pad odors. It is acidic enough to kill most bacteria and mold spores while being gentle on microfiber fabric. This method works well as a weekly deep clean.
Fill a basin or bucket with warm water and add one cup of white distilled vinegar for every gallon of water. Stir the mixture briefly. Submerge the smelly mop pad completely and let it soak for 30 to 60 minutes. For pads with severe odor, you can extend the soaking time to two hours.
After soaking, use your hands to gently scrub the pad in the vinegar solution. Pay special attention to stained or discolored areas where bacteria concentrate. You may notice the water turning cloudy or brown as trapped grime releases from the fibers.
Drain the vinegar water and rinse the pad thoroughly under clean running water. Continue rinsing until you no longer detect any vinegar smell. This usually takes about two minutes of steady rinsing. The vinegar scent disappears completely once the pad dries, leaving behind a fresh, clean mop pad.
Squeeze out the excess water and lay the pad flat or hang it to air dry in direct sunlight if possible. Sunlight provides natural UV disinfection that further kills bacteria. If indoor drying is your only option, choose a spot with good air circulation and avoid humid rooms like bathrooms.
Using Baking Soda To Neutralize Stubborn Smells
Baking soda is a natural deodorizer that works differently from vinegar. While vinegar kills bacteria with its acidity, baking soda absorbs and neutralizes odor molecules directly. Using both methods in rotation gives you the best results.
Create a paste by mixing three tablespoons of baking soda with enough warm water to form a thick consistency. Spread this paste directly onto the smelly areas of the mop pad. Let it sit for 15 to 20 minutes so the baking soda has time to absorb the odors embedded in the fibers.
After the paste has set, gently scrub the pad with a soft brush or your fingers. Work the baking soda into the fabric using small circular motions. This helps dislodge grime trapped deep within the microfiber weave that regular rinsing misses.
Rinse the pad under warm running water until all baking soda residue washes away. Feel the fabric with your fingers to check for any gritty texture, which indicates leftover baking soda. Keep rinsing until the pad feels smooth and soft again.
For an extra powerful treatment, you can combine vinegar and baking soda. Sprinkle baking soda on the pad first, then pour a small amount of vinegar over it. The fizzing reaction helps lift grime and kill bacteria simultaneously. Rinse thoroughly after the fizzing stops. This combination treatment works especially well on pads that have been neglected for several weeks.
Can You Machine Wash Robot Vacuum Mop Pads
Many robot vacuum mop pads are machine washable, but not all of them are. Check your owner’s manual or the manufacturer’s website before putting any pad in a washing machine. Using the wrong wash setting can ruin the pad permanently.
If machine washing is approved for your pad, place it inside a mesh laundry bag to protect it from snagging on the drum or getting stretched. Use a gentle or delicate cycle with cold or warm water. Hot water above 60 degrees Celsius can damage adhesive layers and warp the pad structure on some models.
Choose a mild, fragrance free detergent for the wash. Avoid fabric softener completely. Fabric softener coats microfiber strands with a waxy layer that blocks the tiny gaps between fibers. These gaps are what make microfiber effective at trapping dirt and absorbing water. A softener treated pad will smear dirt across your floor instead of lifting it.
Bleach should also be avoided in most cases. While bleach kills bacteria effectively, it degrades microfiber fabric over time and can weaken the velcro backing. If you need a disinfecting boost, add half a cup of white vinegar to the rinse cycle instead.
After washing, remove the pad immediately from the machine. Do not leave it sitting in a damp drum. Air dry the pad completely. Many manufacturers specifically warn against using a tumble dryer because high heat shrinks microfiber and damages its structure. If your manual allows machine drying, use the lowest heat setting only.
Cleaning The Docking Station To Stop Recurring Odors
Your mop pad might be perfectly clean, but if the docking station is dirty, the smell will return immediately. The docking station basin, wash tray, and water tanks are common hiding spots for bacteria and slime that reinfect the pad after every wash cycle.
Start by emptying the dirty water tank after every mopping session. Stale dirty water sitting inside the tank for days produces a foul odor that transfers to the mop pad during the next auto wash cycle. Rinse the tank with warm water and let it dry before reinstalling.
Remove the wash basin or tray from the docking station. Most models allow this component to slide or lift out. Scrub the basin with warm water and a small amount of dish soap. Use a brush to reach corners and grooves where biofilm and slime tend to accumulate. This slimy buildup is a colony of bacteria, and it produces a significant portion of the smell many owners blame on the mop pad alone.
Wipe down the interior walls of the docking station with a damp cloth. Check for any visible mold spots, especially around water inlet and outlet ports. A cotton swab dipped in white vinegar works well for reaching tight spaces.
Clean or replace the pad washing filter if your model has one. A clogged filter restricts water flow during the auto wash cycle, resulting in an incomplete clean. Rinse the filter under running water, let it air dry, and reinstall it. Most manufacturers recommend replacing this filter every two to three months.
How To Prevent Your Mop Pad From Smelling In The Future
Prevention is always easier than repeated deep cleaning. A few simple habits will keep your mop pad fresh and odor free between washes.
Remove the mop pad immediately after the mopping cycle ends. This is the single most important habit you can build. A wet pad left on the robot for even a few hours gives bacteria enough time to start multiplying. Make pad removal part of your post cleaning routine.
Use the hot air drying feature if your docking station has one. Many modern robot vacuums from brands like Roborock, Ecovacs, and Dreame include heated drying that blows warm air through the mop pad after washing. This feature reduces drying time and limits bacterial growth significantly. Enable it in your robot’s app settings if it is not already active.
Rotate between two or more mop pads so one can fully dry while the other is in use. This simple rotation system ensures you never attach a damp pad to your robot. Replacement pads are inexpensive and having extras on hand makes maintenance much easier.
Keep your floors reasonably clean between mopping sessions. Vacuum first before running the mop function. This removes loose debris, hair, and dust so the mop pad does not absorb as much grime during each session. A cleaner pad after mopping means less bacteria growth during drying.
Store clean, dry mop pads in an open, ventilated area rather than a sealed container or drawer. Airflow prevents any residual moisture from becoming a problem.
What Cleaning Products To Avoid On Robot Mop Pads
Using the wrong cleaning product can damage your mop pad, reduce its performance, or even void your warranty. Knowing what to avoid is just as important as knowing what to use.
Bleach and chlorine based cleaners are too harsh for most microfiber mop pads. They break down the synthetic fibers over time, causing the pad to thin, fray, and lose its ability to absorb water. A pad damaged by bleach often feels rough and scratchy instead of soft and plush.
Fabric softener is the most common mistake robot vacuum owners make. It seems logical to use softener for a softer pad, but it does the opposite of what you want. The softening agents coat individual microfiber strands and seal the microscopic gaps that give the fabric its cleaning power. Your pad will feel smooth, but it will push dirty water around instead of absorbing it.
Strongly scented detergents and essential oils can leave residue in the fibers. This residue attracts dirt faster and can cause a buildup that traps bacteria. Stick to mild, unscented dish soap or laundry detergent for the best results.
Avoid using abrasive scrubbing tools like steel wool or stiff bristle brushes. These tools tear microfiber strands and create rough spots on the pad surface. A damaged pad scratches delicate flooring materials like hardwood or vinyl. Use your hands or a soft cloth for scrubbing instead.
Do not mix multiple cleaning chemicals when treating a mop pad. Combining products like vinegar with bleach produces dangerous chlorine gas. Stick to one cleaning method at a time and rinse completely before switching to a different product.
How Often Should You Clean And Replace Mop Pads
Cleaning frequency depends on how often you use your robot mop and the conditions in your home. Following a consistent schedule prevents odor from developing.
Rinse the mop pad after every use. This five minute habit removes fresh grime before it has a chance to dry and bond with the fibers. A quick rinse under warm water with a drop of dish soap is enough for daily maintenance.
Deep clean the pad once a week using the vinegar soak or baking soda method described earlier. Weekly deep cleaning removes bacteria and grime that daily rinsing cannot reach. If you have pets, children, or heavy foot traffic in your home, consider deep cleaning twice per week instead.
Machine wash every two weeks if your pad is machine washable. This provides the most thorough cleaning possible and resets the pad to near new condition. Always follow the gentle cycle and cold water guidelines.
Replacement is necessary when cleaning no longer restores the pad’s performance. Most mop pads last three to six months with proper care. Replace your pad sooner if you notice these signs: persistent odor even after deep cleaning, visible staining that will not wash out, matted or frayed fibers, reduced water absorption, or streaky cleaning results on your floor.
Homes with pets typically need more frequent replacement, around every two to three months. Pet dander and hair are particularly difficult to fully remove from microfiber, and they accelerate bacterial growth.
Signs Your Mop Pad Needs Immediate Attention
Sometimes the smell is not the only warning sign. Your mop pad communicates its condition through several visual and performance clues. Learning to read these signs helps you act before the problem gets worse.
A sour or musty smell that hits you the moment you pick up the pad means bacterial colonies have established themselves deep in the fibers. This requires immediate deep cleaning with vinegar or baking soda, not just a simple rinse.
Visible discoloration or dark stains that do not fade after washing indicate ground in grime. These stained areas harbor bacteria even when the rest of the pad is clean. If washing does not remove the stains, the pad has reached the end of its useful life and needs replacement.
Slimy or sticky texture on the pad surface is a clear sign of bacterial biofilm. This film feels slippery when wet and sticky when dry. Do not use a pad in this condition because it will spread bacteria across your entire floor instead of cleaning it.
Your floors may also give you clues. If your floor smells bad after mopping or feels sticky once dry, the mop pad is likely the cause. A dirty pad redistributes grime in a thin layer across the floor surface, leaving behind that unpleasant residue.
Reduced water absorption is another warning sign. Hold the pad under running water and observe how quickly it absorbs moisture. A healthy microfiber pad soaks up water almost instantly. A worn or contaminated pad lets water roll off or absorbs it very slowly.
Quick Reference Cleaning Schedule For Mop Pad Maintenance
Keeping track of your cleaning routine does not need to be complicated. Here is a simple schedule that keeps your robot vacuum mop pad fresh and effective.
After every mopping session, remove the pad from the robot, shake off loose debris, rinse under warm water with a small drop of dish soap, and hang to air dry completely. This takes less than five minutes and prevents bacteria from getting a foothold.
Once per week, perform a deep clean using white vinegar or baking soda. Soak the pad for 30 to 60 minutes, scrub gently, rinse thoroughly, and dry in a ventilated area or in sunlight. Also clean the docking station basin and empty the dirty water tank during this weekly session.
Every two weeks, run the pad through a washing machine on a gentle cycle if your manufacturer allows it. Use mild detergent, skip the fabric softener, and air dry afterward. This biweekly machine wash provides the deepest clean.
Monthly, inspect the pad for signs of wear including fraying, thinning, permanent stains, and loss of absorption. Check the velcro or mounting mechanism for wear as well. Also give the docking station a thorough deep clean, including all water tanks, filters, and internal surfaces.
Every three to six months, replace the mop pad entirely with a new one. Even the best maintenance cannot prevent eventual fiber breakdown. Starting fresh with a new pad ensures your robot mop delivers the best cleaning results and keeps your home smelling clean.
Frequently Asked Questions
Can I use essential oils on my robot vacuum mop pad to make it smell good?
Essential oils are not recommended for robot vacuum mop pads. Oil residue coats the microfiber strands and reduces the pad’s ability to absorb water and lift dirt. The oil can also leave a film on your floor surface and attract more dust. If you want a fresh scent, add a few drops of essential oil to the clean water tank instead, but only if your manufacturer approves this. Check your user manual before adding anything other than water or approved cleaning solution to the tank.
How long should I soak a smelly mop pad in vinegar?
A 30 to 60 minute soak in a solution of one cup of white vinegar per gallon of warm water is effective for most smelly pads. For severe odor caused by weeks of neglect, extend the soaking time to two hours. Do not soak for longer than three hours, as prolonged exposure to acidic solutions can weaken adhesive bonds on some pad types. Always rinse thoroughly after soaking to remove all vinegar residue from the fibers.
Why does my robot mop pad still smell after the docking station washes it?
The docking station auto wash function rinses the pad, but it does not deep clean it. Dirty water residue inside the basin, a clogged wash filter, or a full dirty water tank can mean your pad gets washed in contaminated water. Empty and clean the dirty water tank after every session. Scrub the wash basin weekly. Replace the wash filter every two to three months. These steps ensure the auto wash cycle actually delivers clean results.
Is it safe to use hot water on robot vacuum mop pads?
Warm water is safe and effective for most mop pads. Water temperature up to 40 to 50 degrees Celsius works well for rinsing and soaking. Some premium docking stations use water heated to 60 or even 75 degrees Celsius during their auto wash cycle, which is designed for that specific pad material. Avoid using boiling water because extreme heat warps adhesive layers, weakens fibers, and can permanently damage the pad structure.
How many backup mop pads should I keep on hand?
Having two to three extra mop pads is a good practice. This allows you to rotate pads so one is always clean and completely dry while another is in use. Rotation extends the lifespan of each pad because no single pad endures constant use without adequate drying time. In homes with pets or heavy mopping schedules, keeping four pads in rotation provides the most flexibility and the best odor prevention results.
Hi, I’m Ivy! I’m a smart home enthusiast and self-proclaimed clean freak who loves testing the latest cleaning tech so you don’t have to waste your money on the wrong one. I started HomeTechClean to share honest reviews and practical advice for anyone who wants a cleaner home with less effort.