How To Unclog The Water Pump On A Robot Mop Combo?
If your robot mop combo suddenly stops laying down water on your floors, you know exactly how frustrating that feels. You set the cleaning schedule, hit start, and then watch your robot glide across the floor without leaving a single wet trace behind. Your floors stay dirty, streaks show up everywhere, and your high-tech appliance feels like a very expensive dust pusher.
A clogged water pump is one of the most common reasons this happens. The good news? Most clogs are easy to fix right at home without any special tools or professional help. You just need to know where to look, what to do, and in what order to do it.
This guide walks you through every step of the unclogging process clearly and directly. From diagnosing the problem to cleaning internal channels, you will know exactly what to do before you finish reading.
In a Nutshell
- A clogged water pump is mostly caused by mineral deposits from tap water, dirty mop pads, debris in the nozzle, or air trapped in the internal pump lines. All of these are fixable at home with simple tools and a little patience.
- Symptoms of a clogged pump include dry mop pads after a full cleaning run, no water dispensing even when the tank is full, uneven wet patches on the floor, and strange gurgling sounds from the robot during mopping cycles.
- The fix involves a clear process: you inspect the water tank, clean the outlet nozzle, flush the pump line, check the mop pad, purge air bubbles, descale with a safe solution, and then run a test cycle to confirm the fix worked. Skipping steps often means the problem comes back quickly.
- Using tap water in your robot mop is the single biggest contributor to pump clogs. Hard water leaves behind calcium and magnesium deposits inside the tiny pump channels and nozzles, and these build up over time until water cannot pass through at all.
- Regular maintenance prevents future clogs entirely. Rinsing the tank weekly, using distilled or filtered water, replacing mop pads every two to three months, and cleaning the pump filter monthly keeps the water flowing smoothly every single time.
- If the pump still does not work after going through all the steps in this guide, the internal pump motor may have failed. At that point, a reset, firmware update, or contacting the manufacturer’s support team is the right path forward.
Understanding How The Water Pump Works In A Robot Mop Combo
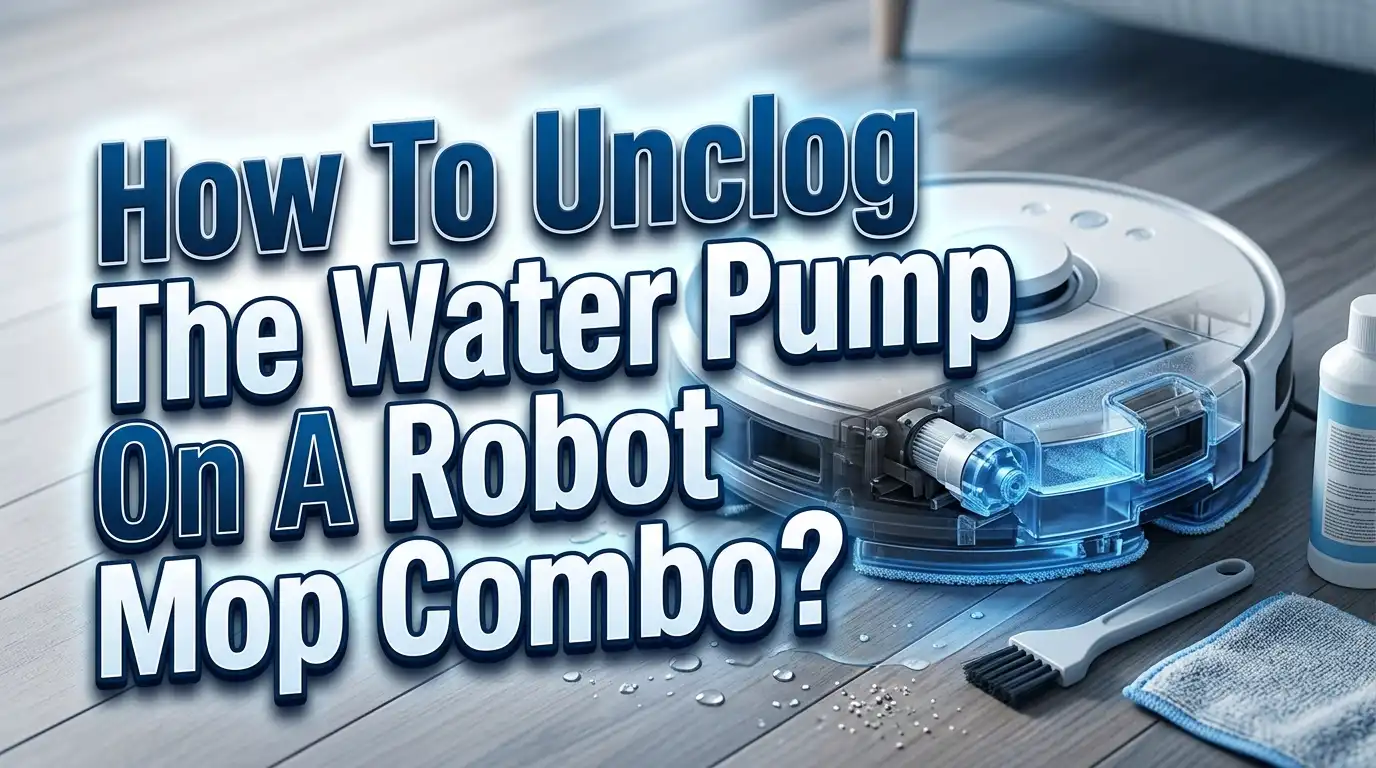
Before you can fix a clogged pump, it helps to understand what you are actually dealing with inside your robot. A robot mop combo has a small, low-powered electric pump that sits between the water tank and the mop pad area. When the robot activates mopping mode, this pump draws water from the tank and pushes it through a narrow internal channel or tube toward the mop attachment.
The pump itself is very small because the robot’s entire body is compact. This compact size means even a tiny amount of mineral buildup or debris can block water flow completely. The nozzle or outlet where water exits the tank is often no wider than a drinking straw, and in some models it is significantly narrower than that.
Most robot mop combos use one of two delivery systems. The first is a gravity-assisted flow regulated by a small valve, and the second is an active pump-driven flow. Active pump systems are more powerful and more reliable, but they are also more sensitive to air locks and debris clogs. Understanding which type your robot uses helps you prioritize which fix to try first.
The water moves from the tank through a small tube or molded channel, passes through a filter screen in many models, goes through the pump, and then exits through the outlet nozzle onto the mop pad. If any point in this path gets blocked, water stops reaching the floor. Identifying where the blockage sits is the key to solving the problem efficiently.
Common Causes Of A Clogged Robot Mop Water Pump
Knowing what causes the clog tells you exactly what to clean and how to prevent the same problem from coming back. There are several reasons a robot mop pump gets blocked, and most of them relate directly to everyday use habits.
Mineral buildup from tap water is the most frequent cause. Hard water contains calcium, magnesium, and other dissolved minerals. Every time water moves through the pump and channels, these minerals get left behind on the internal surfaces. Over weeks and months, they form a hard white or yellowish crust that narrows the channel until water cannot pass through.
Debris entering the water tank is another common cause. Small particles of dirt, lint, or even residue from cleaning solutions can travel into the pump inlet and form a physical blockage. If you have ever added a cleaning solution that was not approved by the manufacturer, residue from that solution is likely coating the inside of the pump channels right now.
A worn or dirty mop pad can also mimic a pump clog. When the pad is saturated with old grime, it loses its ability to absorb water. The water has nowhere to go, so it backs up in the system and the pump struggles to push it forward. This is often mistaken for a pump failure when the real fix is simply replacing the mop pad.
Air bubbles trapped inside the pump or tubing create what is called an air lock. This happens after you refill the tank or when the robot sits unused for a long time. The pump spins but cannot move water because air is blocking the line. Finally, a kinked or misaligned internal tube can reduce flow even when there is no actual blockage. Rough handling, drops, or improper reassembly after cleaning can cause this.
Tools And Supplies You Need Before Starting
Getting everything together before you begin saves time and prevents you from stopping halfway through the process to find something. You do not need any specialized equipment for most of these fixes.
You will need a soft bristle brush or an old toothbrush for scrubbing accessible parts. A sewing needle, toothpick, or fine dental pick works well for clearing small nozzle openings without causing damage. A large bowl or sink will be useful for rinsing components. Distilled white vinegar is helpful for dissolving mineral deposits, but you must check your robot’s manual first because some manufacturers specifically advise against using it in the water system.
A clean microfiber cloth or paper towels are useful for wiping down parts and drying components before reassembly. A small syringe or turkey baster can help you flush water through tight channels with controlled pressure. If your robot has charging contacts near the water tank mount, keep them dry at all times during this process. Having your robot’s user manual handy is always a good idea, since it shows you exactly where each component is located on your specific model.
A flashlight or phone torch helps you inspect small openings that are hard to see clearly in regular lighting. Distilled water is the best choice for flushing and refilling because it has no minerals to leave behind. If distilled water is not immediately available, filtered tap water is a reasonable temporary substitute.
Step One: Power Off The Robot And Remove The Water Tank
Safety always comes first. Never try to clean or inspect your robot mop while it is running or charging. Press the power button to turn the robot off completely, then remove it from the charging dock and place it on a flat, stable surface like a table or countertop.
Once the robot is off and disconnected, locate the water tank. On most robot mop combos, the tank is a removable compartment at the rear of the unit or built into the underside near the mop attachment. Press the release button or tab that holds the tank in place and slide it out carefully. Some tanks require a slight twist before they release.
Look at the tank before you do anything else. Note the water level inside. If the tank is nearly empty or completely empty, the pump has been running dry, which can cause heat damage to the internal pump components over time. A dry pump is a stressed pump, and stress leads to faster wear. Empty any remaining water from the tank into a sink and set the tank aside for cleaning in the next step.
While the tank is out, use your flashlight to look at the socket where the tank connects to the robot body. This is where the water exits the tank and enters the robot’s internal channel. Look for white or yellowish crusty buildup around this connection point. That crust is mineral deposit, and it is a clear sign that the tank needs a descaling treatment.
Step Two: Clean The Water Tank Thoroughly
The water tank needs to be rinsed and cleaned before you put it back in the robot. Even if the tank looks clean from the outside, the inside can have a layer of mineral scale or biofilm that narrows the flow path.
Rinse the inside of the tank under warm running water first. Shake it gently while holding it upside down to dislodge any loose sediment. Look at the small outlet valve or nozzle at the bottom of the tank where water exits. This valve is usually a small silicone or rubber piece with a tiny opening. Gently press or flex this valve with your fingers to check if it moves freely. If it feels stiff or stuck, mineral buildup is likely holding it in place.
To remove mineral deposits from the tank interior, fill it halfway with a mixture of equal parts distilled white vinegar and water, but only do this if your manufacturer’s manual does not prohibit vinegar use. Seal the tank and shake it for about thirty seconds. Then let it soak for fifteen to twenty minutes. The acidity in the vinegar dissolves calcium and magnesium deposits effectively.
After soaking, shake the tank again and pour out the vinegar solution. Rinse the tank thoroughly with clean water at least three times to make sure no vinegar smell or taste remains inside. Residual vinegar can affect the pump seals if left in place. If vinegar is not approved for your model, use a citric acid solution instead, mixing one teaspoon of citric acid powder in a cup of warm water. Citric acid is gentler and is approved by many manufacturers for descaling purposes.
Let the tank air dry completely with the cap off before refilling it. Moisture trapped inside a sealed tank can encourage mold and bacterial growth.
Step Three: Unclog The Outlet Nozzle And Water Port
The outlet nozzle is where most visible clogs form. This is the small opening through which water flows from the tank into the robot’s pump channel. It is also the narrowest point in the entire water delivery path, which makes it the first place mineral deposits and debris accumulate.
Shine your flashlight directly at the nozzle opening on the tank and also at the matching port on the robot body. Look for white crust, dark discoloration, or any physical material blocking the opening. Even a partial clog here can reduce water flow enough to leave your floors dry during a mopping cycle.
Use a sewing needle or fine toothpick to gently break up any visible crust around and inside the nozzle opening. Work slowly and do not apply excessive force. The nozzle components are made of soft plastic or rubber in most models, and aggressive poking can create a tear or permanent damage that worsens the problem. The goal is to loosen the mineral crust, not to drill through the component.
After loosening the debris manually, flush the nozzle with warm water using a small syringe. Push the water through with gentle but firm pressure. You may see small white flakes or discolored water come out, which is exactly what you want to happen. Repeat this flushing process three or four times until the water running through the nozzle comes out clear and flows freely without resistance.
For stubborn clogs, soak a cotton swab in diluted vinegar or citric acid solution and press it gently against the nozzle opening for five minutes before flushing again. This softens hardened deposits that manual picking cannot remove on its own. Rinse the nozzle area clean with fresh water after any acid treatment.
Step Four: Flush The Internal Pump Channel
After cleaning the tank and nozzle, the next step is flushing the internal pump channel inside the robot body. This is where water travels from the tank port through the robot to the mop pad outlet. Debris and minerals can also collect inside this channel, and it is not always visible from the outside.
Fill the water tank with clean distilled water and reinstall it in the robot firmly. Make sure you hear or feel it click securely into place. A loose tank creates a gap in the water path that prevents flow even when the pump is working correctly. Once the tank is seated, place the robot on a flat surface over a towel or in a sink area.
Activate a short mopping cycle manually. Watch the mop pad carefully for any signs of water. Even a small wet patch appearing after a minute or two means the pump is pushing water, just slowly. If the pad remains completely dry after two full minutes of a mopping cycle, the pump channel still has a blockage.
On many models, you can also access a manual flush mode through the companion app. Check your app for a “clean mop” or “wet mopping test” function. This runs the pump at a sustained rate, which helps push debris out of the internal channel more effectively than a standard short cleaning cycle. Run this mode two or three times consecutively for the best flushing result.
If your robot does not have an app flush function, run three or four complete short cleaning cycles back to back on a hard surface. The repeated pump activation creates enough pressure fluctuation to dislodge most soft blockages inside the channel.
Step Five: Purge Air Bubbles From The Pump Line
Air bubbles cause an air lock inside the pump, and this is one of the most overlooked causes of a water flow problem. After refilling the tank, especially if the robot ran dry beforehand, air gets sucked into the pump housing and blocks the intake. The pump motor runs, but water cannot enter the chamber because air is occupying the space.
The simplest way to purge air from the system is to run repeated short mop cycles. Each cycle creates a pulse of pump pressure that gradually pushes trapped air out through the outlet. Fill the tank completely with water so the pump intake stays submerged the entire time. A full tank reduces the chance of pulling in more air while you are trying to clear existing bubbles.
You can also gently tap the sides of the robot near the pump area while it is running a mopping cycle. This vibration helps dislodge air pockets clinging to the inside of the tube walls. Think of it like tapping the side of a water glass to release bubbles clinging to the surface. A few gentle taps are all you need. Do not hit the robot hard or shake it aggressively while water is inside.
Tipping the robot slightly to different angles while it is stationary and not running can also shift air bubbles away from the pump intake. Hold the robot at a 30 to 45 degree angle for about thirty seconds in each direction. Then place it flat and immediately start a mopping cycle. Many users report that this simple trick resolves air lock problems that cleaning alone cannot fix.
Step Six: Inspect And Clean The Pump Filter Screen
Most robot mop combos have a small filter screen near the pump inlet or at the base of the water tank socket. This screen catches debris before it reaches the pump impeller. Over time, this screen collects enough sediment to restrict water flow significantly, even when the rest of the system is clean.
Refer to your robot’s manual or manufacturer’s online support page to locate the pump filter screen on your specific model. On some models it sits inside the water tank recess in the robot body. On others it is a small mesh insert near the water outlet on the tank itself. The filter is usually removable by gently pulling or twisting it out with your fingers or a pair of tweezers.
Once you have the filter screen removed, hold it under running warm water and gently brush it with a soft toothbrush. Do not use soap, bleach, or any chemical cleaners on the filter screen. These substances leave residues that foam up inside the pump during operation and create new blockages. Water alone is sufficient for removing most debris from the screen.
If the screen has mineral deposits on it, soak it in a diluted citric acid or white vinegar solution for ten minutes, then rinse thoroughly. Check the screen mesh under good lighting to make sure the openings are all clear and not still clogged with any solid material. A clean filter screen allows water to enter the pump at full flow rate, which restores normal mopping performance.
Allow the filter screen to air dry completely before reinstalling it. A wet filter reinstalled in a robot that will be stored creates conditions for mold growth. This monthly task takes less than five minutes and prevents most pump clog scenarios before they even develop.
Step Seven: Check And Reinstall The Mop Pad Correctly
A mop pad problem can mimic a pump clog perfectly. If the mop pad is overly soiled, stiff from dried detergent residue, or installed incorrectly, water backs up in the system and never reaches the floor. This is the fix that many users overlook because they assume the problem is mechanical rather than with the pad itself.
Remove the mop pad and hold it under warm running water. Gently squeeze and work the water through the fabric fibers. If the water running out of the pad is brown, grey, or discolored, the pad has been absorbing dirty water and redistributing it on your floors. A pad in this condition cannot absorb fresh water properly because its fibers are already saturated with grime.
Wash reusable mop pads with warm water and a small amount of mild dish soap. Rinse them completely until no soap suds remain in the rinse water. Never use fabric softener when washing mop pads because softener coats the microfiber strands and makes them water-repellent, which is exactly the opposite of what you need from a mop pad.
After washing, let the pad air dry completely before reinstalling it. A partially damp pad reinstalled in the robot can develop a mildew smell within a day or two. When attaching the pad back to the robot, make sure it lies completely flat with no wrinkles or bunching. An uneven pad creates pressure imbalances that affect water distribution across the floor surface.
If the pad has been in use for more than two to three months or shows signs of fraying, stiffness, or a permanent grayish color that does not wash out, replace it entirely. A fresh mop pad restores water absorption immediately and is one of the most cost-effective maintenance steps you can take.
Step Eight: Check The Water Flow Settings In The App
A surprising number of robot mop users experience what they think is a pump clog when the actual cause is a water flow setting that got changed accidentally. Most robot mop combos allow you to control how much water the pump releases during mopping, and the lowest setting can look identical to no water at all from the outside.
Open your robot’s companion app on your smartphone or tablet. Navigate to the mopping settings section. Look for a water level or water flow control that typically shows settings like low, medium, and high, or displays a numbered scale. If the setting is at its lowest level, the pump releases only a tiny amount of water that evaporates almost instantly on warm floors without leaving visible moisture on the mop pad.
Set the water flow to medium or high and then run a short test mopping cycle. Watch the mop pad directly after about sixty seconds of mopping. If you see moisture on the pad and light wet tracks behind the robot, the pump is working correctly and the earlier low setting was the entire problem. This fix takes about thirty seconds and costs nothing.
Also check that the robot is actually in mopping mode and not set to vacuum-only mode. Some models with a retractable mop or a lift-up mop mechanism have a mode where the mop is raised entirely out of contact with the floor. In this configuration, the pump may not activate at all regardless of water level settings. Confirm in the app that mopping mode is active and that the mop pad is lowered to floor contact position.
Step Nine: Perform A Hard Reset On The Robot
If physical cleaning has not restored water flow, a hard reset often resolves software-related pump control errors. Modern robot mop combos run firmware that controls pump timing, flow rate, and cycle duration. A firmware glitch or corrupted setting can tell the pump to stay off even when all the hardware is working correctly.
The reset process varies by brand. For most models, press and hold the power button for ten to fifteen seconds until you hear a chime or see the indicator lights flash in a different pattern. This performs a soft reset that clears the current operating state without deleting your cleaning maps or settings.
For a full factory reset, check your manual for the specific button combination or app setting. A factory reset deletes saved cleaning maps and custom settings, so only do this if the soft reset does not resolve the issue. Before performing a factory reset, take a screenshot of your current cleaning zones and schedules in the app so you can recreate them afterward.
After any reset, fill the water tank with fresh distilled water, reinstall the mop pad, and run a complete mopping cycle. Give the robot two to three full minutes of operation before judging whether water is flowing. Some models need a short warm-up period after a reset before all systems return to normal operation.
Step Ten: Update The Robot’s Firmware
Firmware updates often include fixes for water pump control bugs that cause irregular or absent water dispensing. Manufacturers release these updates in response to user reports of exactly the kind of problem you are experiencing, so checking for an update is always worth doing before assuming a hardware failure.
Open your robot’s companion app and navigate to the settings or device information section. Look for a firmware or software version display with a “check for update” button. If an update is available, download and install it while the robot is on its charging dock with a strong WiFi connection.
Do not interrupt a firmware update by powering off the robot or moving it away from the dock. An interrupted update can corrupt the robot’s operating system and create a much larger problem than a clogged pump. The update process typically takes between five and fifteen minutes depending on your internet speed and the size of the update file.
After the update completes and the robot restarts, test the water pump by running a mopping cycle. Firmware updates sometimes reset water level settings back to defaults, so check the app settings again after the update to make sure your preferred flow level is still configured.
Step Eleven: Use Distilled Water Going Forward To Prevent Future Clogs
Once you have resolved the current clog, switching to distilled water is the single most effective thing you can do to prevent the same problem from happening again. Distilled water has had its minerals removed through evaporation and condensation, which means it leaves zero mineral residue inside the pump, channels, tubes, and nozzles.
Tap water in hard water areas contains between 120 and 400 milligrams of dissolved minerals per liter. Over a year of weekly mopping sessions, that adds up to a significant amount of calcium and magnesium depositing inside your robot’s tiny water system. The deposits are not visible at first, but they build up steadily until one day the pump simply cannot push water through at all.
Distilled water is available at most grocery stores and supermarkets at a low cost per gallon. You only need a small amount per mopping session since robot mop tanks are typically between 100 and 300 milliliters in capacity. The cost of using distilled water is far lower than the cost of a professional repair or a replacement pump assembly.
If distilled water is not readily available, filtered water from a pitcher or under-sink filter system is a good alternative. Filtered water removes a significant portion of dissolved minerals even if it does not eliminate them entirely. It is noticeably better than unfiltered tap water for reducing pump clog frequency. Avoid using sparkling water, mineral water, or any water with added electrolytes because these contain substances that will clog the pump faster than regular tap water.
Step Twelve: Establish A Regular Maintenance Routine To Keep The Pump Clear
Fixing a clogged pump is a reactive solution. Building a simple maintenance routine is the proactive approach that prevents clogs from forming in the first place. Regular maintenance takes very little time and dramatically extends the life of your robot mop’s water delivery system.
After every mopping session, empty any remaining water from the tank. Water left sitting in the tank between uses grows bacteria and algae over time, and the deposits they leave behind can clog the pump filter screen within weeks. Take the tank out, pour out the remaining water, and leave the cap off so the inside can air dry before the next use.
Once a week, rinse the inside of the water tank with clean water and give the nozzle area a visual check. Wash the mop pad under warm water and let it air dry. This weekly rinse takes about three minutes and prevents mineral deposits from hardening into the stubborn scale that requires soaking and picking to remove.
Once a month, remove and clean the pump filter screen as described earlier in this guide. Also check the outlet nozzle for any early-stage mineral buildup and flush it with a citric acid solution if you see white residue starting to form. Monthly descaling of the entire tank and nozzle system adds about fifteen minutes of maintenance time and completely eliminates the kind of severe clog that stops water flow entirely.
Replace mop pads every two to three months, or more frequently if you mop daily or have pets in the home. A fresh pad absorbs water efficiently, puts less backpressure on the pump, and cleans floors more effectively than a worn one.
Step Thirteen: When To Contact Customer Support Or Seek Professional Repair
You have gone through every step in this guide, cleaned everything, replaced the mop pad, reset the firmware, and tried every tip described above. If the water pump still does not dispense water, the problem has moved beyond a standard clog into a hardware failure. This is when contacting the manufacturer’s support team is the right move.
Signs that point to a hardware failure rather than a clog include: a grinding or high-pitched whining noise from the pump area during operation, an error code on the robot’s display or in the app that specifically mentions the water pump, water leaking from underneath the robot body instead of flowing to the mop pad, or a pump that makes absolutely no sound at all when it should be running.
Before contacting support, gather information that will help the support team diagnose the issue faster. Note the model name and serial number of your robot, which are usually printed on a sticker on the bottom of the unit. Write down all the troubleshooting steps you have already taken so the support agent does not repeat suggestions you have already tried. Take a short video of the problem in action if possible, since this gives the support team visual evidence of the exact failure behavior.
Most robot mop manufacturers offer a one to two year warranty that covers pump failures caused by manufacturing defects. If your robot is within the warranty period and the pump has failed without any physical damage or misuse on your part, you may be eligible for a free repair or replacement unit. Always check warranty coverage before paying for out-of-warranty repairs, because replacement costs can sometimes exceed the cost of a refurbished unit.
FAQs
How do I know if my robot mop’s water pump is clogged or just broken?
A clogged pump usually produces a faint humming sound during mopping mode but delivers no water. A broken pump motor is often silent when it should be running, or produces a grinding or high-pitched noise. Start with all the cleaning steps in this guide before assuming the motor has failed. Most “broken” pumps turn out to be severe clogs that respond well to a thorough cleaning and descaling treatment.
Can I use vinegar directly in the robot mop’s water tank to unclog it?
This depends entirely on your robot’s manufacturer. Some brands explicitly allow diluted white vinegar for descaling, while others warn that vinegar degrades the internal seals and pump components. Check your user manual or the manufacturer’s support website before putting any vinegar solution in the tank. Citric acid dissolved in water is a gentler alternative that most manufacturers accept as a safe descaling agent.
How often should I deep clean the water pump system?
A thorough pump system cleaning, including the tank, nozzle, filter screen, and internal channel flush, should happen once a month for regular users. If you mop more than four times per week or live in a hard water area, clean the system every two weeks. If you use distilled water consistently, once every six weeks is usually sufficient to keep everything flowing freely.
Why does water come out unevenly or in random spurts during mopping?
Uneven water flow typically points to a partial clog rather than a complete one. Mineral deposits or debris is narrowing the channel but not blocking it entirely, which causes water to push through inconsistently. Follow the nozzle cleaning and internal flush steps in this guide. Also check that the mop pad is installed completely flat with no wrinkles, because pad bunching creates uneven pressure that disrupts consistent water release.
Is it safe to run the robot mop without water in the tank?
Running the pump dry stresses the pump motor and can shorten its lifespan. Most models have a dry-run detection sensor that stops the pump when the tank is empty, but not all models have this feature. If your robot does not have dry-run protection, always make sure there is water in the tank before starting a mopping cycle. Running a few dry cycles occasionally will not cause immediate damage, but doing it regularly accelerates pump wear.
What cleaning solutions are safe to put in a robot mop water tank?
Only use water or cleaning solutions that are explicitly approved by your robot’s manufacturer. Regular household cleaners, floor cleaning concentrates, and soap solutions are not safe for robot mop water systems. They foam inside the pump, leave sticky residue in the channels, and can permanently damage the pump seals. Some brands offer their own certified cleaning tablets or solution drops that are formulated to be safe for internal pump components. When in doubt, plain distilled water is always the safest choice.
My robot mop shows a “water pump error” message. What does that mean?
A water pump error code means the robot’s sensor detected that the pump ran but did not detect the expected water flow. This can be triggered by a clog, an air lock, an empty tank, a loose tank connection, or a failing pump motor. Start by checking that the tank is full and properly seated, then work through the cleaning steps in this guide. If the error code persists after all cleaning and reset steps, contact the manufacturer’s support team with your model number and a description of everything you have already tried.

Hi, I’m Ivy! I’m a smart home enthusiast and self-proclaimed clean freak who loves testing the latest cleaning tech so you don’t have to waste your money on the wrong one. I started HomeTechClean to share honest reviews and practical advice for anyone who wants a cleaner home with less effort.