How To Use A Vacuum Sealer Attachment With A Standard Vacuum Hose?
Have you ever bought a vacuum sealer only to realize you have no idea how the hose attachment works? You are not alone. Thousands of home cooks and food storage enthusiasts face this exact problem every week. The vacuum sealer sits on the counter, the hose is in the box, and the jar sealer attachment collects dust in a drawer.
The truth is, a vacuum sealer hose attachment opens up a whole new range of food preservation options beyond basic bag sealing. You can seal mason jars, canisters, wine bottles, and zipper bags with just one simple accessory. But the setup process confuses many first time users.
This guide will walk you through every step. You will learn how to connect the hose, match attachments, seal different containers, and fix common problems. By the end, you will use your vacuum sealer attachment like a pro and keep your food fresher for much longer.
Key Takeaways
- Your vacuum sealer needs an accessory port for the hose to work. Not all models include this feature, so check your machine before purchasing any hose or attachment accessories.
- The hose connects the vacuum sealer to external accessories like jar sealers, canisters, bottle stoppers, and zipper bags. This lets you seal containers that do not fit inside the machine itself.
- Always check the hose and port for debris before you begin. A blocked connection is the number one reason for poor suction and failed seals.
- Use the correct jar sealer size for your containers. Regular mouth and wide mouth mason jars each require a different attachment to create a proper seal.
- Powdery foods like flour need a barrier such as a coffee filter placed on top of the food inside the jar. This prevents fine particles from getting sucked into the hose and damaging the machine.
- Label every sealed container with the contents and the date. Dehydrated peppers can look identical to dried carrots, and you will thank yourself later for taking this simple step.
What Is A Vacuum Sealer Hose Attachment And What Does It Do
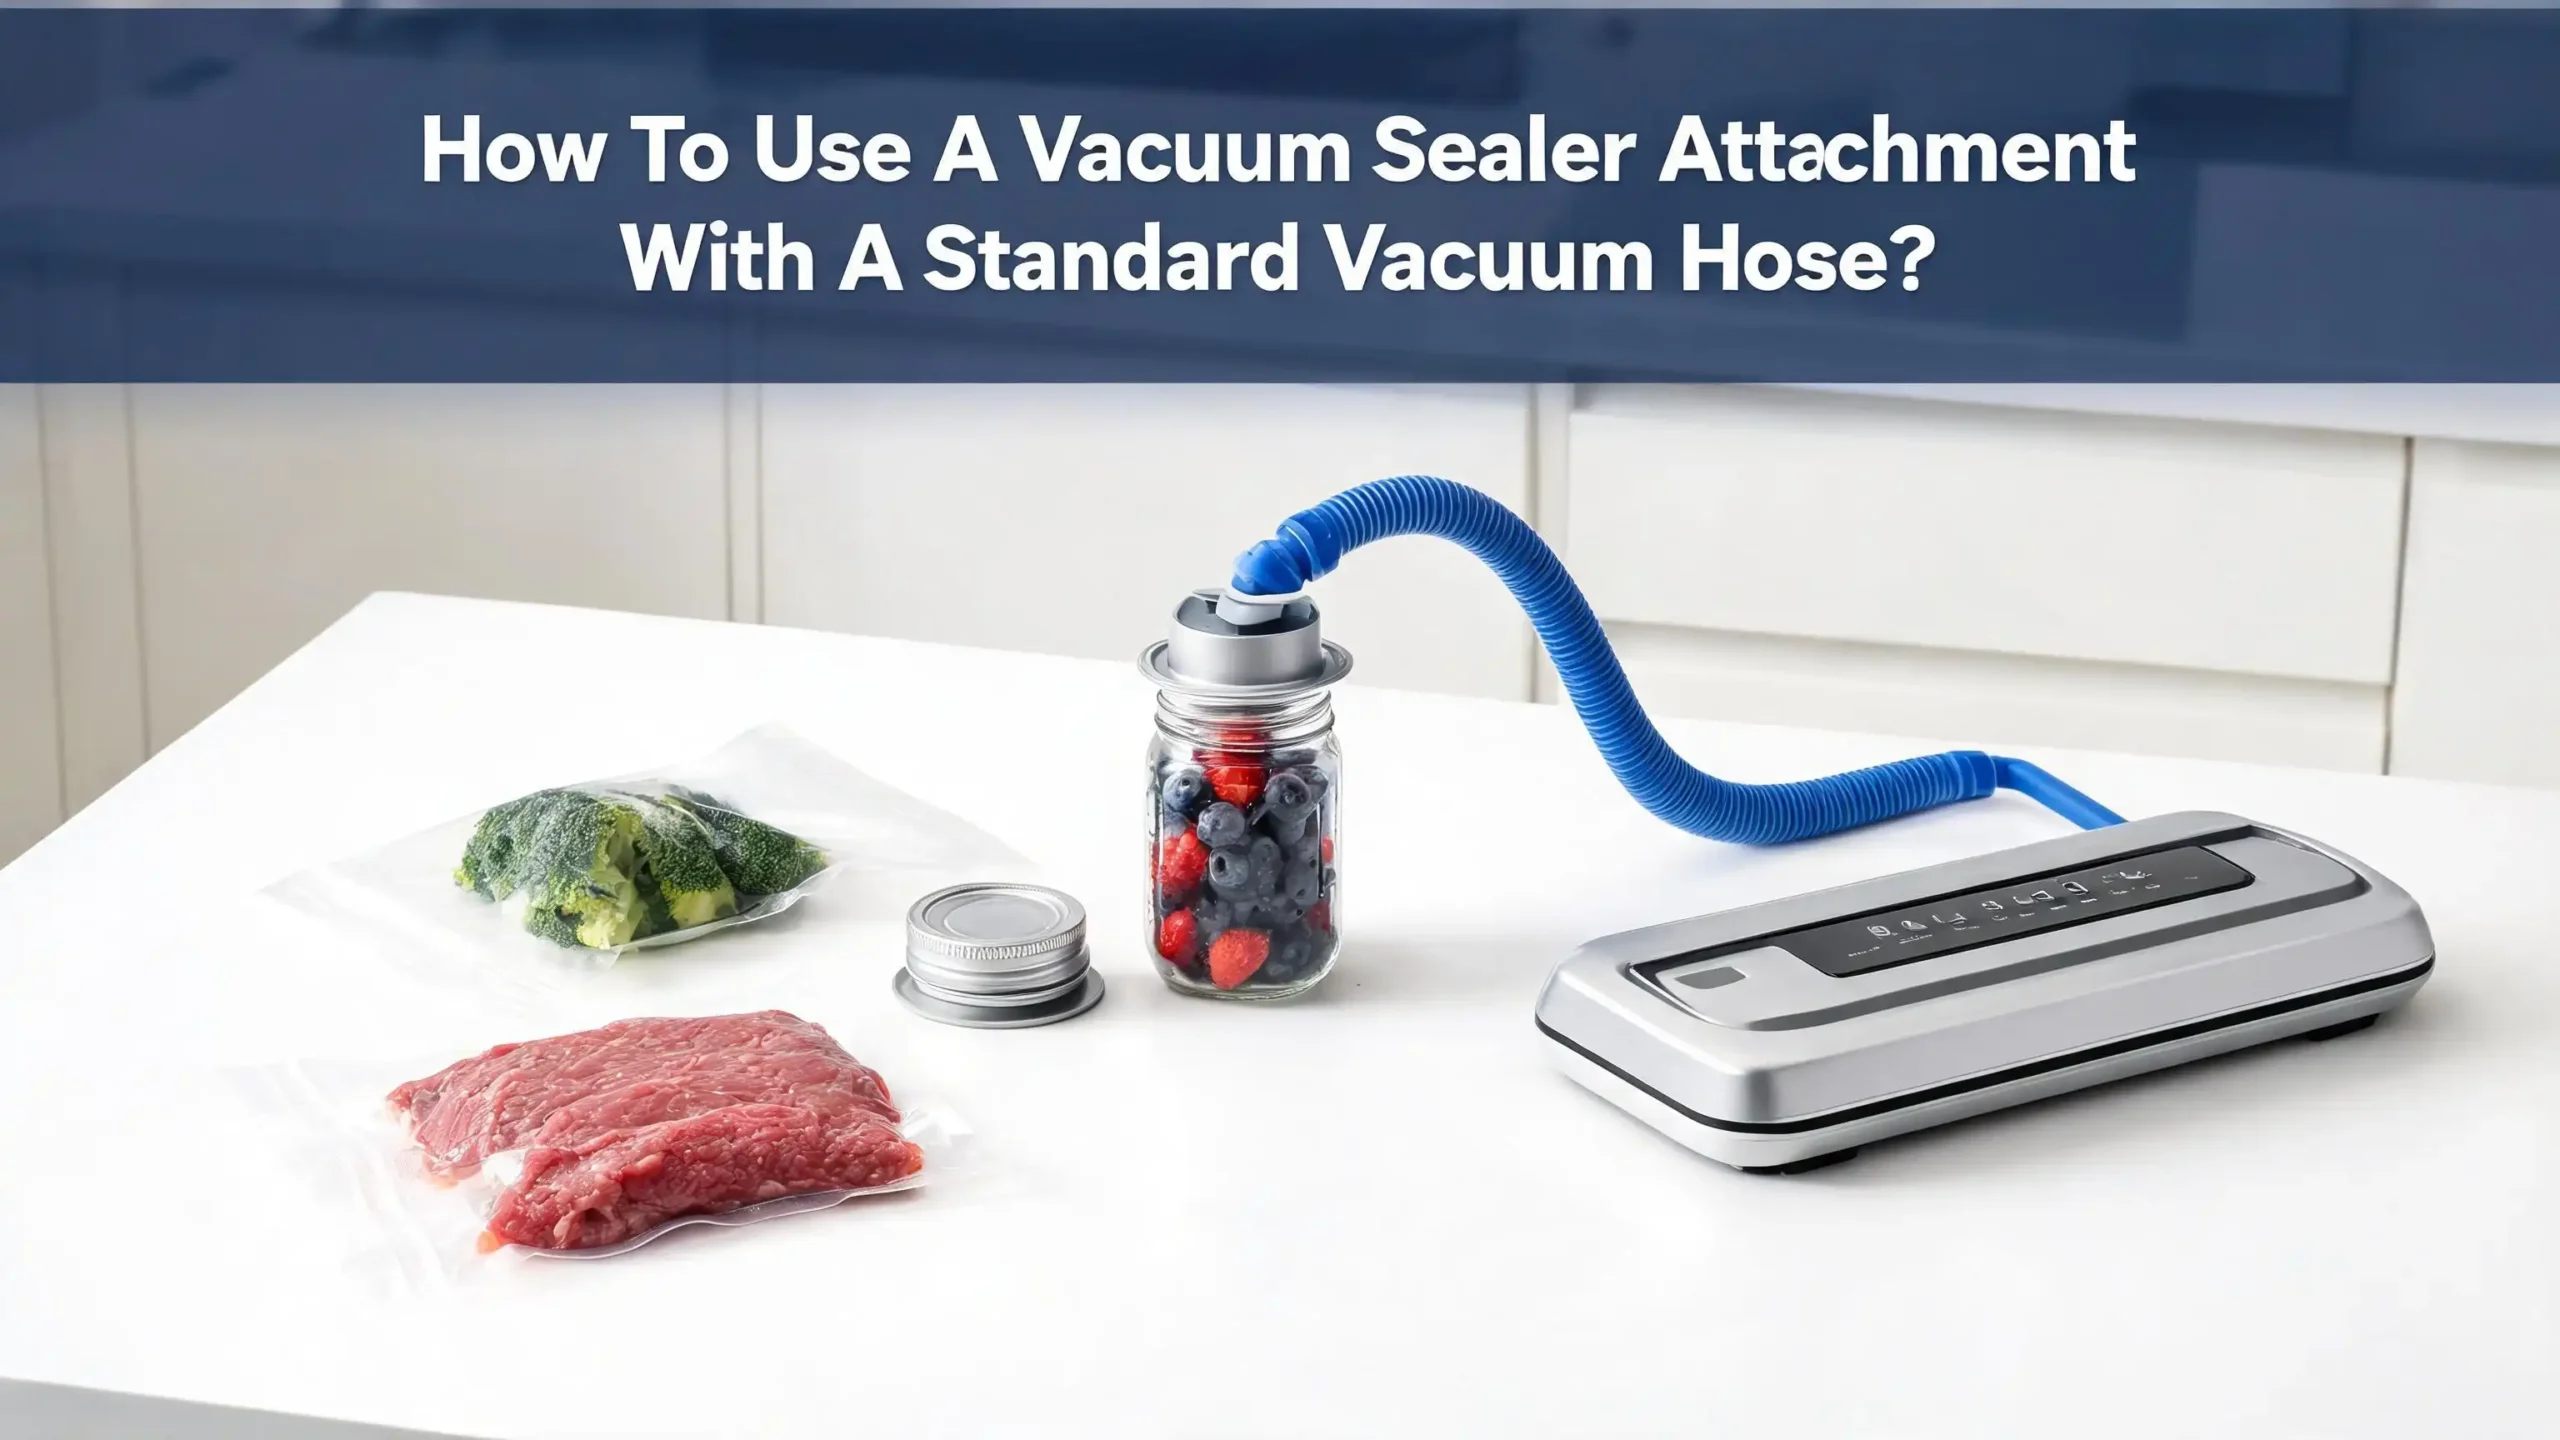
A vacuum sealer hose attachment is a flexible tube that connects your countertop vacuum sealer to external accessories. These accessories include jar sealers, vacuum canisters, bottle stoppers, and zipper bag ports. The hose acts as a bridge between the vacuum pump inside your machine and the container you want to seal.
Most countertop vacuum sealers are built to seal bags. The machine pulls air from the open end of a bag, then heat seals it shut. But many foods store better in jars, bottles, or reusable containers. The hose attachment makes this possible by routing the suction power to an external device.
The hose typically measures around two to three feet long. One end plugs into the accessory port on your vacuum sealer. The other end connects to whatever attachment you are using, such as a jar sealer lid or canister port. The fit needs to be snug on both ends to maintain proper suction.
Some newer vacuum sealer models include a retractable hose built directly into the machine. Others require you to purchase the hose separately. Either way, the function is the same. The hose transfers the vacuum power from the pump to the container attachment.
How To Check If Your Vacuum Sealer Has An Accessory Port
Before you buy a hose or any attachment, you need to confirm that your vacuum sealer has an accessory port. This is the single most important compatibility check you should make. Without an accessory port, a hose attachment will not work with your machine.
Look at the top or side of your vacuum sealer for a small, round opening. This opening is usually labeled “Accessory Port” or marked with a small icon. On many popular models, the port sits on the upper left or upper right side of the unit. Some models hide the port under a small plastic cap that you need to remove before inserting the hose.
If you cannot find a port, check your user manual. The manual will list all features and ports on your specific model. You can also search the model number online to find detailed specifications. Many manufacturers post user guides on their websites for free.
Not every vacuum sealer includes an accessory port. Budget models and compact handheld sealers often skip this feature. If your machine does not have one, you will need to upgrade to a model that does, or use a standalone handheld sealer that connects directly to jar and canister attachments.
Gathering The Right Equipment Before You Start
Proper preparation saves time and prevents frustration. Before you plug in your vacuum sealer, gather all the equipment you will need. Having everything ready on the counter ensures a smooth process from start to finish.
You will need your vacuum sealer with a working accessory port. You will also need the hose attachment that fits your specific model. Check that the hose ends are clean and free of food particles before you begin. Even a small piece of dried food can block airflow and ruin the seal.
Next, choose your sealing accessories. For mason jars, you need a jar sealer attachment. These come in two sizes: regular mouth and wide mouth. Pick the size that matches your jars. For vacuum canisters, you just need the hose and the canister with its built in valve. For wine bottles, you need bottle stopper accessories.
Prepare your containers by washing and drying them thoroughly. Fill jars with your chosen dry goods, but leave at least one inch of space at the top. This headspace prevents food from getting pulled up into the hose during the vacuum process. Finally, have fresh, flat lids ready for your mason jars. Bent or previously used lids may not create a reliable seal.
How To Connect The Hose To Your Vacuum Sealer
Connecting the hose is straightforward once you know the correct steps. A secure connection on both ends is essential for the vacuum to work properly. A loose fit will let air leak in and prevent a good seal.
Start by locating the accessory port on your vacuum sealer. Remove any protective cap or cover from the port. Take the hose and identify which end goes into the machine. On many models, the machine end of the hose is color coded. For example, FoodSaver hoses often have a green tip that goes into the accessory port.
Push the hose firmly into the port until you feel it click or seat snugly. Do not force it. If the hose does not slide in easily, check for debris inside the port. A cotton swab can help clean out any dust or food particles that block the connection.
The other end of the hose connects to your chosen attachment. For a jar sealer, push the hose into the small port on top of the jar sealer lid. For a canister, connect the hose to the valve on the canister lid. Again, make sure the connection is firm but not forced.
Once both ends are connected, give the hose a gentle tug to verify it stays in place. You are now ready to begin the vacuum sealing process.
Step By Step Guide To Vacuum Sealing Mason Jars With A Hose
Mason jars are one of the most popular containers to seal with a hose attachment. This method works perfectly for dry goods like rice, pasta, beans, nuts, flour, and dehydrated foods. Here is exactly how to do it.
Fill your clean mason jar with the food you want to store. Leave at least one inch of headspace at the top. For powdery foods like flour or powdered milk, place a small coffee filter on top of the food before adding the lid. This acts as a barrier and stops fine particles from traveling up through the jar sealer and into the hose.
Place a flat canning lid on top of the jar. You do not need the screw band ring for this step. The vacuum process will hold the lid in place on its own. Now place the jar sealer attachment over the lid and jar opening. Make sure it sits flat and centered.
Connect one end of the hose to the jar sealer and the other end to your vacuum sealer’s accessory port. Close the lid of your vacuum sealer if your model requires it. Press the accessory or start button on your machine.
The machine will run for 10 to 30 seconds as it pulls air from the jar. You will hear the motor working. When the machine stops automatically, the process is complete. Carefully remove the jar sealer attachment by lifting it straight up. The flat lid should now be firmly sealed to the jar.
How To Use A Hose Attachment With Vacuum Canisters
Vacuum canisters offer another excellent storage option. They are especially useful for sealing items that do not fit in standard jars or for storing snacks, baked goods, and delicate items like crackers or cookies.
Start by placing your food inside the canister. Do not overfill the canister. Leave enough room for the lid to close properly. Place the canister lid on top and make sure it sits evenly. Most vacuum canisters have a small valve or port on the lid where the hose connects.
Attach one end of the hose to the canister lid valve. Attach the other end to your vacuum sealer’s accessory port. Press the start or accessory button on your machine. The vacuum pump will pull air from inside the canister through the hose, creating a sealed environment.
You can also use vacuum canisters to seal glass jars that are not mason jars. Place a recycled jar with its original metal lid (loosely screwed on) inside a canister. The vacuum process removes air from both the canister and the jar inside it. When you open the canister afterward, the jar lid will have sealed tightly thanks to the rubber gasket inside the metal lid.
This trick works with spaghetti sauce jars, salsa jars, and any jar that has a rubber or silicone ring inside its metal lid. It is a great way to reuse jars you already have in your kitchen.
Sealing Wine Bottles And Other Specialty Containers
Your vacuum sealer hose can do more than seal food containers. Bottle stopper accessories let you reseal wine bottles and preserve the flavor of opened wine, vinegar, and cooking oils.
To seal a wine bottle, insert a vacuum bottle stopper into the neck of the bottle. Connect the hose to the top of the stopper. Plug the other end of the hose into your vacuum sealer’s accessory port. Press the start button, and the machine will pull air from inside the bottle.
The stopper creates a tight seal that keeps oxygen away from the liquid. This slows down oxidation, which is the main cause of wine going bad after opening. A properly sealed bottle of wine can stay fresh for several additional days compared to just pushing the cork back in.
You can also use this method for vinegar, olive oil, and other bottled liquids that lose quality after exposure to air. Make sure the bottle stopper fits securely in the bottle neck before starting the vacuum process. If the stopper is too loose, air will leak in and the seal will fail.
Some users also seal zipper style vacuum bags using the hose attachment. These bags have a small valve port where the hose connects. Fill the bag, close the zipper seal, attach the hose to the valve, and run the vacuum. This is a convenient alternative for items that do not fit in rigid containers.
Understanding Hose Compatibility And Universal Adapters
Not all hoses fit all machines. Compatibility is a common source of frustration for people who buy generic hose attachments or switch between brands. Understanding how compatibility works will save you money and headaches.
Most vacuum sealer manufacturers use a proprietary port size. This means a hose made for one brand may not fit another brand’s accessory port. Always check the model number of your vacuum sealer before purchasing a replacement or additional hose.
Some third party manufacturers sell universal hoses with interchangeable tips. These hoses come with multiple adapter ends that fit various vacuum sealer brands. This can be a cost effective solution if you own more than one vacuum sealer or if you want to use accessories from different brands.
Another thing to watch for is the difference between older and newer models from the same brand. Some manufacturers have changed their port sizes over the years. A hose from an older model may not fit a newer machine, even if both are from the same brand. Check the product specifications carefully before you buy.
If you already own a hose that does not fit, conversion adapters are available from specialty retailers. These small plastic fittings bridge the gap between different port sizes. They are inexpensive and can save you from buying a completely new hose.
Troubleshooting Common Problems With Hose Attachments
Even with proper setup, things can go wrong. Knowing how to troubleshoot common issues will save you time and keep your food preservation on track.
The most frequent problem is weak or no suction. This usually means air is leaking somewhere in the system. Check every connection point. Make sure the hose is fully seated in the accessory port and in the attachment. Inspect the hose for cracks or holes. Even a tiny crack can let air in and ruin the vacuum.
If the hose fits into the port but feels loose, clean both the hose end and the port opening. Food residue and dust can prevent a tight seal. Use warm water and a small brush to clean inside the port. Dry everything completely before reconnecting.
Another common issue is the jar lid not sealing after the vacuum cycle. Try using a fresh lid. Old or bent lids often have imperfections that prevent a proper seal. Some users find success by stacking two flat lids on the jar. The top lid lifts off when you remove the jar sealer, but the bottom lid stays sealed.
If flour or other fine particles clog the hose, disconnect it and rinse it with warm water. Let it dry fully before using it again. Prevent future clogs by always placing a coffee filter barrier on top of powdery foods before sealing.
Tips For Getting The Best Seal Every Time
Consistency matters with vacuum sealing. A few simple habits will improve your success rate and extend the life of both your food and your equipment.
Always start with clean, dry containers. Moisture inside a jar or canister can prevent a proper seal and encourage mold growth on stored food. Run containers through the dishwasher and let them air dry completely before filling.
Use flat, undamaged lids for every jar. Inspect each lid before use. Bend marks, rust spots, or missing rubber gaskets will cause leaks. Keep a supply of new canning lids on hand so you always have a reliable option available.
Test your seal after every use. Pick up the jar by the lid only. If the lid holds firmly, the seal is good. If the lid pops off, the seal failed, and you need to try again. This simple test takes two seconds and gives you confidence that your food is protected.
Store sealed containers in a cool, dark place. Heat and direct sunlight can weaken seals over time and degrade the food inside. A pantry shelf or cabinet is ideal. Avoid storing sealed jars near the stove, dishwasher, or any heat source.
Clean your vacuum sealer and hose after every few uses. Wipe down the accessory port with a damp cloth. Flush the hose with warm water if it has been exposed to food particles. Regular maintenance prevents buildup that leads to poor performance.
What Foods Work Best With Jar And Canister Vacuum Sealing
Not every food belongs in a vacuum sealed jar. Understanding which foods benefit most from this method helps you get the best return on your effort.
Dry goods are the ideal candidates. Rice, pasta, dried beans, oats, flour, cornmeal, and powdered milk all store extremely well in vacuum sealed jars. These foods already have a long shelf life, and removing the oxygen extends it even further.
Dehydrated and freeze dried foods are another excellent choice. Dried mushrooms, onion slices, peppers, and herbs stay fresh much longer without oxygen exposure. Coffee beans and ground coffee also benefit greatly from vacuum sealing, as oxygen is the main enemy of coffee freshness.
Nuts and seeds tend to go rancid because of their high oil content. Vacuum sealing removes the oxygen that causes this rancidity. Sealed nuts can last months longer than those stored in open bags or loosely closed containers.
However, avoid vacuum sealing sugar or brown sugar. The vacuum process compacts these into a solid brick that you cannot break apart. Also, do not use this method to store fresh or cooked foods on pantry shelves. Fresh and cooked foods must be refrigerated or properly canned using water bath or pressure canning methods. Vacuum sealing alone does not make perishable food shelf stable.
Maintaining Your Hose And Attachments For Long Term Use
Your vacuum sealer hose and attachments will last for years with proper care. A little regular maintenance goes a long way in keeping everything working smoothly.
After each use, wipe down the hose ends with a clean, damp cloth. If food particles entered the hose during sealing, flush it with warm soapy water. Rinse thoroughly and hang the hose to air dry completely before storing it. Storing a damp hose can lead to mold growth inside the tube.
Inspect the hose regularly for cracks, kinks, or stiff spots. A damaged hose cannot maintain proper suction and needs to be replaced. Avoid bending the hose at sharp angles during storage, as this weakens the material over time. Coil the hose loosely or hang it on a hook.
Clean your jar sealer attachments after every use. Remove any food residue from the rubber gasket inside the jar sealer. This gasket creates the seal between the attachment and the jar, so it needs to stay clean and flexible. Wash it with warm water and mild soap, then dry it completely.
Check the accessory port on your vacuum sealer for dust and debris at least once a month. A blocked port reduces suction power and makes the motor work harder than it should. Use a cotton swab or small brush to clean inside the port opening.
Store all attachments together in a drawer or container near your vacuum sealer. This keeps everything organized and prevents small parts like bottle stoppers and adapter tips from getting lost.
Safety Precautions And Important Reminders
Vacuum sealing with a hose attachment is safe and simple, but a few precautions keep you and your food protected. Following these guidelines ensures reliable results every time.
Never vacuum seal perishable foods like raw meat, fresh vegetables, or cooked meals in jars intended for pantry storage. These foods require proper canning methods to be shelf stable. Vacuum sealing removes air but does not kill bacteria. Store perishable vacuum sealed items in the refrigerator or freezer only.
Do not overfill jars or canisters. Food pushed too close to the top can get sucked into the hose and damage your vacuum sealer’s internal pump. Always leave at least one inch of headspace in every container you seal.
Unplug your vacuum sealer after each use. This protects the machine from power surges and reduces wear on the motor. Let the machine cool down between sealing sessions if you are processing many jars in a row. Most countertop vacuum sealers need a short rest period between cycles to prevent overheating.
Label every sealed container with the contents and the date you sealed it. Use tape and a permanent marker or printable labels. Proper labeling removes all guesswork and helps you rotate your food supply effectively. Use the oldest sealed items first and replace them with fresh stock.
Frequently Asked Questions
Can I use any brand of hose with my vacuum sealer?
No. Most vacuum sealers use brand specific port sizes. A hose made for one brand may not fit another. Always check your vacuum sealer’s model number and match it with a compatible hose. Universal hoses with adapter tips are available and can work across multiple brands, but verify the fit before relying on one.
Why does my vacuum sealer hose keep falling out of the port?
This usually happens because of debris inside the port or on the hose tip. Clean both surfaces with warm water and a small brush. If the hose still feels loose, the rubber tip may be worn out and need replacement. A snug fit is essential for proper suction and sealing.
Can I vacuum seal liquids using the hose attachment?
You should not vacuum seal jars of liquid for pantry storage. However, you can use bottle stopper attachments to remove air from opened wine bottles and similar containers. The hose attachment is best suited for dry goods, dehydrated foods, and reusable zipper bags.
How do I know if my jar has sealed properly?
Press the center of the lid with your finger. If the lid does not flex or pop, the seal is good. You can also try lifting the jar by the lid alone. A properly sealed lid will hold the weight of the jar and its contents without releasing.
How often should I replace my vacuum sealer hose?
Replace the hose if you notice cracks, stiff spots, or a persistent loss of suction even after cleaning. With proper care, a quality hose lasts several years. Store it loosely coiled and keep it clean to maximize its lifespan.
Can I vacuum seal mason jars without the screw band ring?
Yes. You only need the flat lid for vacuum sealing. The vacuum process holds the lid firmly in place without the screw band. You can add the ring afterward for extra security during storage, but it is not required for the seal itself.

Hi, I’m Ivy! I’m a smart home enthusiast and self-proclaimed clean freak who loves testing the latest cleaning tech so you don’t have to waste your money on the wrong one. I started HomeTechClean to share honest reviews and practical advice for anyone who wants a cleaner home with less effort.