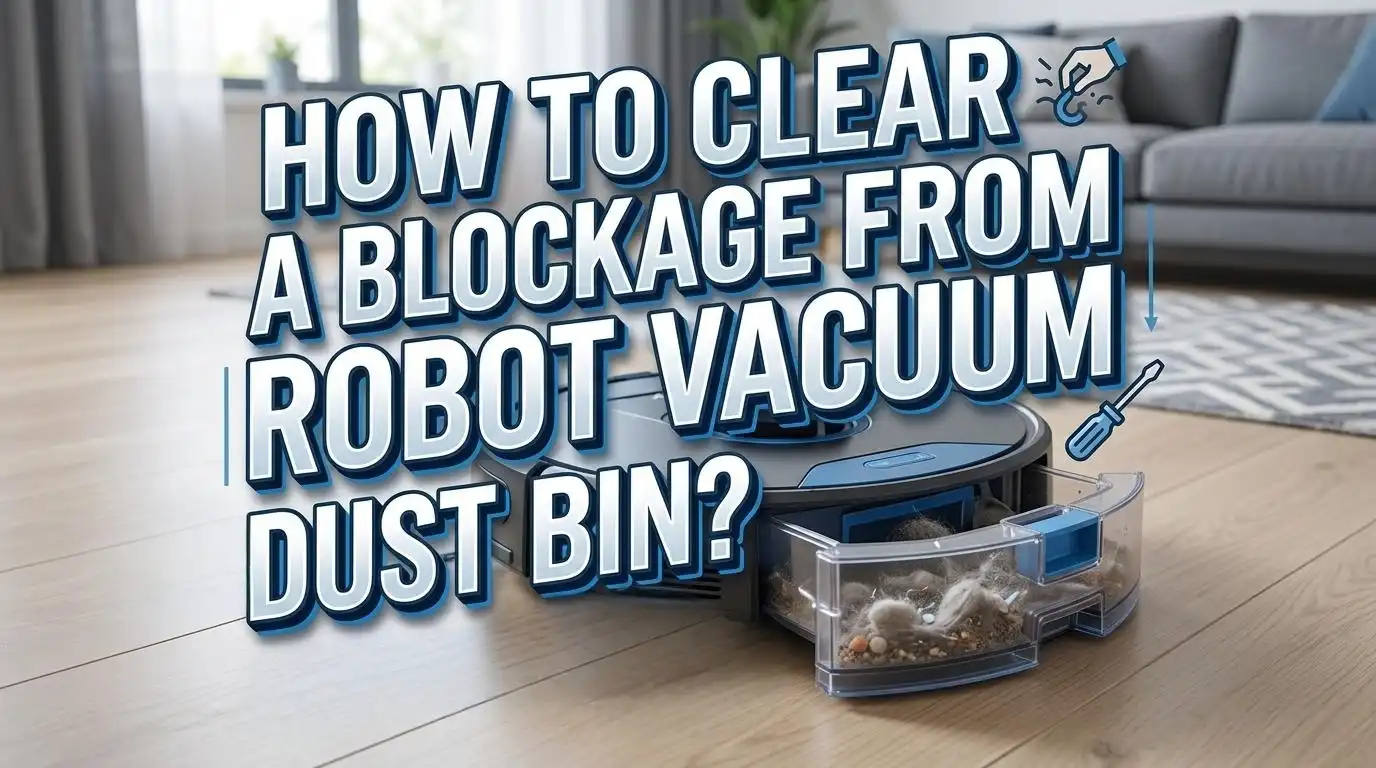
How to Clear a Blockage From a Robot Vacuum Dust Bin?
A blocked robot vacuum dust bin can turn a smart cleaner into a weak one very fast. You may notice poor pickup, loud noise, dirt left behind, or a full bin alert that will not go away. The good news is that most dust bin blockages are easy to fix at home with a calm, simple process.
This guide shows you exactly what to do. You will learn how to spot the real cause, clear the packed debris, clean the filter the right way, and stop the same problem from coming back.
Many brands also give similar care advice. They often recommend emptying the bin often, checking the dust inlet, keeping the filter clean, and making sure every part is fully dry before reuse.
Key Takeaways
- A blockage usually starts with packed hair, fine dust, or a dirty filter. The dust bin is often blamed first, but the real trouble can sit in the suction inlet, the filter frame, or the path between the brush and the bin. Check the full air path, not just the bin.
- Start with the safest fix first. Remove the bin, empty it into a trash bag, loosen packed debris by hand or with a soft brush, and inspect the bin door and inlet. This method is fast and low risk. The main downside is that it may miss deep clogs hidden behind the filter or inside the dock channel.
- Treat the filter with care. A blocked filter can cut suction hard and make the motor work more. Some filters are washable, while others are not. A wet filter placed back too soon can cause more trouble, including bad smell, dust clumping, or false error messages.
- Homes with pets need a stronger routine. Pet hair can twist into ropes, trap fine dust, and create dense plugs inside the bin. Emptying after each run is often the best method here. The pro is better suction every day. The con is more frequent maintenance.
- Auto empty systems can block too. If your robot empties into a base station, the clog may sit in the dock air duct, dust bag path, or inlet flap. Manual bin cleaning helps, but sometimes you must inspect the dock as well.
- Prevention is easier than repair. Clean the bin often, keep sensors clear, dry washable parts fully, and replace worn filters on time. Small habits save time and help your robot clean better for longer.
Why Robot Vacuum Dust Bin Blockages Happen
A robot vacuum dust bin blocks when air can no longer move dirt through the normal path. The most common cause is simple. The bin gets too full, and fresh debris has nowhere to go.
Pet hair makes this worse. Hair wraps around dust, lint, and crumbs and forms a soft plug. That plug then sticks near the inlet or inside the filter screen.
Fine dust is another common cause. It packs tightly, especially in homes with rugs, litter, ash, flour, or drywall dust. If the dust meets even a little moisture, it can turn into clumps that are hard to remove.
A dirty filter can also act like a blockage. Airflow drops, suction weakens, and dirt starts collecting at the entry point instead of moving into the bin. This is why the filter and dust bin must always be checked together.
Some blockages happen because the bin door is not sealed well. If the latch is loose or the flap does not close right, air leaks out. The robot then loses the pressure it needs to move dirt properly.
Pros of understanding the cause: You fix the right part first, save time, and avoid needless part replacement.
Cons: The cause is not always visible at first glance, so you may need to inspect more than one area.
Brand care pages also show that dock systems can add one more trouble spot. The dust may block the dock channel, dust bag path, or air duct. So if the bin keeps filling fast, the dock may be part of the problem too.
Signs Your Dust Bin Has a Real Blockage
A real blockage usually shows itself in a few clear ways. The first sign is poor pickup. The robot runs, but crumbs, pet hair, or dust stay on the floor.
The second sign is a full bin alert that keeps coming back. You empty the dust bin, but the robot still says the bin is full or dirty. That often means the filter, sensor area, or inlet path is still blocked.
Another common sign is a change in sound. The robot may get louder, harsher, or more strained. A healthy airflow sounds steady. A blocked path often sounds sharp or uneven.
Watch the debris pattern on the floor too. If the robot leaves thin trails or drops dirt after turning, the bin may be packed near the inlet. Dirt can also spill back out if the flap or door does not close well.
A blocked dust bin can also cause extra heat. The motor works harder when air cannot pass through. Over time, this can wear parts faster and reduce cleaning power.
If you have allergies, you may notice more dust in the air after a run. Some support guides warn that a blocked filter may fail to trap particles well. That means dust and pet dander can move back into your room.
Pros of checking symptoms first: You can narrow the problem fast and avoid taking apart parts that are fine.
Cons: Symptoms can overlap. A weak battery, dirty brush, or worn seal can look like a dust bin blockage too.
A good rule is simple. If suction drops, alerts repeat, or noise changes, inspect the bin, filter, inlet, and dock path in one session.
What to Prepare Before You Open the Dust Bin
Before you start, gather a few simple items. You need a trash bag or bin, a soft brush, a dry microfiber cloth, and good light. If your model has a washable bin or filter, keep a clean towel nearby too.
Turn the robot off first. Remove it from the dock if needed. This keeps the machine still and makes the cleaning process safer and easier.
Work over a trash can if possible. Packed dust can fall out fast once you open the bin door. This small step keeps the mess under control.
If you are sensitive to dust, wear a simple mask. Fine dust can puff out when you tap the filter or brush away lint. That matters even more in homes with pet dander.
A second vacuum can also help. You can use it to pull loose debris from the robot dust bin or dock channel. This method is useful for deep clogs that do not lift out by hand.
Pros of using only hand tools: Safe, cheap, and gentle on the robot.
Cons: It can take more time with sticky dust or heavy pet hair.
Pros of using a second vacuum: Fast for deep dirt and good for dock channels.
Cons: Too much suction or a hard nozzle can damage thin flaps or seals if you rush.
Check your manual if you are unsure whether the bin or filter is washable. Some brands allow water on the bin only. Some allow water on the filter only after certain steps. Some say to keep the filter dry and replace it instead.
Preparation may feel basic, but it saves mistakes. A rushed cleaning session often leads to broken tabs, wet filters, or parts put back in the wrong order.
How to Remove the Dust Bin and Empty It the Right Way
Start by removing the dust bin slowly. Most robot vacuums have a release button or latch. Press it gently and pull the bin straight out without twisting.
Hold the bin over a trash can before opening it. Open the bin door and let the loose dirt fall out first. Then tap the side lightly to release more debris.
Do not slam the bin against a hard surface. That can crack the plastic or damage the door latch. A few light taps are enough for most dry dirt.
Next, look inside the bin. Check the corners, the inlet opening, and the area near the filter frame. Packed lint often hides along the edges, even after the bin looks empty.
Use your fingers or a soft brush to pull out hair clumps. If the dirt is packed tight, loosen it little by little instead of forcing it out all at once. This helps protect the bin walls and inner screen.
Pros of manual emptying: Quick, simple, and good for daily care. It also lets you spot hair ropes and stuck clumps right away.
Cons: It may leave fine dust behind, and it may not fix a deeper clog near the inlet.
If the dust bin door does not swing freely, inspect the hinge and flap. A small clump can stop the door from opening or sealing well. That alone can cause poor emptying and weak suction later.
After the dirt is out, wipe the outer surfaces with a dry cloth. This removes dust from the sensor area and helps the bin slide back into place cleanly. A careful emptying step often solves the issue before you need deeper cleaning.
How to Clear the Dust Inlet and Inner Air Path
If the dust bin is empty but suction is still weak, the blockage may sit in the inlet or inner air path. This area connects the brush pickup zone to the bin. It often traps hair, paper, and dense lint.
Remove the bin and look into the intake opening with a flashlight. Check for a packed plug near the entrance. These plugs often look like gray felt or twisted hair mixed with dust.
Use a soft brush to loosen the clog. Pull debris out in small sections. If a long hair rope is wrapped inside, twist it gently as you pull so it does not tear into smaller pieces.
For tight clogs, use a second vacuum to pull dirt from the opening. Keep the nozzle a little away from delicate flaps or seals. Gentle suction is enough.
Some robots also need the main brush cover to sit correctly for airflow to work well. If the cover is loose or seated wrong, debris may collect near the inlet instead of moving into the bin.
Pros of clearing the inlet by hand: You can see what you remove and lower the risk of pushing dirt deeper.
Cons: Deep clogs take patience, and tight spaces can be hard to reach.
Pros of using a second vacuum: It removes fine dust fast and helps with hidden debris.
Cons: If you press too hard, you may shift small seals or doors.
After the inlet looks clear, inspect the path from the brush area again. Spin the brush by hand and look for trapped hair at the ends. A clean dust bin cannot help much if the air path just before it stays blocked.
How to Clean the Filter Without Causing New Problems
The filter is a major part of airflow. If it is dirty, your robot may act as if the dust bin is blocked even when the bin is nearly empty. That is why filter care matters so much.
First, remove the filter from the bin. Hold it over a trash can and tap it gently to release loose dust. Many blockages improve after this simple step alone.
Do not scrub every filter with your fingers or a stiff brush. Some support guides warn that certain filter materials can tear or lose shape easily. A damaged filter can lower suction and leak dust back into the air.
If your filter is washable, rinse it with cool or lukewarm water only. Avoid hot water. Let the water run through until the dirt loosens. Then shake off the excess water and leave the filter to air dry fully.
Some brands suggest a full dry time of about 24 hours. That may feel slow, but it is important. A damp filter can cause bad smell, dust clumps, and airflow trouble.
Pros of tapping or dry cleaning the filter: Fast, safe for many filters, and good for regular upkeep.
Cons: It may not remove deep fine dust.
Pros of washing a washable filter: Better for heavy dirt and pet homes.
Cons: Long drying time, and a wet reinstall can cause bigger problems.
If your filter is torn, warped, or still smells bad after cleaning, replace it. Cleaning helps only when the material still works well. A worn filter often keeps the blockage cycle going, even after the dust bin looks spotless.
When to Wash the Dust Bin and When to Keep It Dry
Many users wash the dust bin too often, while others never wash it at all. The right answer depends on your model. Some bins are washable. Some have electrical parts or seals that should stay dry.
If your manual says the bin is washable, remove the filter first and rinse the bin with cool or lukewarm water. Use a soft cloth or brush for stuck dirt. A little mild soap can help if the bin smells bad or holds greasy dust.
Do not use hot water, bleach, or harsh cleaners. These can warp plastic, harm seals, or leave residue behind. Simple cleaning works best.
If your dust bin is not washable, keep it dry. Use a soft brush and cloth instead. You can wipe the inside carefully and vacuum out the loose dirt with a second vacuum.
The biggest rule is this. Never reinstall a wet bin. Even a little trapped moisture can make fine dust stick to the walls and form new clumps. Moisture can also confuse sensors or damage parts on some models.
Pros of washing a washable bin: Better odor control, cleaner surfaces, and less sticky dust over time.
Cons: Drying takes time, and users sometimes forget to remove the filter first.
Pros of dry cleaning only: Faster and safer for non washable bins.
Cons: It may leave stuck dust in corners.
A smart routine is to empty the bin often, do dry cleaning weekly, and wash only when the model allows it and the bin truly needs it. That balance keeps the bin clean without creating new trouble.
Best Ways to Remove Pet Hair and Fine Dust Clumps
Pet hair and fine dust are the two biggest troublemakers in robot vacuum dust bins. On their own, they seem easy. Together, they build thick plugs that block airflow fast.
Start with the hair first. Pull out any large clumps by hand. Hair usually sits near the inlet, around the filter frame, or packed into the corners. If the clump resists, use a soft brush to loosen it before pulling.
Fine dust needs a different approach. Tap the bin gently, then use a second vacuum or cloth to remove the soft layer left behind. If your model allows washing, a rinse can help with dust that sticks to the walls.
For homes with pets, emptying after every run is often the best fix. It sounds like extra work, but it stops hair from packing into dense plugs. Small, frequent cleaning beats deep rescue cleaning every time.
You can also split long cleaning runs into shorter ones. That keeps the dust bin from filling too densely in one session. This method works well for heavy shedding seasons.
Pros of hand removal for pet hair: Very effective for thick hair ropes and easy to control.
Cons: Dust can scatter, and it takes longer if the hair is tightly packed.
Pros of rinsing washable parts for fine dust: It clears stuck residue well.
Cons: Dry time is long, and it works only on parts that allow water.
If you live with pets and carpets, check the dust bin more often than the app reminder suggests. Heavy homes fill faster. A simple look after each run can save you from hard blockages and weak suction later.
How to Fix Auto Empty Dock Blockages
If your robot has an auto empty dock, the blockage may not be inside the robot alone. The dock can clog too. This is common when hair, lint, or large crumbs block the air duct or dust path.
Start by checking whether the robot dust bin is the correct type for auto empty use. Some systems need a specific bin or setup to seal well. Then inspect the inlet area where the robot meets the dock.
Next, check the dock dust bag or collection bin. If it is full, installed wrong, or not seated all the way down, emptying power drops. Some support guides also warn that a blocked air duct in the dock can stop emptying almost completely.
Look for a clog in the dock channel. Use a flashlight and remove visible debris carefully. If your dock manual allows it, open the duct area and clear the packed dirt. A second vacuum can help here too.
The brush cover on the robot matters as well. If it is not fitted right, airflow during emptying may weaken. Make sure covers, tabs, and seals sit flat and lock in place.
Pros of checking the dock path: It solves repeat bin problems that simple robot cleaning cannot fix.
Cons: It takes more time and may require more careful disassembly.
Pros of replacing or reseating the dock bag: Fast and easy, especially if the dock sounds normal but empties poorly.
Cons: It will not help if the true clog sits in the duct.
If the dock gets loud during emptying but the robot bin stays full, think airflow problem first. That clue often points to a blocked dock channel or a poor seal.
How to Check the Bin Door Seal Latch and Sensors
A dust bin can look clean and still fail because of a latch, seal, or sensor issue. The bin door must close fully. If it sits even slightly open, suction drops and dirt may stay near the inlet.
Take a close look at the bin door edge. Remove any lint trapped in the hinge or along the flap. Press the door shut and listen for a clear click if your model uses one. The closure should feel firm, not loose.
Now inspect the rubber seal, if your model has one. Dirt on the seal can create a tiny air leak. Wipe it with a dry cloth and check for cracks or bending.
Sensors also matter. Dust on the bin sensor area can trigger false full bin warnings. Wipe the sensor windows or nearby plastic surfaces gently. A clean sensor can fix alerts that cleaning the bin alone cannot solve.
If the robot reports a dust cup or dust bin error, remove and reseat the bin once more. Slide it in fully until it locks. A bin that is slightly off track may seem installed, but airflow and sensor contact can still fail.
Pros of checking seals and sensors: Fast, low effort, and often missed by users. It can solve false warnings and weak suction with no deep cleaning.
Cons: Damage to a seal or latch may need part replacement, not cleaning.
After reassembly, run a short test on a small dusty area. If pickup improves and the alert is gone, the problem was likely the seal, latch, or sensor area rather than a deep clog.
How to Build a Cleaning Routine That Prevents Future Clogs
The best way to clear a blockage is to stop the next one before it starts. A short routine works far better than rare deep cleaning. This is true in almost every home, and even more in homes with pets or thick rugs.
Empty the dust bin after each full cleaning run if your home gets dusty fast. If your home stays fairly clean, empty it every one to two runs. The goal is simple. Do not let the bin pack tightly.
Check the filter often. Tap off loose dust weekly, or sooner if suction drops. Wash it only if your model allows it, and always let it dry fully before reuse.
Look into the inlet path every few days. Hair ropes start small. If you remove them early, they never become hard plugs. One minute of checking can save twenty minutes of repair.
Wipe the sensor area and bin edges every week with a dry cloth. This helps stop false alerts and keeps the bin sealing well. Also inspect the brush ends, since trapped hair there can slow debris flow before it even reaches the bin.
Pros of a frequent light routine: Better suction, fewer alerts, less smell, and longer filter life.
Cons: It asks for regular attention, which some users forget.
A good routine also includes timing. If you vacuum after heavy cooking, pet play, litter spills, or entryway mess, empty the bin right after. The dust is heavier then, and that is when clogs often begin. Light, steady care keeps your robot useful and your floors cleaner.
When to Replace Parts Instead of Cleaning Again
Cleaning solves most dust bin blockages, but not every one. Sometimes the real issue is a part that has worn out. If the same clog returns again and again, inspect the filter, seals, and door parts more closely.
Replace the filter if it stays dirty after cleaning, smells bad, looks warped, or has tears. A weak filter restricts airflow and can keep the robot in a cycle of poor suction and repeat alerts.
Check the bin itself for cracks. Even a small crack can let air leak out and reduce pickup. The robot may still run, but dirt will move poorly and collect in the wrong spots.
Look at the door latch and flap too. If the door will not close firmly, or if the flap hangs open, suction pressure drops. No amount of brushing will fix a broken latch.
For auto empty systems, replace the dock bag if it is old, damp, or fitted badly. Also inspect any removable duct covers or seals that no longer sit flat. A good seal matters as much as a clean path.
Pros of replacing worn parts: Stronger airflow, fewer repeat clogs, and better long term cleaning.
Cons: It costs more than routine care, and users sometimes replace parts before checking for a simple clog.
Ask for support if you have cleaned the bin, filter, inlet, sensors, and dock path and the problem still stays. That can point to a deeper airflow issue, a sensor fault, or a motor problem. At that stage, repair advice for your exact model is the safest next step.
FAQs
How often should I empty a robot vacuum dust bin?
For many homes, emptying the dust bin every one to two runs works well. If you have pets, carpet, or lots of daily dust, empty it after every run. This keeps hair and fine dust from packing into a dense plug. A less full bin keeps airflow stronger and reduces false full bin alerts.
Can I wash every robot vacuum filter with water?
No. Some filters are washable, and some are not. Check your model instructions before you rinse anything. If the filter is washable, use cool or lukewarm water and let it dry fully before reinstalling it. If it is not washable, tap or brush off loose dust and replace it when worn.
Why does my robot vacuum say the bin is full after I emptied it?
This usually means one of four things. The filter is still clogged, the sensor area is dusty, the bin is not seated correctly, or a blockage remains in the inlet or dock path. Clean the sensor area, reseat the bin, and inspect the full airflow path instead of checking the dust bin alone.
What is the fastest way to clear a packed pet hair blockage?
Remove the bin, pull out the hair clump by hand, and use a soft brush to loosen the rest. Then inspect the inlet path and filter frame for hidden hair ropes. If needed, use a second vacuum to lift fine debris. This method is fast and effective, but move gently so you do not damage seals or flaps.
Is it safe to put the dust bin back while it is still damp?
No. A damp bin or filter can make fine dust stick, create odor, and cause fresh blockages. Moisture can also harm some parts or confuse sensors. Dry all washable parts fully before reinstalling them. If you need the robot right away, keep a spare dry filter if your model supports one.
When should I stop cleaning and replace parts?
Replace parts when the filter is torn or warped, the bin has a crack, the seal is bent, or the latch no longer closes firmly. If you keep cleaning the same blockage and it returns fast, a worn part may be the real cause. In that case, replacement is usually the better fix.
Hi, I’m Ivy! I’m a smart home enthusiast and self-proclaimed clean freak who loves testing the latest cleaning tech so you don’t have to waste your money on the wrong one. I started HomeTechClean to share honest reviews and practical advice for anyone who wants a cleaner home with less effort.