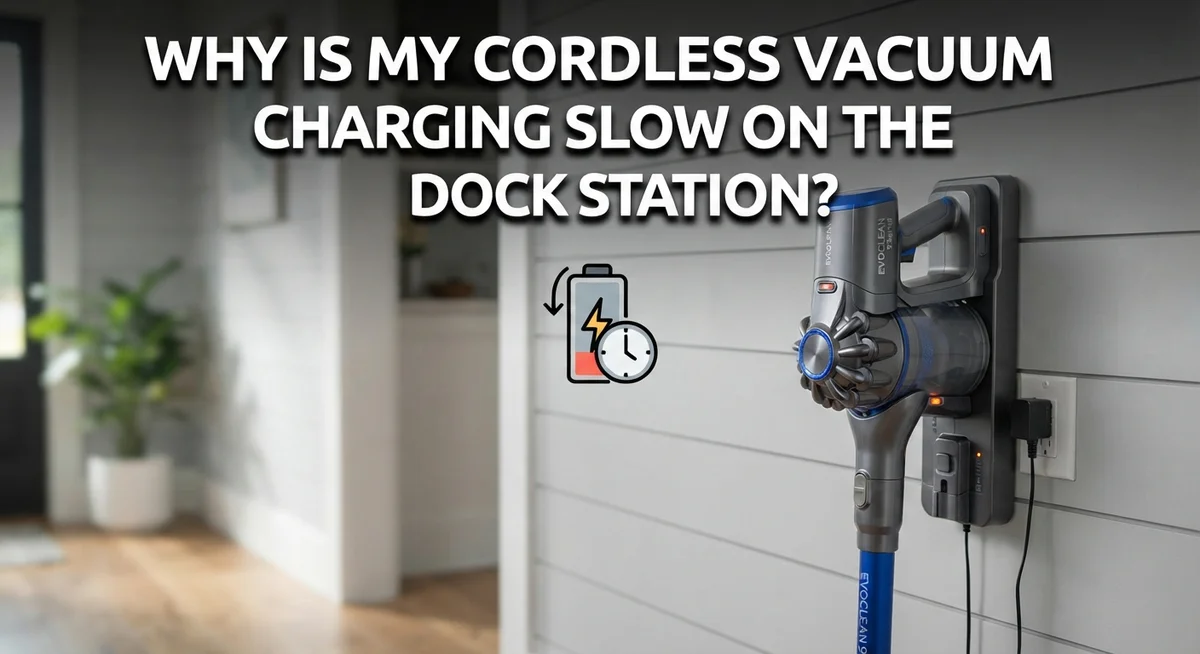
Why Is My Cordless Vacuum Charging Slow On The Dock Station?
You plug in your cordless vacuum and wait. And wait. The dock light blinks, but the battery seems stuck.
This is a common problem for many vacuum owners. Your vacuum charges slower than your phone or laptop, even with a similar battery size. That’s actually normal by design.
But sometimes slow charging points to a real issue. Dirty charging contacts often cause this problem. A faulty dock station or defective charger can also be the reason.
The good news? Most causes are simple to fix. You can clean contacts, restart the charging cycle, or test your charger with a multimeter.
This article walks you through why your cordless vacuum charges slowly on its dock. You’ll learn what to check first, common mistakes to avoid, and simple steps to get your vacuum back to full power fast.
In a Nutshell
- Dirty contacts cause most problems. Dust and grime build up on the battery and dock contacts. This blocks the power flow and slows charging down.
- Your dock station might be faulty. Check for loose connections or misalignment. A weak dock connection can trickle power instead of charging fully.
- Batteries wear out over time. Older batteries hold less charge and take longer to fill up. This is normal after months or years of use.
- Your charger could be defective. Test it with a multimeter to check power output. This step tells you if the charger works properly.
- Restarting the charging cycle often helps. Stop the charge through your app, then start it again. This simple trick fixes many slow charging issues.
- Check the blue LED lights on your battery. A flashing light means active charging. This tells you the connection is working right.
Understanding How Cordless Vacuum Charging Works
A cordless vacuum uses a battery pack that connects to a dock station through metal contact points. These contacts transfer electrical power from the dock to your battery. Understanding this basic system helps you spot charging problems quickly.
Your battery pack has metal terminals on its bottom or side. Your dock station has matching metal contacts. When you place the battery on the dock, these points touch and create an electrical connection. Power flows through this connection to charge your battery.
The charging speed depends on several factors working together. The dock station sends a specific amount of electrical current to your battery. Your battery accepts this current and converts it into stored energy. This process takes longer with cordless vacuums than with phones because vacuum batteries require different charging speeds for safety.
Dirty contacts are the main reason charging slows down. Dust, pet hair, and debris accumulate on these metal points over time. A thin layer of grime blocks electrical flow. Even a small amount of dirt reduces how much power reaches your battery. This makes charging take much longer than normal.
The dock station itself must stay properly aligned with your battery. Loose connections or misalignment prevent good electrical contact. Your battery won’t charge efficiently if it’s not sitting flush against the dock contacts.
Battery age also affects charging speed. Older battery packs naturally charge slower than new ones. Chemical changes inside the battery cells reduce their ability to accept power quickly. This is normal wear and tear.
Your charger could also be the culprit. A faulty dock station or power adapter delivers weaker electrical current. Your battery receives less power, so charging takes significantly longer. Testing your charger helps identify this issue.
Common Causes of Slow Charging on the Dock
Dirty charging contacts stand as the most common cause of slow charging. Your battery pack has metal terminals, and your dock station has matching contact points. Over time, dust, pet hair, and debris settle on these surfaces.
When contacts get dirty, electrical resistance increases. This means less power flows from the dock to your battery. The charging process slows down significantly as a result.
Check your contacts regularly. Look at the metal terminals on your battery pack’s bottom or side. Examine the corresponding contact points inside your dock station. Do you see any discoloration, corrosion, or buildup?
A faulty dock station creates another common problem. If your dock isn’t properly aligned, the battery won’t make solid contact. Loose connections prevent efficient power transfer. Check that your battery sits flush against the dock with no gaps.
Battery degradation happens naturally over time. Lithium ion batteries lose capacity as they age. An older battery charges slower than a new one, even with perfect contacts and a working charger. This is normal wear and tear.
Your charger itself might be defective. If the dock receives insufficient power, it can’t charge your battery quickly. The charger converts wall outlet electricity into the right voltage for your battery.
Test your charger with a multimeter if you have one available. This tool measures electrical output and reveals whether your charger delivers proper power levels.
Blue LED lights on your battery indicate charging status. A flashing light means active charging is happening. A solid light means charging is complete. No light might signal a contact problem or charger issue.
Start by cleaning those metal contact points first. This simple step solves most slow charging complaints without needing repairs or replacements.
How to Check and Clean Charging Contacts
Dirty charging contacts are the primary reason your cordless vacuum charges slowly on the dock. Metal contact points accumulate dust, pet hair, and debris over time. This buildup creates electrical resistance that blocks power flow to your battery.
Start by examining the metal terminals on your battery pack. Look at the bottom or side where the contacts sit. You should see shiny metal points. If they appear dull, discolored, or covered in grime, cleaning is necessary.
Use a dry, soft cloth to wipe the battery contacts gently. A microfiber cloth works best. Rub each metal point carefully until it shines. Avoid using water or liquid cleaners on electrical contacts. Moisture can damage the battery or dock station.
Next, clean the dock station contacts. These metal points receive power from your wall outlet and transfer it to the battery. Wipe them with the same dry cloth. Make sure you reach all contact points on the dock surface.
After cleaning, reposition your battery on the dock. Ensure it sits flat and secure. The contacts should make firm contact with no gaps between them.
Check the blue LED light on your battery after reinserting it. A flashing light indicates active charging. If the light remains solid or off, the contacts may need additional cleaning.
Perform this cleaning routine every two weeks for best results. Regular maintenance prevents debris buildup and keeps charging speeds normal. Clean contacts ensure maximum electrical connection between your battery and dock station, which directly improves charging performance and extends battery life overall.
Reading Battery LED Indicators Correctly
Your battery’s LED lights tell you exactly what’s happening during charging. Understanding these signals helps you spot problems fast.
A flashing blue LED means your battery is actively charging. This is the normal state you want to see when the battery sits on the dock. The light should stay on continuously while power flows into the battery pack.
A solid blue LED indicates your battery is fully charged. Once you see this steady light, the charging cycle is complete. Remove the battery from the dock to avoid overcharging.
A red or amber LED signals a problem. This color usually means the charger detected an issue with the battery pack or dock connection. Stop charging immediately and inspect both the battery and dock contacts for dirt or damage.
A blinking red LED suggests a fault condition. Your charger may have detected abnormal voltage or temperature levels. Let the battery cool down for 30 minutes, then try charging again.
If the LED doesn’t light up at all, the battery isn’t making proper contact with the dock. Remove the battery and clean both the dock terminals and battery contacts with a dry cloth. Reinsert the battery firmly until you hear a click.
Some cordless vacuums have LED indicators on the dock station itself. A green light on the dock means it’s ready to charge. A red light on the dock indicates a connection problem or charger malfunction.
Check your battery’s LED status within the first minute of docking. If you don’t see a flashing blue light, remove the battery and clean the contacts immediately. This simple check prevents hours of wasted charging time and identifies issues before they worsen.
Step-by-Step Troubleshooting Guide
When your cordless vacuum charges slowly, you need a systematic approach to find the problem. Start with the simplest fixes first before assuming something is broken.
Step 1: Inspect the Charging Contacts Closely
Look at both the battery pack and dock station. The metal contact points may have dust, pet hair, or mineral buildup. Use a dry, soft cloth to gently wipe each contact point. Don’t use water or liquids, as moisture can damage the electrical connections.
After cleaning, reposition your battery firmly on the dock. Listen for a click or feel for resistance. The battery should sit flush against the dock station.
Step 2: Restart the Charging Cycle
Remove your battery from the dock completely. Wait 30 seconds. Place it back on the dock and observe the LED indicator.
Step 3: Test the Dock Station Connection
Try charging your battery with a direct charger cable instead of the dock. If charging speed improves significantly, your dock station may be faulty.
Step 4: Check Battery Alignment
Ensure your battery sits straight on the dock. Tilted or misaligned batteries don’t make proper electrical contact. Some dock stations have alignment guides or markers.
Step 5: Verify Power Supply to the Dock
Check that your dock station plugs into a working outlet. Plug a lamp or phone charger into the same outlet to confirm it works.
Step 6: Monitor Temperature
Extremely cold environments slow charging. Move your dock to a warmer location if possible. Most cordless vacuums charge best between 50 and 95 degrees Fahrenheit.
These steps address 90 percent of slow charging issues without requiring replacement parts.
Testing Your Charger and Battery for Faults
A multimeter is your best tool for checking if your charger actually works. This simple device measures electrical voltage and helps you spot a faulty charger before you blame the battery.
Start by unplugging your dock station from the wall outlet. Set your multimeter to DC voltage mode. Touch the red probe to the positive contact on your charger and the black probe to the negative contact. A working charger should show voltage output that matches what your manual specifies. Most cordless vacuum chargers output between 18 to 25 volts.
If your multimeter reads zero or shows significantly lower voltage, your charger is faulty. This explains your slow charging problem. The dock station isn’t delivering enough power to charge your battery properly.
Next, test your battery pack directly. Many cordless vacuums allow you to bypass the dock and charge the battery with a direct cable connection. Use this method to see if your battery charges faster. If it does, your dock station itself has an internal problem.
You can also test battery health by checking its voltage when fully charged. A degraded battery won’t hold the same voltage as a new one. This matters because older batteries naturally charge more slowly as their internal chemistry breaks down over time.
Don’t overlook power supply issues either. Plug your dock into a different outlet to rule out electrical problems at your current location. Some outlets provide inconsistent power, which slows charging dramatically.
Testing with a multimeter takes just minutes and gives you clear answers. You’ll know whether to replace your charger, battery, or dock station based on actual measurements rather than guessing.
Mistakes That Make Charging Problems Worse
Many people make mistakes that turn a slow charging problem into a bigger headache. Understanding these errors helps you avoid making things worse.
Ignoring dirty contacts is the most common mistake. People assume their charging problem is serious when really it’s just dust or debris blocking the connection. You don’t need to replace anything. A simple wipe with a dry cloth often fixes the issue completely.
Not restarting your charging cycle is another frequent error. Your dock station sometimes gets stuck in a confused state. Simply unplugging everything for 30 seconds, then plugging back in, can reset the system. This costs you nothing and takes two minutes.
Assuming your battery is dead without testing your charger first leads people astray. Many folks buy new batteries when their actual charger is faulty. Test your charger with a multimeter before spending money on replacements. You might discover the dock station itself has a problem, not your battery.
Leaving your battery on the dock when it’s fully charged creates unnecessary wear. Overcharging doesn’t help and actually stresses your battery over time. Remove your battery once the LED shows solid blue or your app confirms full charge.
Using the wrong power outlet can cause slow charging too. Damaged outlets or extension cords with low power capacity make charging take longer. Plug your dock directly into a wall outlet instead of power strips when possible.
Failing to check battery alignment wastes your troubleshooting time. A battery sitting crooked on the dock won’t charge properly. Make sure it clicks firmly into place and sits completely flat.
These simple mistakes are easy to fix once you know what to avoid.
When Slow Charging Signals a Bigger Problem
Slow charging often signals deeper issues beyond simple contact dirt. Understanding when your problem requires attention helps you avoid permanent damage to your vacuum system.
Battery degradation happens naturally over time. Lithium ion batteries lose capacity after hundreds of charge cycles. If your vacuum is more than two years old and charges noticeably slower than before, age may be the culprit. This is normal wear and tear.
A faulty dock station creates persistent slow charging. Even after cleaning contacts, a broken dock won’t deliver full power to your battery. The dock’s internal circuitry can fail, preventing proper voltage transfer. This requires testing with a multimeter to confirm.
Your charger itself might be defective. Many people replace batteries when the charger is actually broken. A faulty charger delivers insufficient power to the dock, causing slow charging regardless of battery condition. Testing the charger’s voltage output reveals this problem quickly.
Physical damage to the battery pack also slows charging. Corrosion inside the battery, damaged cells, or internal short circuits reduce charging speed. You’ll notice the battery feels warm during charging if internal damage exists.
Watch for these warning signs: the battery charges extremely slowly but still reaches full capacity, the dock station gets hot during charging, or your vacuum loses power quickly after a full charge. These symptoms suggest internal problems rather than simple surface issues.
When slow charging persists after cleaning and restarting your cycle, testing the charger and battery with a multimeter becomes essential. This identifies whether you need dock replacement, charger replacement, or battery replacement. Acting quickly prevents further damage to your entire cordless vacuum system.
Final Thoughts
Slow charging on your dock station is usually a simple fix. Dirty contacts cause most problems. A quick clean often solves the issue right away.
Start with the basics every time. Check your charging contacts first. Look at those blue LED indicators too.
Restart your charging cycle if cleaning doesn’t help. This simple step fixes many stuck docks. Your vacuum sometimes just needs a fresh start.
Testing matters more than guessing. Grab a multimeter before you assume anything. Your charger or battery might work fine when you thought otherwise.
Remember that cordless vacuums charge differently than phones. Slower charging happens by design here. Don’t panic if it takes longer than your other devices.
Pay attention to warning signs though. A dock that overheats needs attention. A battery that never reaches full charge signals real trouble.
Most slow charging issues resolve quickly with basic troubleshooting. Clean contacts solve the majority of cases. Simple restarts fix confused charging cycles too.
Testing your equipment prevents wasted money. You avoid buying unnecessary replacement parts this way. Confirming the actual problem saves time and cash.
Some issues do require replacement parts eventually. Batteries degrade naturally after years of use. Docks and chargers can fail permanently sometimes.
Trust your troubleshooting process before assuming the worst. Work through each step patiently. Most vacuums bounce back with proper care.
Your cordless vacuum should serve you well for years. Regular maintenance keeps charging smooth and reliable. A few minutes of cleaning prevents bigger headaches later.
Stay consistent with contact cleaning and proper charging habits. Your vacuum will reward you with dependable performance every time you need it.
Frequently Asked Questions
Why does my cordless vacuum charge so slowly on the dock?
Slow charging usually happens because of dirty charging contacts. Dust and debris build up on the metal points where your battery meets the dock. This blocks the electrical connection and reduces power flow to your battery.
Other common causes include a faulty dock station, a defective charger, or natural battery degradation over time. The good news is that most slow charging issues have simple fixes.
How do I clean the charging contacts?
Start by unplugging your dock station from the wall. Use a dry cloth or soft brush to wipe the metal contact points on both the battery and the dock station. Look for any visible corrosion or sticky residue.
For stubborn dirt, use a slightly damp cloth. Make sure everything dries completely before reconnecting. This single step fixes slow charging in many cases.
Should I try restarting the charging cycle?
Yes. Sometimes your dock gets stuck in a confused state. Stop the charging process completely, wait 30 seconds, then place your battery back on the dock and start again.
Watch for the blue LED indicator on your battery. A flashing light means charging is active. This restart often resets the charging system and improves speed.
When should I test my charger?
Test your charger with a multimeter if cleaning and restarting don’t help. This tells you if your charger is actually delivering power. A defective charger is often the culprit, not the battery itself.
If the charger fails the test, it needs replacement. Always test the charger before assuming your battery is bad.

Hi, I’m Ivy! I’m a smart home enthusiast and self-proclaimed clean freak who loves testing the latest cleaning tech so you don’t have to waste your money on the wrong one. I started HomeTechClean to share honest reviews and practical advice for anyone who wants a cleaner home with less effort.