How To Clean Ash Out Of A Vacuum Without Clogging It?
Cleaning ash from your fireplace or wood stove seems simple. You grab your vacuum and start sucking up the mess. But fine ash particles can quickly clog your filter and damage your machine.
Ash is not like regular dust. It is powdery and light, and it slips right through standard filters. This can leave your vacuum choking, or worse, blowing ash back into your room.
The good news is that you do not need a special ash vacuum to get the job done right. With the right steps, your regular shop vac can handle ash cleanup safely.
This guide will show you exactly how to clean ash without clogging your vacuum. You will learn how to remove bulk ash first, protect your filter with simple barriers, and clear clogged nozzles without burning your fingers.
By the end, you will know exactly how to tackle ash safely and keep your vacuum running like new.
In a Nutshell
- Always let the ash cool completely. Wait at least 24 hours before you touch it. Warm ash can damage your vacuum and cause burns.
- Remove bulk ash first. Use a small shovel or dustpan to scoop out large piles. This step protects your filter from instant clogging.
- Sweep loose debris after removing the bulk ash. This clears fine particles that settle on surfaces.
- Add a filter barrier before vacuuming. Place a satin bag or pantyhose over your vacuum filter. This simple trick blocks fine ash from clogging the system.
- Check your nozzle if suction stops. Gently tap it against the firebrick or fireplace base. Never use your fingers to clear a clogged nozzle.
- Clean filters after every use. Remove the primary filter to access the secondary one underneath. Regular cleaning keeps your vacuum working well for years.
Why Ash Clogs Vacuums So Easily
Ash clogs vacuums because of its extremely fine particle size. When ash cools, it breaks down into powder smaller than regular household dust. These tiny particles slip through standard vacuum filters with ease.
The problem starts at the filter level. Most vacuum filters have small pores designed to catch normal dust. Ash particles are so fine that they pass right through those pores and coat the filter material itself. This creates a thick, dense layer that blocks airflow completely.
Moisture makes ash stickier than you might think. Even after cooling, ash retains some dampness from the burning process. This moisture causes ash particles to clump together and adhere to filter fibers. The particles bond to the filter surface instead of sitting loosely on top where you can shake them off easily.
Ash also has a different density than regular dust. It compacts more tightly in your vacuum’s filter and hose. When ash gets wet or compressed, it hardens into a cement-like substance. This buildup reduces suction power quickly and can damage your vacuum motor over time.
The hose and nozzle get clogged too. Ash settles in low spots inside the hose and blocks the nozzle opening. Once ash dries in these areas, it becomes nearly impossible to remove without special techniques.
This is why prevention matters more than cleanup after the fact. Using a filter barrier stops ash from reaching your filter at all. The barrier catches the fine particles before they can coat your filter material. This simple step keeps your vacuum working properly and extends its lifespan significantly.
What You’ll Need Before You Start
Before you start cleaning ash from your vacuum, gather the right supplies. Having everything ready prevents mistakes and keeps the process smooth.
Start with protective gear. Wear a dust mask or respirator to avoid breathing fine ash particles. Safety glasses protect your eyes. Gloves keep your hands clean and safe from hot ash residue.
Get a filter barrier ready. This is the most important item. You need either a satin bag or pantyhose to place over your vacuum filter. This layer stops ash from clogging the filter itself. The barrier catches particles before they reach the filter material.
Prepare manual removal tools. Have a small shovel or dustpan nearby. You will remove bulk ash by hand before vacuuming. A small broom or brush helps sweep remaining debris. Keep a firebrick or fireplace base nearby for later unclogging steps.
Gather cleaning supplies. Keep a damp cloth ready for wiping down hose sections. Have a trash bag open for disposing of ash safely. A small container helps organize loose items you might find.
Check your vacuum setup. Make sure your shop vac or regular vacuum is in working condition. Test the suction before you start. Know where your primary and secondary filters are located. This saves time during the cleaning process.
Have water available. Keep water nearby but away from the vacuum. You may need it for dampening ash to prevent dust clouds. Never pour water directly into ash or your vacuum.
Clear your work area. Remove obstacles around your fireplace or wood stove. This gives you safe space to work and prevents accidents.
Step-by-Step: Removing Bulk Ash Before Vacuuming
Start by letting the ash cool completely. Wait at least 24 hours before touching it. Hot ash can burn your skin and damage your vacuum motor.
Once the ash is cool, put on your dust mask or respirator. Fine ash particles float into the air easily, and breathing them causes lung irritation. This step protects your health during the entire removal process.
Use a small shovel or dustpan to scoop out the bulk ash manually. Work slowly to avoid stirring up particles. Remove as much ash as possible by hand before the vacuum ever touches it. This single step prevents most clogs from happening.
After scooping, sweep the remaining loose debris with a broom. Sweep toward the dustpan and collect what you can. This removes another layer of fine particles that would otherwise clog your filter.
Wipe down the fireplace base or wood stove area with a damp cloth. This captures ash dust that floats in the air. Let the damp cloth sit for a moment so particles stick to it instead of becoming airborne.
Empty your dustpan into a trash bag outside. Never dump ash indoors, as it creates more airborne particles. Seal the bag tightly before bringing it back inside.
Check the floor one more time. Look for ash streaks or dusty spots. Use the damp cloth to wipe these areas clean.
Now your work area is ready for vacuuming. The bulk removal is complete, and your vacuum filter faces far less stress. This preparation step takes 10 to 15 minutes and saves your vacuum from serious damage. Your machine will thank you with years of reliable performance.
Setting Up Filter Protection to Prevent Clogging
A filter protection layer is your best defense against ash clogging your vacuum. This simple barrier catches fine ash particles before they reach your actual filter.
The most common protection method uses a satin bag or pantyhose stretched over your filter. This creates a first line of defense. Fine ash particles get trapped in the mesh instead of embedding into your filter fibers.
Here’s how to set it up properly. First, turn off and unplug your vacuum completely. Remove your filter from the unit. Slide a clean satin bag or pantyhose leg over the filter carefully. Make sure it covers the entire filter surface with no gaps. Secure it gently with a rubber band or elastic, but don’t squeeze too tight. Reinstall the filter back into your vacuum.
The protection layer works because ash particles are extremely fine. They pass through normal filters like smoke. The barrier material catches these particles on the outside surface instead.
You’ll notice suction may decrease slightly with the protection layer in place. This is normal and expected. The trade off is worth it because your actual filter stays clean much longer.
Check your protection layer after each ash cleaning session. If it looks heavily coated with ash, replace it with a fresh one. A clogged barrier is still easier to replace than cleaning a ruined filter.
This setup works with regular shop vacs or standard household vacuums. You don’t need expensive specialized equipment. The barrier method is affordable and highly effective at preventing the frustration of constant filter clogs.
How to Safely Unclog a Blocked Nozzle
A blocked nozzle stops your vacuum from working properly. Ash particles pack tightly inside the opening, restricting airflow completely. You need to clear this clog safely without damaging the nozzle or burning yourself.
Start by letting the nozzle cool down completely. Never touch a hot nozzle with your bare hands. Wait at least 30 minutes after vacuuming before attempting any unclogging work.
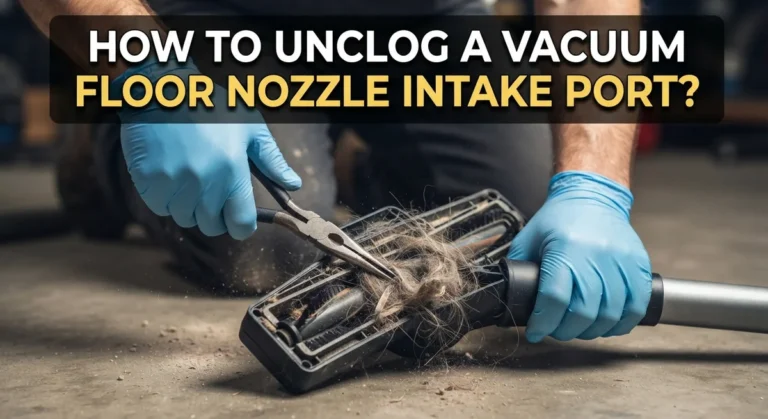
Once it cools, hold the nozzle opening facing downward. Tap it gently against a firebrick or the fireplace base. Light tapping breaks up the ash buildup inside without forcing particles deeper into the tube.
Rotate the nozzle while tapping. This helps dislodge ash from all angles. Work slowly and steadily rather than striking hard. Aggressive tapping can crack the nozzle or push ash further back into your hose.
If gentle tapping doesn’t work, try a different approach. Use a straightened wire coat hanger or similar thin tool. Carefully insert it into the nozzle opening to break up the blockage. Push gently and withdraw slowly. Never force the tool or jab it repeatedly.
For stubborn clogs, disconnect the nozzle from the hose. This gives you better access to the blockage. You can tap the nozzle more freely without worrying about damaging the connection point.
Never use compressed air on a clogged nozzle. High pressure forces ash deeper into the vacuum system, creating worse clogs elsewhere.
After clearing the nozzle, inspect it for cracks or damage. Run your finger along the inside to feel for remaining debris. Reattach it securely to the hose before resuming work.
Cleaning and Maintaining Primary and Secondary Filters
Your vacuum’s filters need special attention when dealing with ash. Primary and secondary filters work together to trap particles, but ash clogs them faster than regular dust.
Start by removing your primary filter first. This gives you access to the secondary filter underneath. Most vacuums have the secondary filter sitting directly below the primary one. Check your vacuum’s manual to find the exact location if you’re unsure.
Once you remove the primary filter, inspect it for ash buildup. Tap it gently over a trash can to release loose particles. Never bang it hard against a surface, as this can damage the filter material. If ash is packed into the filter folds, use a soft brush to gently sweep between the pleats.
Now access your secondary filter. This filter catches what the primary filter misses. Ash particles are extremely fine, so they can penetrate the first layer. Remove the secondary filter carefully and tap it gently as well. Secondary filters often need more attention because they collect the finest ash particles.
Clean both filters in a well ventilated area or outside. Wear your dust mask during this process. Never wash ash filters with water unless your vacuum manual specifically allows it. Water can damage the filter material and reduce suction power.
Check if your secondary filter shows ash caked on its surface. This means your primary filter protection layer isn’t working effectively. You may need to replace the protection layer more frequently or use a thicker barrier.
Replace filters according to your vacuum’s schedule. Clogged filters reduce suction and strain your motor. Clean filters ensure your vacuum works properly and lasts longer.
Common Mistakes That Lead to Clogs and Damage
Using your vacuum on ash without proper preparation causes serious problems. The most common mistake people make is vacuuming bulk ash directly without removing it first. Ash particles are extremely fine and cling to filter surfaces immediately, reducing suction power within minutes.
Another frequent error is operating your vacuum without filter protection. Many people assume their standard filter will handle ash like regular household dust. It won’t. Ash bypasses normal filters and coats internal components, leading to permanent damage that requires expensive repairs.
Hot ash creates a different danger altogether. People often try to vacuum ash while it’s still warm or hot. Heat damages filter fibers and can melt plastic components inside your vacuum. Always wait until ash cools completely before starting any cleaning work.
Using your fingers to clear a clogged nozzle is risky and damaging. Even cooled ash can cause burns, and probing with fingers pushes ash deeper into the system. This makes clogs worse, not better.
Ignoring secondary filters is another costly mistake. Many people clean only the primary filter and forget the secondary filter underneath. Ash builds up on the secondary filter over time, eventually blocking airflow completely.
Finally, people often skip the pre cleaning step entirely. They think the vacuum will handle everything. This overwhelms your vacuum’s system and causes filter collapse. The solution is simple: remove bulk ash manually first, use filter protection, and maintain both filters regularly. These steps prevent 90 percent of vacuum damage related to ash cleaning.
Troubleshooting Persistent Clogging Issues
When your vacuum keeps clogging despite your best efforts, you need a systematic approach to fix the problem. Persistent clogs usually mean ash is bypassing your protection layer or building up in hidden areas.
First, check your filter protection barrier. A satin bag or pantyhose layer over your filter can tear or shift during use. If you notice tears or gaps, replace it immediately. The protection layer does its job only when it stays intact and positioned correctly.
Next, inspect your hose for internal blockages. Ash can pack tightly inside the hose, restricting airflow and causing backups. Disconnect the hose from both the vacuum and nozzle. Hold it up to a light source and look through it. You may see ash buildup along the interior walls. Gently tap the hose on the ground or a hard surface to dislodge packed ash. For stubborn deposits, try running warm water through the hose or using a plumbing snake to push debris out.
Check your vacuum’s collection tank or bag. Even with protection, some fine ash particles escape into the main container. Empty your collection system more frequently when working with ash. A nearly full tank reduces suction and increases clogging risk.
Examine all connection points between parts. Loose connections create air leaks that reduce suction power, making clogs worse. Tighten all hose connections and ensure your nozzle attaches firmly.
Finally, verify your vacuum’s motor isn’t overheating. Ash clogs force your motor to work harder. If the motor sounds strained or feels hot, turn off the vacuum and let it cool. Continued use with clogs damages internal components.
Final Thoughts
Cleaning ash out of a vacuum does not need to feel hard. A few simple habits make all the difference between a smooth job and a clogged machine.
Always remove bulk ash first. Use a shovel or dustpan before you even turn on your vacuum. This one step prevents most clogging problems.
Filter protection is your best friend. A satin bag or pantyhose layer stops fine ash from reaching your filters. This small addition saves you hours of cleaning later.
Remember to check both filters regularly. Your primary filter blocks large particles, but your secondary filter catches what slips through. Both need attention after every ash cleanup session.
When nozzles clog, stay calm and patient. Gentle tapping on a firebrick works better than force. Never use your fingers on hot ash, and never reach for compressed air.
Think about your vacuum as a system with multiple parts working together. A leak at one connection point can cause suction problems everywhere else. Check hoses, tanks, and fittings often.
Good ash cleanup habits protect your equipment long term. A little preparation now means less repair work later. Your vacuum will thank you with better performance and a longer life.
Fireplace and wood stove owners deal with ash regularly, so these steps become second nature over time. Practice makes the process quick and easy.
Take your time with each cleaning session. Rushing leads to mistakes and skipped steps that cause clogs. Slow, careful work always pays off.
With the right approach, your vacuum stays clog free and ready for the next ash cleanup job. Simple prevention beats complicated repairs every single time.
Frequently Asked Questions
Can I use a regular shop vacuum to clean ash?
Yes, you can use a regular shop vacuum for ash cleanup. The key is adding filter protection before you start. A satin bag or pantyhose layer over your filter stops fine ash particles from clogging the system.
Shop vacs work well when you prepare them correctly. Just remember that ash is different from regular dust. It’s finer and stickier, so it needs extra care.
What’s the safest way to unclog a vacuum nozzle?
Never use your fingers on a hot or clogged nozzle. Instead, tap the nozzle gently against a firebrick or your fireplace base. This dislodges the ash buildup without burning yourself.
If tapping doesn’t work, remove the nozzle and inspect it from both ends. You can use a straightened wire or pipe cleaner to push ash out gently. Always let the nozzle cool first if you just finished vacuuming.
How often should I check my vacuum filters when cleaning ash?
Check your filters after each ash cleaning session. Look at both your primary and secondary filters. The secondary filter catches particles that slip past the primary one.
If ash appears caked on either filter, it’s time to clean them. Work in a well ventilated area or outside. Replace filters according to your vacuum’s schedule, and replace them sooner if ash buildup is heavy.
Do I really need to remove bulk ash before vacuuming?
Absolutely. Use a shovel or dustpan to remove the bulk of ash first. This step prevents your vacuum from getting overwhelmed. Sweep up the remaining debris after you shovel.
This simple step protects your vacuum’s motor and reduces filter stress. It makes the entire cleaning process faster and easier too.

Hi, I’m Ivy! I’m a smart home enthusiast and self-proclaimed clean freak who loves testing the latest cleaning tech so you don’t have to waste your money on the wrong one. I started HomeTechClean to share honest reviews and practical advice for anyone who wants a cleaner home with less effort.