How To Unclog A Self-Emptying Robot Vacuum Base?
Does your robot vacuum suddenly refuse to empty itself? You are not alone.
Self-emptying bases make cleaning easier. But they can get clogged over time.
The good news? You can fix this yourself in minutes.
This guide walks you through simple steps to unclog your base. We will show you where clogs usually hide.
Let us get your vacuum back to work.
In a Nutshell
- Check the duct first. Most clogs happen in the tube connecting the dustbin to the base. Look for stuck debris or tangled hair.
- Inspect the fan intake. Dust and pet hair often build up here. A blocked fan stops proper suction and emptying.
- Clean both sets of sensors. Wipe sensors on the vacuum and the base with a soft, dry cloth. Dirty sensors confuse the system.
- Reset the base connection. Simply unplug the base, wait a moment, then plug it back in. This often clears minor glitches.
- Build a maintenance routine. Clean your base every few weeks to prevent future clogs. Regular filter checks help too.
- Use app controls wisely. The “Empty Bin” button lets you trigger emptying manually whenever needed.
Understanding How Self-Emptying Bases Work
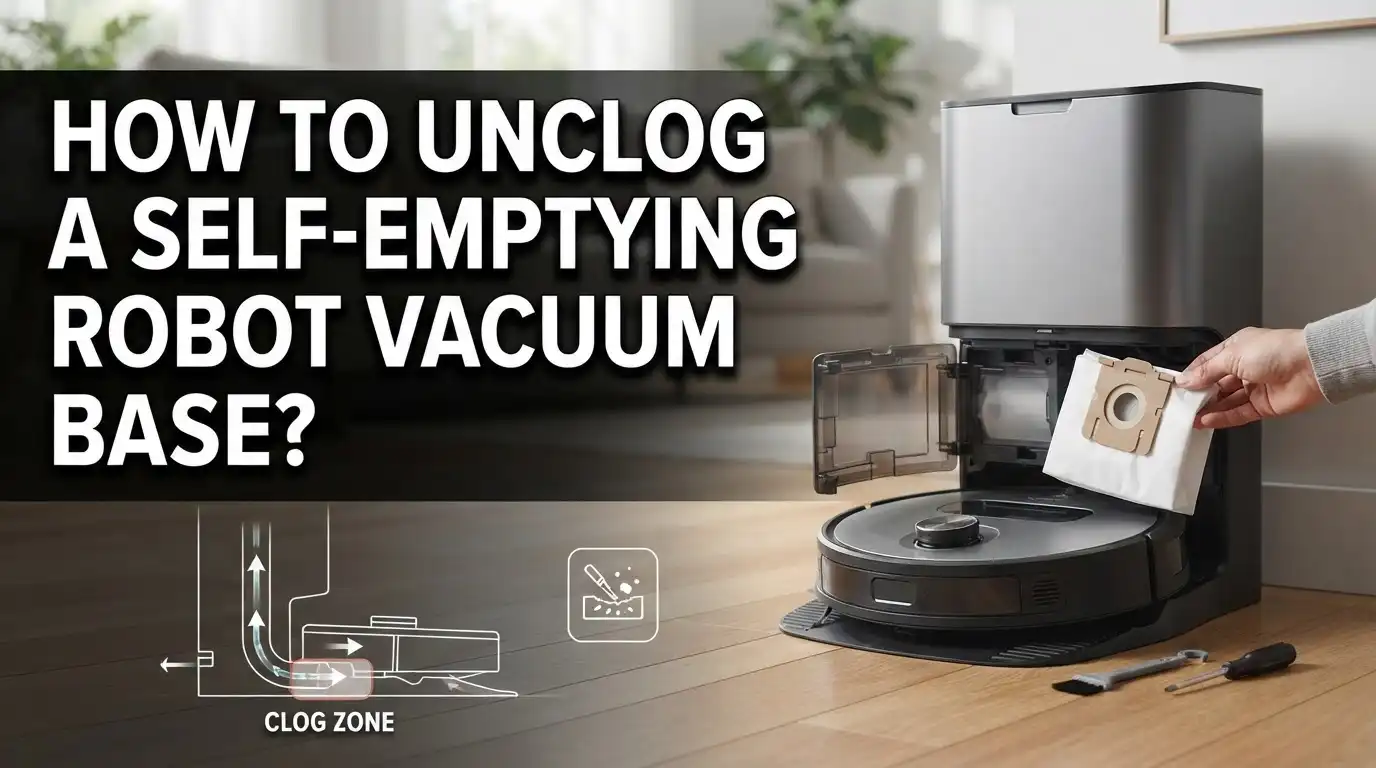
Your self-emptying robot vacuum base works through a simple but clever system. A motor inside the base creates suction that pulls dirt from your vacuum’s dustbin into a larger collection bag or container. This happens through a tube or duct that connects the two units together.
The vacuum sits on the base and triggers the emptying cycle automatically. A fan inside the base generates the strong airflow needed to move debris. Sensors on both the vacuum and base communicate to start and stop the process. Everything relies on this airflow staying clear and unobstructed.
Understanding the flow path helps you spot problems faster. Dust travels from the vacuum’s dustbin through the connecting duct into the base. The fan intake pulls this debris along. If anything blocks this route, the system fails. Your vacuum won’t empty, and it may show error messages or refuse to dock properly.
Clogs typically happen in two places. The duct between your vacuum and base gets blocked first because debris accumulates there. The fan intake also collects dust and pet hair over time. Both locations need regular attention to keep things flowing smoothly.
The good news is prevention works well. Most clogs develop gradually, not suddenly. Small amounts of pet hair and dust build up week after week. By understanding how air moves through your base, you can spot warning signs early. Your vacuum might empty slower than usual or make unusual noises before it stops working completely.
Regular cleaning prevents expensive repairs. Keeping these pathways clear ensures your base performs reliably for years. The system is durable when maintained properly, so simple habits make a huge difference in performance.
Signs Your Base Is Clogged
Your self-emptying base sends clear signals when something blocks the system. Recognizing these signs helps you act fast and prevent damage.
The most obvious sign is when your vacuum stops emptying itself. You press the empty button in the app, but nothing happens. The base makes no sound or makes strange noises instead of the normal suction sound. This tells you a blockage exists somewhere in the system.
Listen for unusual sounds from the base. A grinding or rattling noise means debris is stuck in the fan intake. A weak suction sound suggests the duct is partially blocked. Normal operation produces a consistent, smooth humming sound.
Check your vacuum’s dustbin. If it fills up quickly and the base never empties, a clog is likely present. The vacuum may also show error messages on its app. Some models display warnings like “base error” or “empty base.”
Watch for performance drops. Your vacuum might clean less effectively because the dustbin is full. It may return to the base more often than usual. The base might feel warm to the touch, which indicates the motor is working harder than it should.
Look at the duct connecting the vacuum to the base. Visible dust buildup or debris around the connection point signals trouble. Pet hair wrapped around the connection area is another red flag.
Don’t ignore these warning signs. A clogged base gets worse over time and can damage the motor. Early action prevents costly repairs. Most clogs are simple to fix yourself with basic cleaning. Catching problems early keeps your vacuum working like new for years.
Step-by-Step: Clearing the Duct and Tube Blockages
Start by unplugging your self-emptying base from the power outlet. This keeps you safe while you work on clearing blockages inside the unit.
Next, locate the duct or tube that connects your vacuum’s dustbin to the base. This is where most clogs happen. Gently pull out this tube and look inside from both ends. Hold it up to a light source so you can see any debris trapped inside.
Use your fingers or a flashlight to spot blockages. Pet hair, dust clumps, and small objects often get stuck here. If you see something blocking the path, carefully remove it. You can also use a straightened wire or a plumbing snake to push stubborn clogs through the tube.
Now check the fan intake inside the base itself. This is the opening where air gets pulled through during the emptying cycle. Dust and hair frequently build up around the fan blades. Wipe away any visible debris with a clean, dry cloth.
Don’t forget the sensors on both your vacuum and the base. Blocked sensors stop the emptying process from starting. Gently wipe each sensor with a soft cloth to remove dust buildup.
After clearing everything, reassemble the duct and reconnect it firmly to both the vacuum and base. Make sure all connections are tight and secure.
Finally, plug the base back into power. Press the “Empty Bin” button on your app or the base itself to test if everything works. Listen for normal suction sounds. The vacuum should empty smoothly without grinding noises.
This process usually takes 10 to 15 minutes and solves most clogging problems quickly.
Step-by-Step: Inspecting and Cleaning the Fan Intake
The fan intake is where air gets pulled into the base during the emptying cycle. When debris blocks this area, your vacuum stops emptying completely. Let’s walk through how to inspect and clean it properly.
Start by unplugging the base from the wall. This keeps you safe while working inside. Wait a few seconds before opening the base compartment. Most bases have a removable cover or panel that slides or clips off easily.
Look inside the fan intake area with a flashlight. You’ll see a fan blade that spins during emptying. Debris often wraps around the blade edges or clogs the intake opening. Pet hair is the most common culprit, especially in homes with dogs or cats.
Use your fingers to gently pull out any visible hair or debris. A soft brush works well for stubborn particles stuck to the fan blades. Be careful not to bend or damage the blades. They need to spin freely to work properly.
Check the intake opening where air enters the system. Dust and pet hair can form a mat that blocks airflow completely. Wipe this area clean with a dry cloth. Remove any buildup you find.
After cleaning, spin the fan blade by hand a few times. It should rotate smoothly without resistance. If it feels stuck, something is still blocking it. Keep looking until the blade moves freely.
Once the fan intake is clear, wipe down the entire interior with a clean, dry cloth. Reassemble the base cover firmly. Plug the base back in and test the emptying function. Your vacuum should now empty normally again.
Resetting the Base and Checking Sensors
Your base needs a proper reset after you clear blockages. This simple step often fixes issues that remain even after cleaning. Resetting restores normal communication between your vacuum and base.
Start by unplugging the base from the wall outlet. Wait for at least 30 seconds. This pause allows the system to fully power down and clear any stuck processes. Then plug it back in firmly. You should see lights on the base indicating it’s ready to work again.
Next, check all sensors on both your vacuum and base. Sensors tell the system when the dustbin is full and when emptying is complete. Dirty sensors send wrong signals and prevent proper emptying. Use a clean, dry cloth to gently wipe each sensor. Look for a small lens or window on the vacuum’s dustbin and on the base itself.
Place your vacuum back on the base carefully. The charging contacts should align properly. Listen for a beep or tone confirming the connection is good. Some bases show a light pattern indicating successful reset.
Run a test cycle through your app or use the manual empty button. Watch the base during the emptying process. The fan should run smoothly without grinding sounds. Air should flow through the duct without blockages.
If the vacuum still won’t empty after reset, the problem might be deeper inside. Check the duct connection one more time to ensure it’s completely secure. Wipe the interior of the base with a dry cloth to remove any remaining dust particles. Most resets solve the issue within minutes and restore normal operation.
Preventive Maintenance Routine to Avoid Future Clogs
A good maintenance routine stops clogs before they start. You’ll spend less time fixing problems and more time enjoying clean floors.
Check your filters every two weeks. Dirty filters reduce suction power and make the base work harder. A clogged filter forces the fan to pull debris into places it shouldn’t go. Replace or clean your filter according to your vacuum’s manual. This single step prevents most future clogs.
Wipe the interior of your base monthly. Use a clean, dry cloth to remove dust buildup inside the chamber. Pay special attention to corners where debris collects. This keeps air flowing smoothly through the system.
Empty your vacuum’s dustbin regularly. Don’t wait until it’s completely full. A packed dustbin means more material tries to squeeze through the duct at once. This causes blockages faster. Empty it when it reaches the halfway mark.
Clear the sensors every few weeks. Sensors tell your vacuum when to empty. Dirty sensors send wrong signals and trigger unnecessary emptying cycles. These extra cycles increase wear on the fan and duct.
Adjust your vacuum’s settings for your home. If you have pets, use the pet hair mode. This setting handles hair better and reduces clogs. Check your app to see what options work best for your environment.
Run a test empty cycle weekly. Press the manual empty button in your app. Listen for normal sounds. Strange noises mean something needs attention. Catching problems early stops major damage.
These simple habits take just minutes each month but add years to your base’s life.
Common Mistakes That Make Clogs Worse
People often make mistakes that turn a small clog into a big problem. Understanding these errors helps you avoid them.
Ignoring the first sign of trouble is the biggest mistake. When your vacuum doesn’t empty completely, many people assume it will fix itself. It won’t. A partial clog gets worse each time the base tries to empty. The blockage grows thicker and harder to remove.
Forcing the emptying cycle causes real damage. Don’t press the empty button repeatedly when you hear strange sounds or notice slow suction. Repeated attempts push debris deeper into the duct. This makes the clog harder to reach and clear later.
Using water to clean internal parts creates new problems. Moisture damages the fan motor and electrical connections inside the base. Always use a dry cloth for cleaning. Water and electronics don’t mix.
Skipping sensor checks lets problems hide. Dirty sensors tell your vacuum the dustbin is full when it’s not. This stops the emptying cycle before it finishes. Clean sensors take seconds but prevent major headaches.
Neglecting the duct itself is another common error. People focus on the fan intake and forget the tube connecting the dustbin to the base. Hair wraps around the inside walls of this duct. Check both ends thoroughly.
Waiting too long between cleanings makes clogs inevitable. Dust and pet hair accumulate in the system. Monthly maintenance prevents most blockages from forming at all.
The key is acting quickly when you notice problems and maintaining your base regularly. Small actions now save you from expensive repairs later.
Troubleshooting When the Base Still Won’t Empty
When your self-emptying robot vacuum base still won’t empty after basic troubleshooting, deeper issues may be at play. The problem often hides in places you haven’t checked yet.
Start by examining the duct connection. This tube runs between your vacuum’s dustbin and the base. Disconnect it carefully and look inside with a flashlight. Pet hair wraps around the interior walls. Debris gets stuck at bends and joints. Use a straightened wire or plumbing snake to push blockages through. Wiggle it gently to avoid damaging the tube.
Next, inspect the fan intake inside the base itself. This is where air gets pulled through to create suction. Hair and dust accumulate here heavily. Remove any visible clogs with your fingers or tweezers. Check around the fan blade edges where material bunches up easily.
Look for hidden debris in unexpected places. Small objects like puzzle pieces, coins, or rubber bands sometimes get sucked into the system. They lodge in corners or against the fan. Remove anything you find.
Test the base motor sound. A struggling or unusual noise means the motor works harder than normal. This happens when airflow gets restricted somewhere you haven’t found yet.
If the vacuum still refuses to empty, the motor itself might be failing. The fan may not spin with enough force to move debris. Listen carefully during the emptying cycle. Weak or absent sounds suggest motor problems rather than clogs.
Document what you’ve checked. This helps you explain the situation if professional help becomes necessary. Sometimes the issue requires internal repairs that go beyond basic cleaning.
Final Thoughts
A clogged base does not mean your vacuum is broken. Most problems come from simple blockages you can fix yourself.
Regular checks save you time and money. You avoid bigger repairs later.
Think about the duct, fan intake, and sensors first. These three spots cause most clogging issues.
Clean components on a schedule. Weekly or biweekly checks catch small problems early. This stops them from turning into bigger headaches.
Your self-emptying base works hard every day. It deserves attention just like any other appliance in your home.
Pet owners face more frequent clogs. Hair builds up faster in these homes, so check your base more often.
Don’t ignore strange noises or error messages. These signals tell you something needs attention right away.
A few minutes of maintenance beats hours of troubleshooting. Small habits create big results over time.
Keep spare filters on hand. This makes swapping them quick when you notice reduced suction power.
Trust your instincts when something feels off. Your vacuum usually shows warning signs before it fully clogs.
Consistency matters more than perfection. You don’t need to be an expert. You just need to check your base regularly.
Write down what works for your home. Every household has different needs based on pets, flooring, and daily use.
Simple actions like wiping surfaces and clearing sensors make a real difference. These small steps keep your system running smoothly.
Your robot vacuum saves you time each day. A little care on your part keeps that convenience going strong.
With the right habits, clogs become rare instead of routine. You get more days of hands free cleaning.
Take these tips and build them into your routine. Your base will thank you with reliable performance for years to come.
Frequently Asked Questions
Why won’t my robot vacuum empty into the base?
A clogged duct or blocked fan intake usually causes this problem. The tube connecting your vacuum’s dustbin to the base can trap hair, debris, or small objects. Check inside the base for blockages first. Look at the fan intake area closely. Sometimes pet hair wraps around the fan blades and stops them from spinning.
Also inspect the sensors on both your vacuum and base. Dirty sensors send false signals that prevent emptying. Wipe them with a clean, dry cloth.
How do I reset my self-emptying base?
Unplugging and reconnecting the base often fixes emptying issues. Turn off your vacuum first. Unplug the base from the wall outlet. Wait about 30 seconds. Plug it back in and wait for the base to power up completely.
This simple reset clears temporary errors in the system. Try using the manual empty button in your app after reconnecting. If the base still won’t work, move to deeper troubleshooting of the duct and fan.
What should I clean inside the base regularly?
Focus on three main areas: the duct, the fan intake, and the sensors. Clean these components every few weeks with a dry cloth. Never use water inside the base.
Pay special attention to the duct where hair accumulates most. Remove any visible debris by hand. Check the fan intake for wrapped hair or stuck objects. Keep sensors clear so the base can detect when it needs to empty.
Can debris other than dust cause clogs?
Yes, small objects frequently cause problems. Puzzle pieces, coins, rubber bands, and toys can get sucked into your vacuum. These items travel through the duct and jam the fan or block the opening.
Empty your floors of small objects before running your vacuum. This simple step prevents many clogging issues.

Hi, I’m Ivy! I’m a smart home enthusiast and self-proclaimed clean freak who loves testing the latest cleaning tech so you don’t have to waste your money on the wrong one. I started HomeTechClean to share honest reviews and practical advice for anyone who wants a cleaner home with less effort.