How To Eliminate Musty Odors Coming From Your Vacuum Exhaust?
You turn on your vacuum, ready to clean. Within seconds, a sour, musty odor fills the room. Instead of making your home fresher, the vacuum spreads a smell that lingers for hours. You are not alone. This is a common problem that frustrates many homeowners every day.
The good news is that you can fix this. A smelly vacuum exhaust is a sign that something needs attention inside your machine. It is not a reason to throw the vacuum away. With a few simple steps and a little time, you can make your vacuum smell clean again.
This guide will walk you through the causes and solutions. You will learn how to deep clean every part of your vacuum. You will also discover simple habits that stop odors from returning. Let us get started and bring the fresh air back to your cleaning routine.
Key Takeaways
- Musty vacuum exhaust smells come from trapped dirt, moisture, pet hair, and dirty filters. These materials create a perfect home for bacteria and mold inside your machine. Once they start growing, the smell blows out every time you clean.
- Regular deep cleaning solves most odor problems in under an hour. Wash the canister, hose, and washable parts with warm soapy water. Let everything dry fully before you put it back together. Even one wet part can restart the odor cycle.
- Baking soda works wonders as a natural deodorizer. Sprinkle a small amount on your carpet and vacuum it up. Baking soda neutralizes acids and alkalis that cause bad smells. Use it sparingly to avoid clogging your filters.
- Clean or replace your filters every month. A clogged filter blocks airflow and traps odor particles. Washable filters need 24 hours to dry completely. Never put a damp filter back into your vacuum.
- Prevention is easier than fixing a deep odor problem. Empty the dust bin after every use. Avoid vacuuming wet surfaces. Store your vacuum in a dry spot with good airflow. These small habits keep smells away for good.
- Check the brush roll and hose for hidden debris. Hair, string, and food particles often hide in these spots. They rot over time and produce strong odors. Inspect these areas at least once a month to stay ahead of the smell.
Understand the Real Reasons Behind the Musty Smell
Your vacuum smells musty because something inside is breaking down. Dust, dirt, pet hair, and food crumbs collect in the machine each time you clean. When these materials sit in a dark and warm space, bacteria and mold start to grow. The air from the vacuum motor passes over this buildup and blows the odor into your room.
Moisture is the biggest trigger for musty smells. Many people vacuum slightly damp carpets or pick up spilled water without noticing. That moisture gets trapped inside the canister, filter, or hose. Once water sits in a closed space, mold forms quickly. Even a few drops can cause a strong smell over time.
Pet owners face an extra challenge. Pet hair and dander carry natural oils and odors from your animal. When hair wraps around the brush roll or gets stuck in the filter, those smells multiply. The vacuum then spreads that dog or cat smell through the exhaust every time you use it.
A full dust bin or bag is another common cause. When the container overflows, airflow becomes restricted. The motor works harder and heats up. This heat bakes the old dirt inside the machine and creates a burnt, musty odor. Emptying the bin regularly stops this cycle before it starts.
Gather Your Cleaning Supplies Before You Start
You need a few basic items before you begin cleaning. Most of these are already in your home. Grab a bucket of warm water and some mild dish soap. A soft cleaning brush or old toothbrush helps scrub small parts. Keep a microfiber cloth ready for wiping surfaces. White vinegar works as a natural cleaner that kills mold and bacteria. Baking soda acts as a powerful deodorizer.
You may also need scissors to cut hair off the brush roll. A long stick or straightened coat hanger helps push clogs out of the hose. If your filters are too old or damaged, have new replacements ready. Check your vacuum manual before you start. Some models have specific instructions about which parts you can wash and which you cannot.
Empty and Wash the Dust Canister or Replace the Bag
Start with the part that holds the most dirt. Unplug your vacuum and remove the dust canister or bag. If you have a bagged vacuum, throw the old bag away. Do not try to empty and reuse it. Old bags hold bacteria deep in their fibers. A fresh bag instantly removes one major source of odor.
For bagless models, take the canister to your trash bin. Open it and dump all the contents out. You may see compacted dust and hair stuck to the sides. Use a dry paper towel to wipe away loose debris first. Then fill your sink with warm water and add a few drops of dish soap. Submerge the canister and scrub every corner with your brush. Pay attention to the lid seals and hinges where gunk hides.
Rinse the canister until the water runs clear. Let it air dry completely before you put it back. This may take several hours. Any moisture left inside will cause new mold to grow. Place the canister upside down on a towel near a sunny window to speed up drying.
Clean or Replace the Filters the Right Way
Filters are the most common source of vacuum odor. They trap fine dust particles and allergens before air exits the machine. Over time, this layer of trapped dirt becomes a breeding ground for bacteria. A clogged filter also reduces airflow. The motor heats up and the smell gets worse.
Remove all filters from your vacuum. Most models have a primary filter and an exhaust filter. Check your manual to identify each one. Some filters are washable and some are not. Washable foam or plastic filters can be rinsed under cool running water. Tap them gently against the trash bin first to remove loose dust. Then hold them under the faucet and squeeze them softly until the water runs clear.
Never use soap on filters unless the manual says it is safe. Soap residue can clog the tiny pores in the filter material. After rinsing, shake out the excess water. Set the filter on a clean towel in a well ventilated spot. Let it dry for at least 24 hours. A damp filter put back into the vacuum will create an even worse smell.
Non washable filters simply need replacement. Order the correct model for your vacuum brand. Check your filters once a month and replace them on schedule. This is one investment that pays off in fresh air every time you clean.
Scrub the Brush Roll and Remove Trapped Hair
Flip your vacuum over and look at the brush roll. You may find a thick layer of hair, string, and fuzz wrapped around it. This debris traps moisture and organic matter close to the carpet. As the brush spins during use, it releases musty smells into the air.
First, consult your manual to see if the brush roll is removable. Most modern vacuums allow you to take it out for cleaning. If yours is removable, pop it out carefully. Use scissors to cut through the tangled hair. Pull it off in sections and throw it away. Wear gloves if the hair is damp or smells bad.
Wipe the brush roll with a cloth dampened in warm soapy water. Get into the grooves and bristles where fine dust collects. If the manual allows, rinse the brush roll under running water. Dry it completely with a towel and let it air dry for several hours. A wet brush roll will transfer moisture to your carpet and back into the vacuum.
While the brush roll is out, clean the housing area too. Wipe the inside of the brush compartment with a dry cloth. Remove any dirt clumps or debris. Check the end caps and bearings where dust likes to hide. A clean brush area lets your vacuum pick up dirt faster and smell better.
Deep Clean the Hose to Remove Hidden Clogs
The hose often holds the worst smells because dirt gets trapped in its curves. Over time, food particles, pet hair, and moist debris stick to the inside walls. When air flows through, it picks up the odor and pushes it out the exhaust.
Detach the hose from the vacuum body. Most hoses twist off or release with a button. Take the hose outside or to a bathtub. First, hold it up to a light and look through it. You may see a blockage or dark stains on the inside. If you spot a clog, use a long stick, a broom handle, or a straightened coat hanger to push it out gently.
Fill the hose with warm water and a splash of dish soap. Hold both ends up and shake it back and forth. This sloshing action scrubs the inside walls. Drain the soapy water and rinse with clean water until it runs clear. Repeat this process if the first rinse still looks dirty.
Stand the hose upright with both ends open to drain. Let it dry completely for at least a day. Do not reattach a damp hose. Moisture will travel into the motor and create new problems. Some people hang the hose over a shower rod to speed up drying.
Use Baking Soda to Neutralize Stubborn Odors
Baking soda is one of the best natural deodorizers available. It works by neutralizing both acidic and alkaline odor molecules. This makes it perfect for tackling musty vacuum smells that other cleaners cannot remove.
Sprinkle a light layer of baking soda on a section of your carpet. Do not use too much. A thin dusting is enough. Too much baking soda can clog your vacuum filter and create new problems. Let the baking soda sit on the carpet for about 30 minutes. This gives it time to absorb odors from the carpet fibers and the air.
Now vacuum up the baking soda slowly. As it passes through the vacuum, it neutralizes smells inside the hose, canister, and filter area. The baking soda particles coat the internal surfaces and absorb odor molecules. After vacuuming, empty the dust bin right away. Do not let baking soda sit in the canister for days.
For bagged vacuums, you can sprinkle a small amount of baking soda directly into a new bag before installing it. This creates a deodorizing effect every time you clean. Again, use a small amount. A teaspoon or two is plenty. Baking soda inside the bag will also help absorb moisture from the collected debris.
Disinfect Plastic Parts to Kill Mold and Bacteria
If your vacuum still smells after a full wash, mold spores may have settled into the plastic. Plastics are slightly porous. Over time, bacteria and mold can penetrate the surface. A simple soap wash may not reach deep enough.
Mix a solution of one part white vinegar and one part water in a spray bottle. Spray this onto the inside of the canister, the hose, and any removable plastic parts. Let the vinegar sit for about 15 minutes. Vinegar is acidic and kills most mold and bacteria on contact. It also breaks down odor causing residue.
For tougher cases, use diluted rubbing alcohol. Mix 70 percent isopropyl alcohol with an equal part of water. Wipe the plastic surfaces with a cloth soaked in this solution. Alcohol evaporates quickly and leaves no smell behind. It also kills a wider range of microbes than vinegar.
After disinfecting, rinse all parts with clean water. Dry them fully in the sun if possible. Direct sunlight provides UV light that kills remaining bacteria naturally. This step often solves problems that regular washing cannot fix.
Check the Motor and Belt for Burning Odors
Sometimes a musty smell mixes with a burnt odor. This points to a mechanical issue. The vacuum motor needs steady airflow to stay cool. When filters or hoses are blocked, the motor overheats. That heat creates a hot electrical smell. The drive belt can also burn if the brush roll jams.
Unplug the vacuum and let it cool down for an hour. Remove the bottom plate to inspect the belt. Look for cracks, fraying, or a shiny glazed surface. A damaged belt smells like burnt rubber when it runs. Replace the belt if it shows any of these signs.
Look at the motor area without opening the sealed housing. Check for melted plastic, black scorch marks, or a strong burnt smell even when the vacuum is off. These are signs of serious motor damage. If you see these, stop using the vacuum and take it to a repair shop. Continuing to use a damaged motor can create a fire risk.
Prevent motor issues by keeping airflow clear. Clean filters regularly. Empty the dust bin before it overflows. Remove hair from the brush roll often. A motor that runs cool lasts longer and does not produce bad smells.
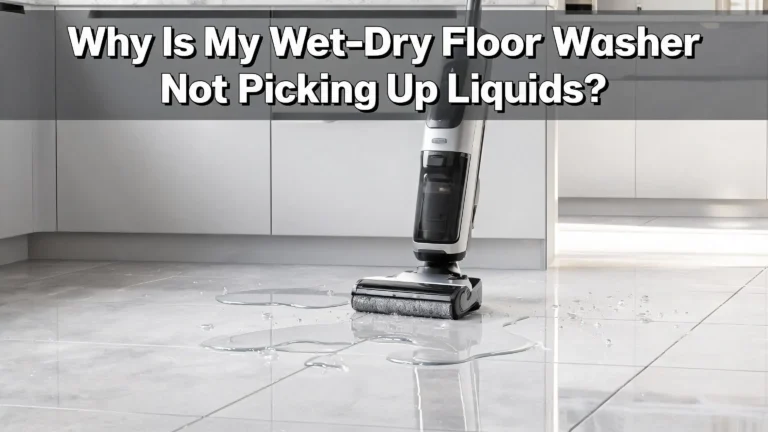
Avoid Vacuuming Wet Surfaces at All Costs
Water and standard vacuums do not mix. Household vacuums are designed for dry debris only. When you vacuum a damp carpet or spilled liquid, water enters the canister, hose, and filter. This moisture starts growing mold within 24 hours. The musty smell builds up fast and is hard to remove.
If you must clean a small spill, use a shop vac designed for wet and dry pickup. Shop vacs have sealed motors and waterproof containers. They handle moisture without damage. Keep a separate shop vac for wet jobs and use your regular vacuum only on dry floors.
After steam cleaning your carpets, wait until they are completely dry before vacuuming. This can take up to 24 hours depending on humidity and airflow. Press a paper towel into the carpet fibers to test for moisture. If the towel comes up damp, the carpet needs more drying time.
If your vacuum accidentally picks up moisture, act quickly. Empty the canister immediately. Remove and dry all filters. Wipe down every internal surface with a dry cloth. Leave the vacuum open and disassembled in a well ventilated area for two days. This fast response can prevent mold from getting a foothold.
Empty the Vacuum After Every Use
One simple habit can stop most odors before they start. Empty the dust bin or check the bag after every cleaning session. Do not wait until the bin is full to empty it. Old dirt sitting in a dark canister for a week creates the perfect conditions for bacteria.
For bagged vacuums, replace the bag when it reaches the fill line. Many vacuums have an indicator light that shows when the bag is full. Do not ignore it. An overfilled bag restricts airflow and strains the motor. The trapped dirt also becomes more compacted and smelly over time.
When you empty a bagless vacuum, do it outside or directly over a trash bin. This prevents a dust cloud from spreading back into your room. Use a gentle tap to dislodge stuck debris. Wash the canister with soap and water at least once a month even if it looks clean. A clear canister can still hold bacteria you cannot see.
Make a schedule that fits your cleaning routine. If you vacuum twice a week, empty the bin after each session. Set a reminder on your phone to wash the canister on the first day of every month. These small actions keep your vacuum fresh without a lot of extra work.
Store Your Vacuum in a Dry and Airy Spot
Where you keep your vacuum affects how it smells. A dark closet with no airflow creates a damp environment. Moisture from the air settles inside the vacuum canister and hose. That moisture feeds mold and bacteria during the days between uses.
Choose a storage spot with good ventilation. A hallway closet with slatted doors works well. A mudroom or laundry room with a window is another good choice. Avoid bathrooms and basements that have high humidity. The extra moisture in these rooms will find its way into your vacuum.
If you must store the vacuum in a closed closet, use a moisture absorber. Small silica gel packs or a damp rid container placed nearby helps keep the air dry. Replace these absorbers every few months. This small step makes a big difference in preventing musty growth.
Cordless stick vacuums often come with a wall mount. Use it if you have one. Hanging the vacuum on the wall keeps it off the floor and allows air to circulate around it. This helps the filter and dust bin dry out completely between uses. A dry vacuum is a fresh smelling vacuum.
Manage Pet Hair to Reduce Long Term Odors
Pets bring joy to a home but they also bring hair, dander, and natural oils. These materials accumulate inside your vacuum and produce a distinct animal smell. The odor gets stronger when the vacuum heats up during use.
Groom your pets regularly to reduce the amount of loose hair in your home. Brush dogs and cats outside whenever possible. Bathe them on a schedule that fits their breed and coat type. Less hair and dander on your floors means less odor buildup in your vacuum.
After vacuuming pet areas, empty the dust bin right away. Do not let pet hair sit in the canister for days. The natural oils in pet fur break down quickly and produce strong smells. Wash the canister more often if you have multiple pets.
Consider using a vacuum designed for pet households. These models often have stronger suction, better filtration, and tangle free brush rolls. They collect hair more efficiently and keep it sealed away from the exhaust path. If your current vacuum struggles with pet odor, an upgrade may be the best long term solution.
Use Scented Vacuum Products With Caution
Many stores sell scented vacuum beads, tablets, or filter inserts. These products release a pleasant fragrance as you vacuum. They can mask mild odors and make your home smell nice during cleaning. However, they do not solve the underlying problem.
Always read your vacuum manual before using any scented product. Some brands warn against putting beads or powders through the machine. These particles can clog the cyclone system and reduce suction permanently. Dyson specifically advises against inserting foreign objects into the bin because it can damage the primary cyclone.
If your manual allows scented products, use them in small amounts. A few beads sprinkled on the carpet before vacuuming is enough. Do not pour them directly into the canister or onto the filter. The fragrance should be a temporary boost, not a cover for a dirty machine.
A safer option is to clean your vacuum thoroughly and rely on that fresh neutral smell. When your vacuum is truly clean, the exhaust air smells like nothing at all. That is the sign of a properly maintained machine. Scents should be a bonus, not a necessity.
Know When It Is Time to Call a Professional
Most musty vacuum odors clear up with the cleaning steps listed above. But sometimes the smell goes deeper. If you have cleaned every part, replaced the filters, and dried everything fully but the odor remains, the motor may be the source.
Mold can grow inside the motor housing where you cannot reach. The suction fan pulls air through the entire system. If mold has settled on the motor blades or housing, the smell will last until a professional opens the sealed unit. Do not open the motor housing yourself unless you have repair experience. Vacuum motors contain electrical components that can shock you even when unplugged.
Take your vacuum to a local repair shop for a deep internal cleaning. Technicians have the tools and knowledge to open the sealed areas safely. They can also replace worn motor parts that may be causing burnt smells. A professional service costs money but it costs far less than buying a new vacuum.
If the repair estimate approaches the price of a new vacuum, consider replacement. A vacuum that has been soaked with water or that has severe mold inside the motor is often beyond saving. Use the lessons from this experience to keep your next vacuum in better condition from day one.
Frequently Asked Questions
Why does my room smell musty after I vacuum?
The smell comes from your vacuum blowing stale air into the room. When dirt, moisture, and bacteria build up inside the vacuum, the exhaust air carries that odor out. The smell lingers in the room because the vacuum has spread odor particles into the air and onto surfaces. Cleaning your vacuum filters, canister, and hose solves this problem. After a deep clean, the exhaust air will smell neutral again.
Can I spray air freshener into my vacuum intake?
Do not spray air freshener into any part of your vacuum. The liquid from the spray can damage the motor and electrical parts. It can also make dust sticky inside the hose and filter, which creates a worse smell over time. Use only dry cleaning methods and products approved by your vacuum manufacturer. If you want a fresh scent, use a vacuum safe deodorizing tablet or clean the machine properly so it smells neutral.
How often should I clean my vacuum to prevent smells?
Empty the dust bin or check the bag after every use. Wash the canister and clean the brush roll once a month. Rinse washable filters every month and replace non washable ones on the schedule in your manual. Deep clean the hose every three months or if you notice a smell. Sticking to this routine stops odors before they can develop. A clean vacuum stays fresh with very little effort.
Is it safe to use baking soda in my vacuum?
Baking soda can be safe if you use a very small amount. Sprinkle a light dusting on the carpet and vacuum it up slowly. Do not pour baking soda directly into the vacuum canister or filter. Too much baking soda clogs fine filters and can damage the motor over time. Always check your vacuum manual first. Some brands advise against using any powders because they affect the cyclone performance.
Why does my vacuum smell like wet dog?
A wet dog smell usually comes from pet hair and dander inside the vacuum. These materials hold natural oils from your pet. When the vacuum heats up, the oils release their odor. If moisture is also present, the smell becomes even stronger. Clean the brush roll to remove trapped hair. Wash the canister and replace the filters. Groom your pets regularly to reduce the hair that enters the vacuum in the first place.
Hi, I’m Ivy! I’m a smart home enthusiast and self-proclaimed clean freak who loves testing the latest cleaning tech so you don’t have to waste your money on the wrong one. I started HomeTechClean to share honest reviews and practical advice for anyone who wants a cleaner home with less effort.