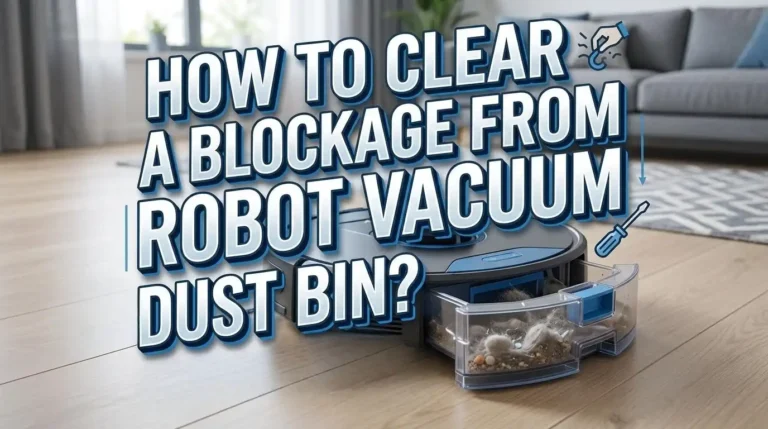
How to Deep Clean a Bagless Vacuum Canister To Restore Strong Suction?
How to Deep Clean a Bagless Vacuum Canister and Restore Strong Suction Fast? A bagless vacuum can lose suction slowly, so the problem often sneaks up on you. One week it picks up crumbs with ease. The next week it leaves dust behind, smells stale, and sounds strained.
In many homes, the real issue is not a broken motor. The issue is a dirty canister, clogged filter, blocked hose, or packed cyclone area.
The good news is simple. You can often fix weak suction with a full clean at home. You do not need fancy tools. If you clean it the right way, you can bring back strong airflow and make the machine work like it should again.
This guide gives you clear, practical steps. You will learn what to clean, what to avoid, and how to stop the problem from coming back.
Key Takeaways
- A full dust canister is only one part of the problem. Weak suction usually comes from a mix of packed dust, dirty filters, hair around the brush roll, and hidden clogs in the hose or floor path. A full clean works better than a quick empty.
- Always unplug the vacuum and check the manual first. Some canisters can be washed with mild soap and water, while others should only be wiped clean. This small check can protect the seals, plastic parts, and filter housing from damage.
- Filters matter more than many people think. A dirty filter can choke airflow and make the motor work harder. Washable filters need a full dry time before you put them back. If a filter stays damp, suction drops and the machine can develop odor or damage.
- The cyclone area and fine dust screen often hold the hidden mess. These parts trap fine dust very well, but that also means buildup can form over time. A careful clean in this area often creates the biggest jump in suction.
- Different cleaning methods have clear pros and cons. Wiping is fast and safe for parts that should not be soaked. Washing removes stuck dirt better, but it takes time to dry. Replacing worn filters costs more, but it can restore airflow faster than repeated washing.
- Routine care prevents major suction loss. Empty the canister before it gets packed, clean filters on schedule, and remove hair from the brush roll often. Small habits keep airflow open and make deep cleaning easier later.
Why a Bagless Vacuum Canister Loses Suction
A bagless vacuum needs free airflow to clean well. Air must move from the floor head, through the hose, into the canister, through the filters, and out again. If one part gets blocked, suction drops. If several parts get dirty at the same time, the change can feel dramatic.
The canister is a common trouble spot. Dust, pet hair, and fine debris collect inside it fast. Some dirt falls out when you empty the bin, but some sticks to the walls, settles around the cyclone, or clings to the screen. That hidden layer slowly reduces airflow even when the bin looks half clean.
Filters also play a big role. Pre motor and post motor filters trap fine dust, but once they clog, air cannot pass through easily. The motor then works harder and may sound louder. That does not mean stronger suction. It often means restricted airflow.
Clogs add another layer to the problem. A small toy, paper scrap, or lump of hair can block the hose or floor path. The brush roll can also wrap up with hair and thread, which reduces pickup on carpet.
What to Prepare Before You Start Cleaning
A good deep clean starts with setup. If you rush in and pull parts apart without a plan, dust can spread everywhere and small pieces can get lost. A few basic supplies make the work easier and cleaner.
You will need a trash bag or outdoor trash can, a soft microfiber cloth, a small soft brush, scissors, mild dish soap, warm water, and a dry towel. A long blunt tool, such as a broom handle or similar smooth stick, can help push out clogs from the hose. Keep the vacuum manual nearby if you still have it. That one step can save you from washing a part that should stay dry.
If you have allergies, wear gloves and a simple mask. Fine dust can puff out when you empty the canister or tap the filters. This part is messy, even in a careful clean.
Set up near an outdoor bin, garage, sink, or well ventilated area. Put small parts together in one bowl or on one towel. That keeps seals, screens, and clips from disappearing during the job.
Now think about the cleaning method you will use. Wiping is best for electronic parts, tight seals, and parts the manual says not to soak. Washing is best for washable bins, foam filters, and heavy dust buildup.
Pros of wiping: fast, safe, and low mess.
Cons of wiping: it may leave stuck fine dust behind.
Pros of washing: deeper clean and better odor control.
Cons of washing: long dry time and more risk if you wash the wrong part.
Step One Empty the Canister the Clean Way
Start with the canister because it holds the biggest dust load. Take the vacuum outside if possible. If that is not possible, empty it into a large trash bag and keep the opening close to the bin. This helps stop a dust cloud from floating back into the room.
Open the canister slowly. Dump the dirt out in one steady motion. If hair or packed debris sticks inside, use a gloved hand or a dry cloth to loosen it. Do not jam sharp tools into the bin. Sharp tools can scratch plastic and damage seals.
Look closely after the first dump. Many people stop here and think the job is done. It is not. Fine dust often sticks to the walls, corners, and cyclone base. Pet hair can form a ring around the center core. That hidden dirt keeps airflow from moving the way it should.
If the dirt is very fine, hold the canister close to the trash opening and tap it gently. A few light taps are enough. Hard banging can crack plastic or loosen clips over time.
This is also a good moment to inspect the rubber seals and latch points. If you see cracks, bent clips, or warped plastic, the vacuum may leak air even after cleaning.
Pros of emptying outside: less indoor dust and easier cleanup.
Cons: wind can blow dust back if the weather is bad.
Pros of emptying into a bag indoors: better control in cold or wet weather.
Cons: more dust can escape if you move too fast.
Step Two Wash or Wipe the Canister Based on Its Material
Once the dirt is out, clean the canister itself. This is the step that many owners skip, and it is often the reason suction never fully returns. Dust sticks to the inside walls and can form a dull film that blocks smooth airflow.
First, check whether your canister is washable. If the manual says yes, use warm water and a small amount of mild soap. Swirl the water around, wipe the interior with a soft cloth, and rinse well. Keep the wash gentle. You do not need harsh cleaners to remove dust film.
If your canister should not be soaked, wipe it carefully with a slightly damp microfiber cloth. Use a dry brush for tight corners. Then wipe again with a clean dry cloth. This method is slower, but it is safer for parts with labels, seals, and built in release pieces.
Do not use bleach, strong cleaners, or very hot water. These can weaken plastic, cloud clear bins, or damage seals. Also avoid rough scrub pads. They scratch the surface, and scratched plastic tends to trap even more dust later.
Pros of washing: removes stuck dirt, reduces odor, and leaves the bin truly clean.
Cons of washing: can take a long time to dry and may damage parts if the bin is not meant to be washed.
Pros of wiping: safer for delicate parts and faster on busy days.
Cons of wiping: may leave residue if the canister is very dirty.
Step Three Clean the Cyclone and Dust Screen
The cyclone area is where fine dust often hides. It may look clean from the outside, but the inner shroud, screen, or cone area can hold a stubborn layer of powder. This buildup can choke airflow and make the vacuum seem weak even after the bin is empty.
Start by removing any detachable inner screen or separator if your model allows it. Use a soft dry brush to loosen dust from mesh surfaces and narrow slots. Work over a trash can. Tap gently to release fine debris. A gentle touch matters here because mesh and cyclone parts can bend or crack if handled roughly.
If your model allows light rinsing of this part, use cool or lukewarm water only. Let water run through until it looks clear. Do not use soap unless the manual says it is safe. Some pleated or fine filter surfaces can be damaged by the wrong cleaning method.
For models that should stay dry, use a dry brush and cloth only. A can of compressed air may help in some cases, but use it with care. Too much force can drive dust deeper into corners.
Pros of dry brushing: quick, low risk, and good for delicate cyclone parts.
Cons: it may not remove sticky grime or damp dust.
Step Four Wash or Replace Filters for Better Airflow
Dirty filters are one of the biggest reasons a vacuum loses suction. A bagless machine depends on filters to trap fine dust. Over time, those filters fill up and air cannot move through them well. The vacuum may still turn on, but pickup drops and the motor may sound stressed.
Remove the filters one at a time so you remember where each one goes. Many vacuums have a pre motor filter and a post motor or exhaust filter. Some are foam. Some are pleated. Some are washable, and some must be replaced. Never guess on this step. Check the manual or filter label first.
If the filter is washable, tap off loose dust over a trash can. Then rinse with cool water until the water runs clear. Do not twist or scrub hard. Lay the filter flat or place it in a well ventilated area to dry fully. In many cases, this takes at least 24 hours.
Pros of washing filters: saves money and removes a lot of trapped dust.
Cons: long drying time and reduced performance if the filter is old.
Pros of replacing filters: fast airflow improvement and cleaner exhaust air.
Cons: extra cost and the need to get the exact filter type.
Step Five Clear Blockages in the Hose Wand and Floor Path
If the canister and filters are clean but suction still feels weak, check for a clog. Many blockages hide in the hose, wand, intake neck, or floor head path. Even a small blockage can reduce airflow a lot.
Detach the hose and wand if your vacuum allows it. Look through each piece toward a light. If you cannot see clear through it, there is likely a clog. Use a long blunt tool to push the blockage out gently. A smooth broom handle works well for many hoses. Do not use a knife, metal rod, or sharp hook. These can puncture the hose or tear the inner lining.
For loose clogs, try gravity first. Hold the hose upright and tap it lightly. For packed hair and lint, push from the side closest to the blockage. Move slowly. If the clog is made of damp dirt, break it apart a little at a time.
Pros of pushing out a clog with a blunt tool: strong result and good for dense blockages.
Cons: risk of damage if you force it too hard.
Pros of shaking and tapping: low risk and easy for loose debris.
Cons: weak against sticky or compacted clogs.
Do not forget the floor path near the brush roll. Coins, paper, pet hair, and string often collect there. This spot is small, but it affects pickup a lot.
Step Six Clean the Brush Roll and Floor Head
The brush roll does not create suction, but it helps the vacuum pick up debris from carpet and rugs. If the brush is wrapped in hair, thread, and lint, the floor head cannot work well. Many people think the vacuum has weak suction when the real problem is poor contact at the floor.
Turn the vacuum over and inspect the brush roll. Use scissors to cut along the groove if your roller has one, then pull away the hair by hand. Wipe the ends of the roller and the housing area with a dry cloth. Keep the cuts shallow so you do not nick the bristles.
Next, inspect the air path behind the brush roll. Dust clumps often gather there. Remove what you can with your fingers or a soft brush. If the plate comes off, clean underneath it too. Check that the roller spins freely before you reassemble the head.
Pros of cutting and pulling hair by hand: very effective and low cost.
Cons: it takes time and can be messy.
Pros of using a seam ripper or small cleaning tool: more precise and good for tight wraps.
Cons: greater risk of scratching plastic or cutting bristles if used carelessly.
If your vacuum has a soft roller for hard floors, clean that as well. Fine dust and hair can build up on the ends and reduce smooth spinning.
Step Seven Dry Reassemble and Test Suction
Drying is the step that decides whether your deep clean succeeds. If any washable part goes back in while damp, airflow drops, dust sticks faster, and odor can appear. In the worst case, moisture can reach the motor area. That is why patience matters here.
Lay washed parts on a clean towel in a well ventilated room. Turn them once or twice if needed. Filters need special care. Let them dry fully before reinstalling. Touch the thickest part of the filter, not just the surface. If it feels cool or damp inside, wait longer.
When everything is dry, reassemble the vacuum in a steady order. Start with the filters, then the canister, then the hose and floor head. Check that each latch clicks into place. Loose seals or half closed parts can create an air leak and undo your hard work.
Now test suction in stages. Turn the vacuum on and listen first. The sound should be smoother and less strained. Then place your hand near the hose opening for a simple airflow check. After that, test on a small patch of floor with crumbs, hair, or lint.
Pros of staged testing: helps you find the exact part if suction is still weak.
Cons: takes a few extra minutes.
Pros of full reassembly and one test: faster when you are sure every part is right.
Cons: harder to spot which section still has a problem.
How Often to Deep Clean and How to Keep Suction Strong
A deep clean works best when it becomes part of a routine. If you wait until the vacuum is barely picking anything up, the cleanup takes longer and parts wear out faster. A simple schedule keeps suction strong and makes each clean much easier.
Empty the canister before it gets packed full. For many homes, that means after each big cleaning session or every few uses. Clean the brush roll often if you have pets or long hair in the house. Check filters on a regular schedule based on your model. Some need a rinse every few weeks. Others need replacement after months of use.
Do a quick hose and floor head check once a month. This takes only a few minutes and helps you catch clogs early. Wipe the canister walls if you see fine dust sticking inside. Small maintenance prevents big airflow loss.
Pros of quick routine care: less mess, shorter cleaning time, and fewer surprise clogs.
Cons: it requires steady habits.
Pros of waiting for a deep clean only: less frequent effort.
Cons: bigger dust buildup, stronger odor, and weaker suction between cleanings.
Also watch what you vacuum. Damp dirt, large paper scraps, powdery debris, and strings can create problems fast. If you notice a sudden drop in suction, stop and inspect the machine right away instead of pushing through the job.
Good maintenance is simple, not complicated. A clean bagless vacuum runs better, smells better, and lasts longer when you give it regular care.
Mistakes That Keep Suction From Coming Back
Sometimes people clean a vacuum and still feel disappointed. In most cases, the issue is not the effort. The issue is one missed step or one common mistake. Knowing these mistakes can save you a lot of frustration.
The first mistake is putting filters back too soon. A damp filter restricts airflow and can create odor. The second mistake is cleaning the bin but skipping the cyclone, hose, or floor path. Suction depends on the full airflow route, not one part alone.
Another mistake is washing parts that should only be wiped. This can warp materials, damage filter media, or weaken seals. The opposite mistake also happens. People wipe a part that really needs a full wash, and the sticky dust film stays in place. The right method matters as much as the cleaning itself.
Many owners also forget to check for cracks, loose seals, or bad latches. Air leaks can make a clean vacuum feel weak. Hair wrapped around the brush roll is another easy miss. The motor may be fine, but pickup still looks poor at the floor.
Here is the final reality check. If you cleaned the canister, cyclone, filters, hose, and brush roll, and the machine still has poor suction, the issue may be a worn filter, damaged hose, failing seal, slipping belt, or motor problem.
Deep cleaning fixes many suction problems, but it cannot repair broken parts. Good cleaning gives you a clear answer. Either the vacuum improves, or you now know it needs a repair part instead of another rinse.
FAQs
Can I use vinegar or strong cleaner inside my vacuum canister
Mild soap and water are usually enough for washable canisters. Strong cleaners can leave residue, damage plastic, or affect seals. If the manual does not approve a product, skip it. A clean rinse and full dry time usually solve the problem without extra chemicals.
How long should I let vacuum filters dry
Let washable filters dry fully before reinstalling them. In many cases, 24 hours is the minimum. Thick filters may need longer. Touch the inner area, not just the surface. If any dampness remains, wait. This step is very important for suction and motor safety.
Why does my vacuum still smell bad after I clean the canister
The odor may be in the filters, hose, brush roll, or hidden dust near the floor head. A damp filter can also cause a stale smell. Check every airflow part, not just the bin. Make sure all washed parts are fully dry before you use the vacuum again.
Should I replace the filter or keep washing it
Wash it if the filter is marked washable and still holds its shape. Replace it if it is torn, warped, stained badly, or still smells after a proper clean. If suction stays weak after washing and drying, a fresh filter is often the better fix.
Hi, I’m Ivy! I’m a smart home enthusiast and self-proclaimed clean freak who loves testing the latest cleaning tech so you don’t have to waste your money on the wrong one. I started HomeTechClean to share honest reviews and practical advice for anyone who wants a cleaner home with less effort.